This site contains affiliate links, view the disclaimer page for more information.
If you’ve been searching for easy homemade ciabatta rolls that actually taste like they came from a real Italian bakery, I want you to stop scrolling right now. I’m going to walk you through the exact recipe I’ve been making on Sunday afternoons for years, five pantry staples, no stand mixer, no kneading, and results that will genuinely make you wonder why you ever bought bread at the grocery store.
I know what you might be thinking. Bread is hard. Bread takes skill. Bread requires equipment I don’t own and techniques I’ve never mastered. I used to think all of those things too. Then a friend showed me her ciabatta method, and I realized the whole thing was a beautiful lie I’d been telling myself.
Ciabatta, which literally means “slipper” in Italian, named for its flat, elongated shape, is actually one of the most forgiving breads you can make. The dough is intentionally wet and sticky, which is the part that freaks most beginners out, but that same high-moisture content is exactly what gives it that signature open crumb and chewy interior. In other words: the thing that looks like a mistake is actually the magic.
These rolls are now my go-to for dinner parties, weekend sandwiches, and honestly, just having around the house so I can tear into a warm roll with good olive oil at 10pm on a Wednesday. Let’s make them.

Table of Contents
Why This Recipe Works for Beginners
Most bread recipes ask you to knead dough for 8–10 minutes, which requires knowing what “properly developed gluten” feels like, and honestly, that only comes from experience. This recipe sidesteps all of that.
Instead of kneading, we use a technique called stretch and fold, except we’re doing it with two forks, right in the bowl, which is even more hands-off. You pull the edges of the dough into the center from all four sides, twice over the course of several hours. That’s it. The long rise does the gluten development work for you. Time is your sous chef.
Here’s what I love about this process: it’s completely forgiving of an imperfect schedule. I usually start the dough around noon, do my first fold around 2pm, my second fold at 4pm, shape the rolls at 4:05pm, let them rest until 5pm, and have warm ciabatta rolls on the table by 5:30pm. If something comes up and the second rise goes a little longer? Usually fine. Bread is more resilient than cookbooks make it sound.
Ingredients
Five ingredients. That’s the whole list. Here’s what you need and why each one matters:
- 1 packet active dry yeast: This is your leavening agent, the living organism that eats sugar and releases carbon dioxide, which makes your bread rise. Active dry yeast needs to be “proofed” in warm water first, which actually works in your favor, it gives you a clear signal that your yeast is alive before you commit the rest of your ingredients.
- 1 and 3/4 cups warm water: Not hot. Not lukewarm. Warm. Think wrist-temperature warm, like bath water for a baby. Somewhere in the range of 100–110°F. Water that’s too hot will kill your yeast; water that’s too cold won’t activate it properly. If you don’t have a thermometer, hold your wrist under the tap and aim for comfortable, not surprising.
- 2 tsp sugar: This feeds the yeast during the proofing stage. You won’t taste sweetness in the finished rolls; the yeast consumes almost all of it. Think of it as fuel for the process.
- 4 cups all-purpose flour: Standard all-purpose works beautifully here. If you want a slightly chewier, more artisan-style roll, you can swap in bread flour, which has a higher protein content and develops more gluten structure. But please don’t run out and buy bread flour just for this recipe. Whatever is in your pantry will work.
- 2 tsp salt: Salt does two things: it flavors the bread and it tightens the gluten structure, which helps the dough hold its shape during baking. Don’t skip it, and don’t add it directly on top of the yeast during the proofing stage, salt can inhibit yeast activity. Add it with the flour.
A note on substitutions: this is a very lean dough, no butter, no oil, no eggs, no dairy. That makes these rolls naturally vegan and dairy-free. You can add a drizzle of olive oil to the dough if you want a slightly richer flavor, but it’s genuinely not necessary.
Step-by-Step Instructions
Step 1: Proof the Yeast
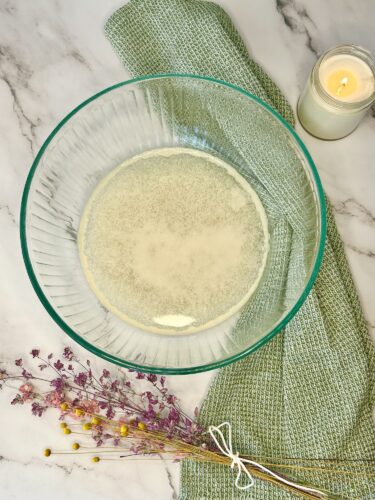
Add the warm water to a large mixing bowl, and I mean large. This dough is going to double in size. Add the sugar and the packet of yeast, give it a gentle stir, and then just walk away. Set a timer for 5–10 minutes and go do something else.
When you come back, the surface should look foamy and slightly bubbly. That foam is your yeast waking up, getting fed, and releasing gas. It’s alive! If you come back and the water looks exactly the same as when you left, flat, clear, no foam, something went wrong. Either your water was too hot and killed the yeast, or the yeast was old and already dead.
Don’t skip this step. I know it can feel like an unnecessary delay, but checking that your yeast is active before you add the flour saves you from the heartbreak of a dough that never rises. I learned this the hard way with a packet of yeast that had been sitting in my pantry for two years. The rolls came out like hockey pucks.
Step 2: Mix the Dough
Once your yeast is foamy, add all four cups of flour and the salt to the bowl. Mix it together until a shaggy, sticky ball of dough forms. You can use a wooden spoon, a rubber spatula, or your hands, whatever you prefer.
This dough is going to look rough. It’s going to look too wet. You’re going to be tempted to add more flour. Please resist this temptation. The stickiness is intentional. High hydration is what gives ciabatta its signature open, airy crumb. Adding too much flour will make the rolls dense and bready in the worst way, more sandwich loaf than Italian bakery.
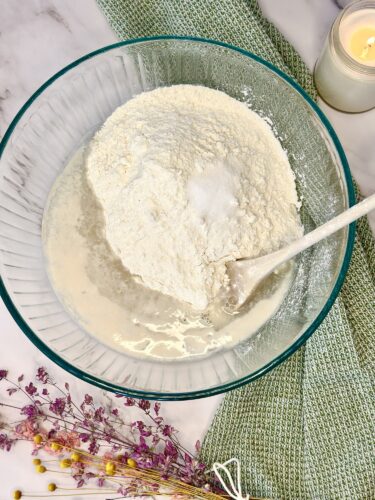
Mix until everything is roughly combined and there are no obvious dry flour pockets. It doesn’t need to be smooth or perfectly uniform at this point. The dough will develop and transform during the long rise. Trust the process.
Step 3: First Rise (2 Hours)
Cover the bowl with a damp kitchen towel, a bread bowl cover, or just a plate or lid that fits on top. You want to trap moisture so the dough doesn’t dry out on the surface.
Set the bowl somewhere warm and let it rest for 2 hours. I like to put mine on top of the refrigerator, near a sunny window, or in the oven with just the oven light on. If your kitchen is particularly cold, these methods can make a real difference in how enthusiastically your dough rises.
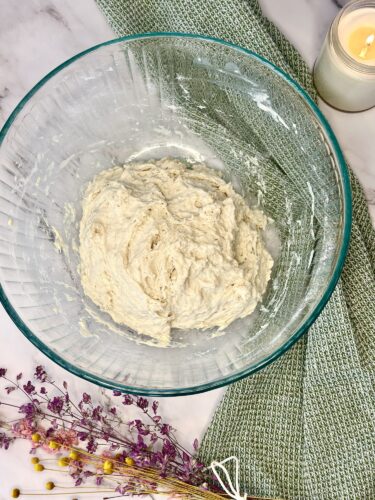
After 2 hours, the dough should look noticeably larger, roughly doubled in size. You’ll see bubbles on the surface and around the edges of the bowl. Those bubbles are the yeast at work, and they’re a very good sign.
Step 4: First Fold
Here’s where ciabatta diverges from most bread recipes you might have tried. Instead of punching the dough down, we’re going to fold it.
Using two forks, gently pull the edge of the dough from one side and fold it into the center. Rotate the bowl 90 degrees and repeat. Do this from all four sides, north, south, east, west, so the dough has been gently gathered in on itself.
That’s it. The whole process takes about 30 seconds. Cover the bowl again.
Step 5: Second Rise (2 Hours)
Back to the warm spot. Another 2 hours. The dough will continue to develop flavor and structure during this time. In fact, the longer you let ciabatta dough rise, the more complex and developed the flavor becomes. This is why some bakers let ciabatta dough cold-proof in the refrigerator overnight, it deepens the flavor significantly. But for today, 2 hours works beautifully and the rolls will taste incredible.
Step 6: Second Fold
Same as Step 4. Two forks, four sides, pull the edges gently into the center. Cover the bowl back up. We’re almost there.
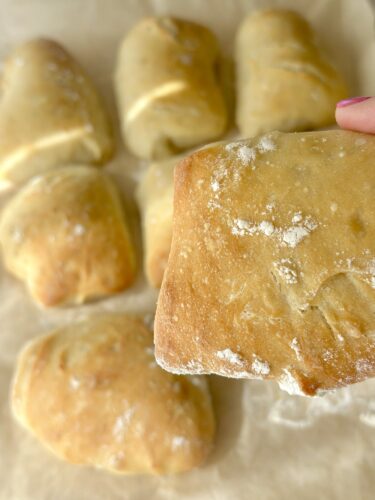
Step 7: Shape the Rolls
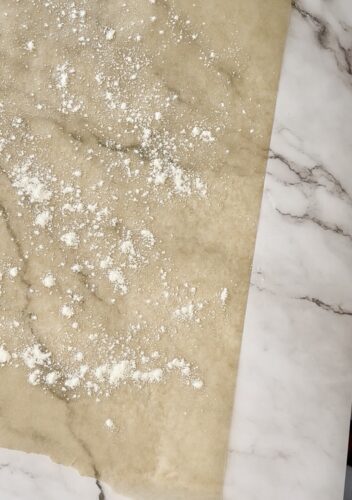
Generously flour a clean work surface. Turn the dough out onto it, use a spatula to help, since the dough will be quite soft and sticky. Sprinkle a little flour over the top as well.
Gentle hands here. The dough is full of air bubbles that have been building up for four hours. We want to keep as many of those as possible. Don’t press, punch, or squeeze. Just coax the dough very softly into a rough rectangle shape, maybe 8 x 12 inches or so. It doesn’t need to be perfect.
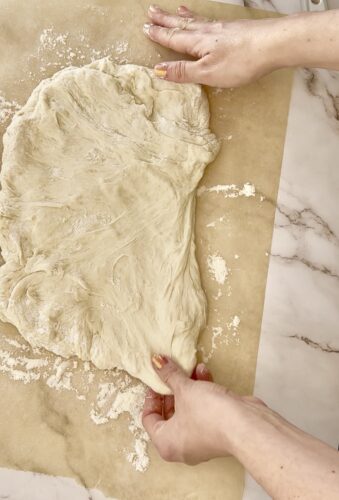
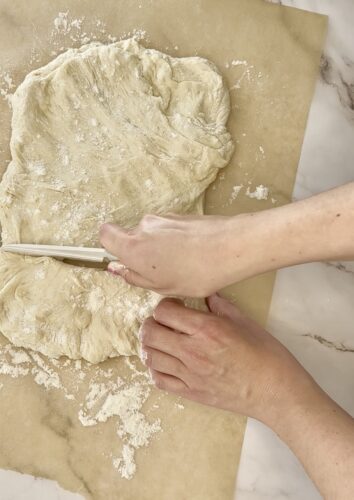

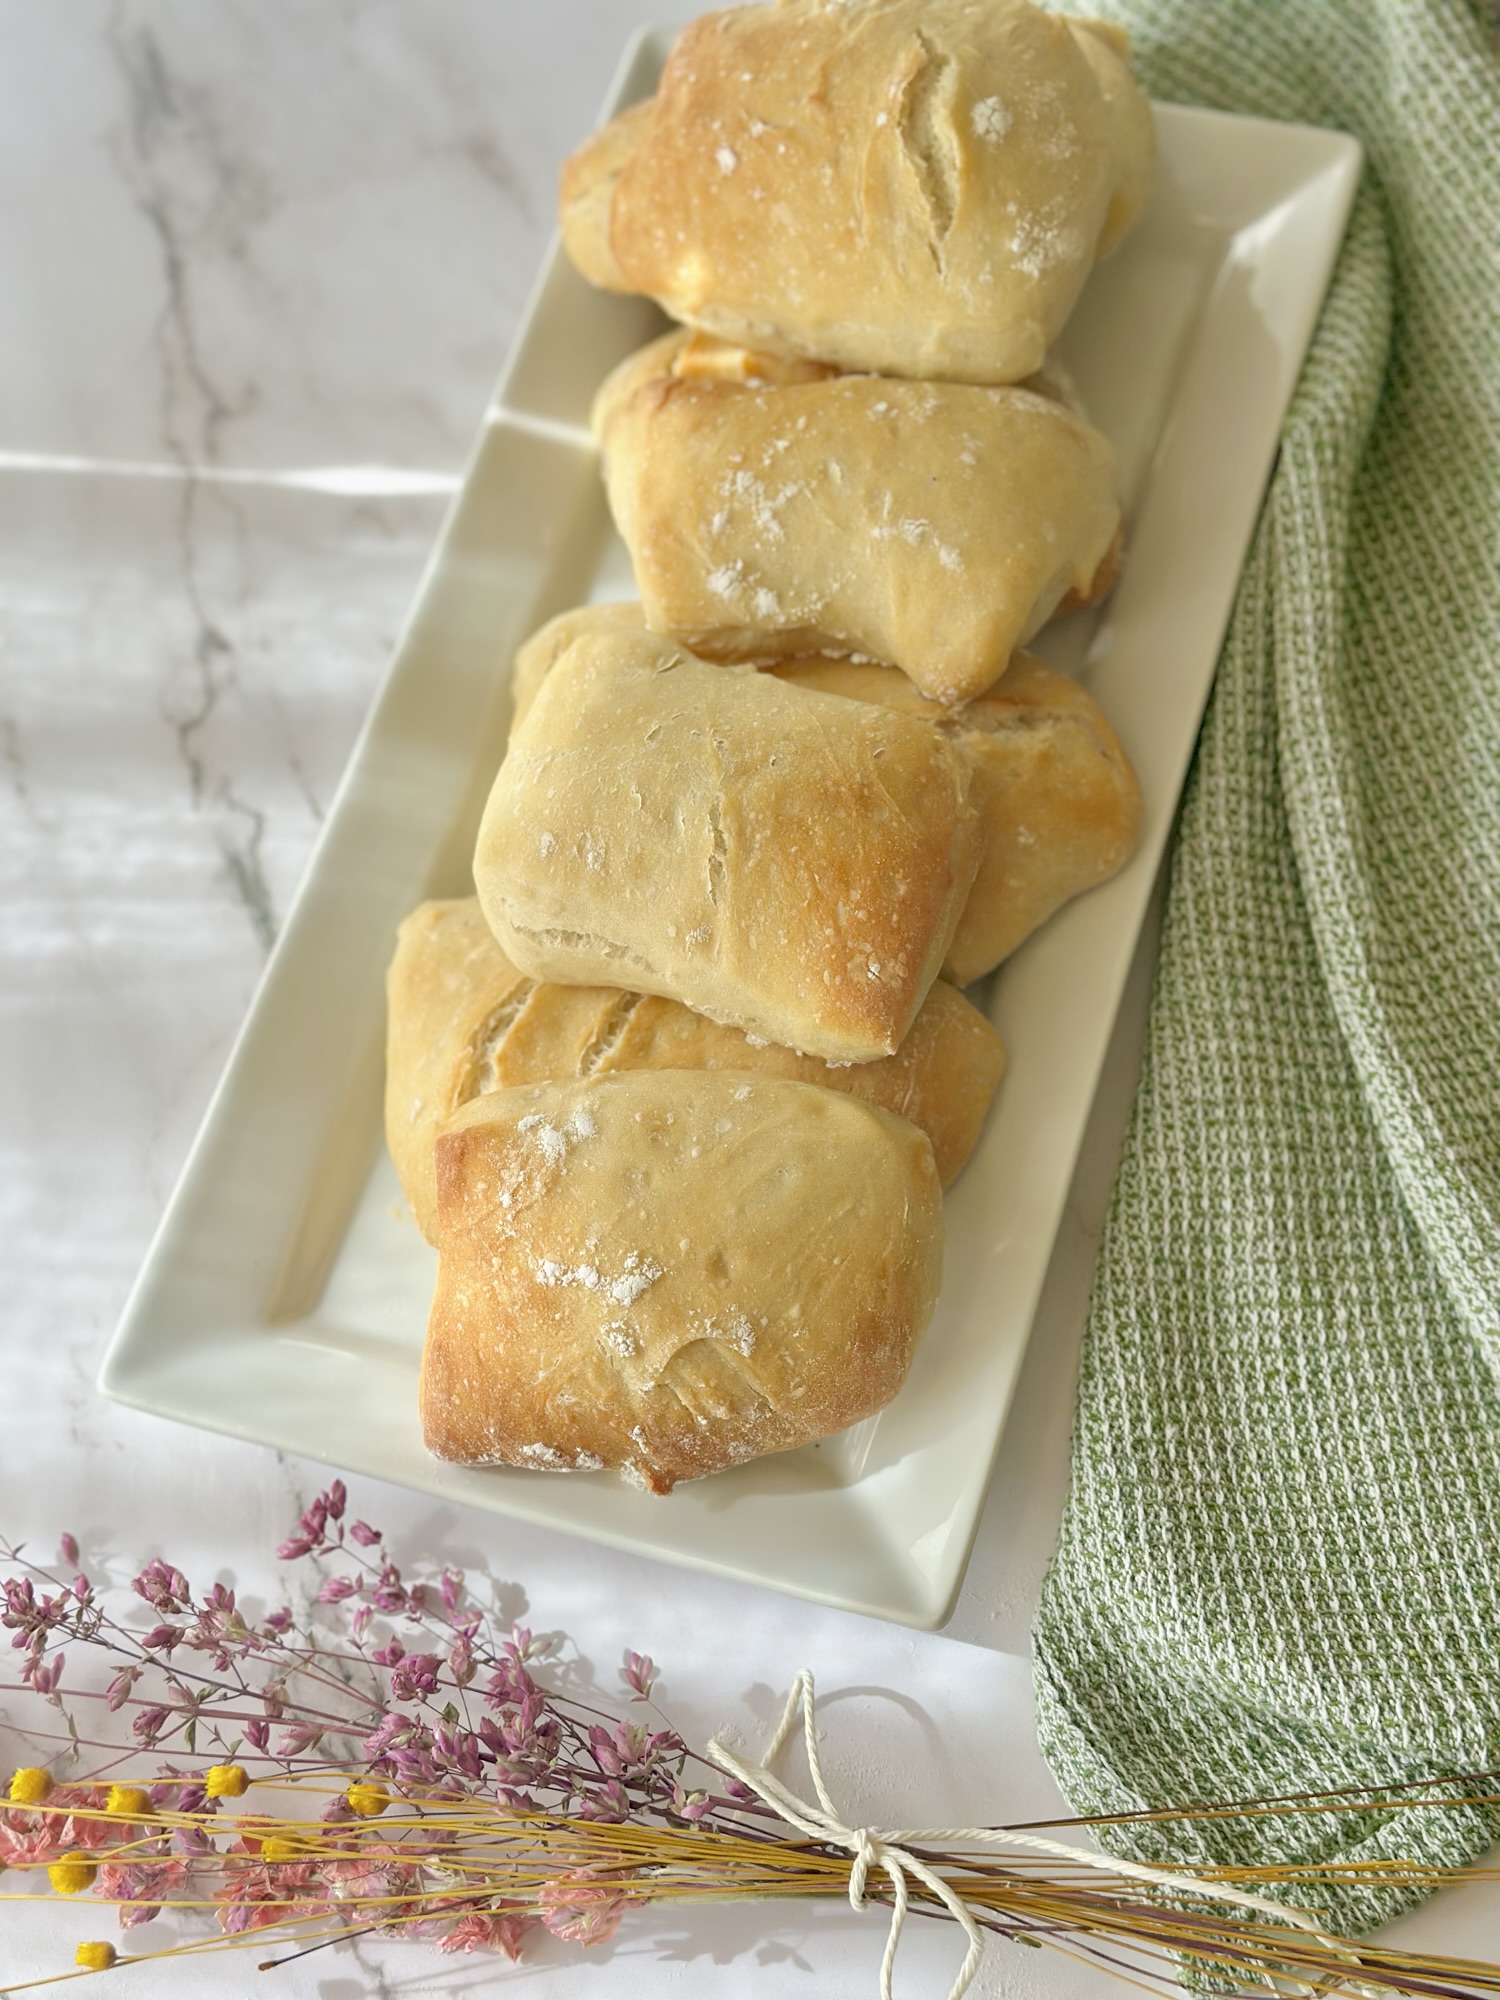
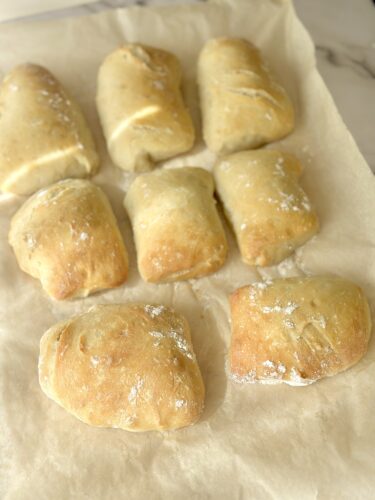
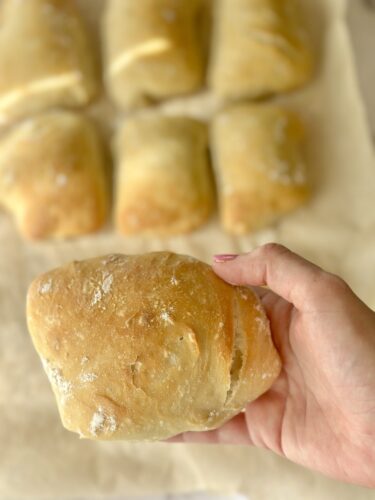
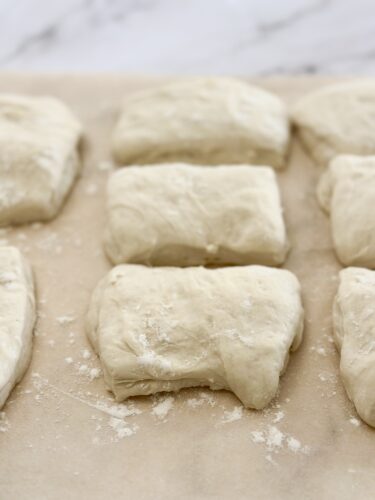
Using a bench scraper, a sharp knife, or even the edge of a spatula, cut the dough into 6 to 8 pieces. Each piece should look like a small, irregular slab, think rustic, not refined. Transfer the cut rolls to a parchment-lined baking sheet, leaving a couple of inches between each one. Cover them again with your damp towel for one final rest.
Step 8: Final Proof (1 Hour)
One more hour. I know, I know. But this last rest allows the cut rolls to puff up slightly and relax after being shaped. They’ll look a little more pillow-like by the end of it. While you wait, you have the perfect excuse to make a great sandwich filling, a pot of soup, or just pour yourself a glass of wine. About 15 minutes before the hour is up, preheat your oven to 400°F.

Step 9: The Steam Trick
This is one of the most underrated techniques in home bread baking, and it’s embarrassingly simple. Place an empty, oven-safe pan, a cast iron skillet or roasting pan works perfectly, on the bottom rack of the oven while it preheats. When you’re ready to bake, carefully pour water into the hot pan to create a burst of steam in the oven.
Why does this matter? Steam keeps the outer surface of the bread moist and flexible during the first critical minutes of baking, which allows the rolls to expand fully before the crust sets. Without steam, the crust firms up too quickly and you lose that oven spring, that final dramatic puff that makes bakery bread look so good. Steam is the reason professional bakeries produce such incredible crusts, and it’s completely replicable at home.
A word of caution: be careful when you add the water. The pan is extremely hot, the steam will rise quickly, and you don’t want to burn yourself. Use oven mitts, pour carefully, and step back.
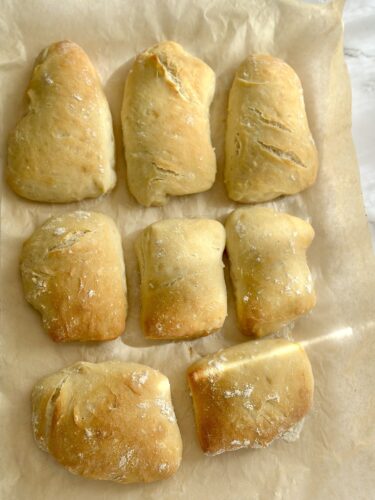
Step 10: Bake
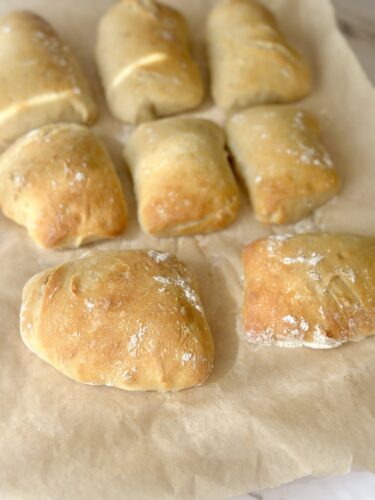
Slide the tray of rolls onto the middle rack. Bake for 20–25 minutes, or until the tops are lightly golden and the rolls sound hollow when you tap the bottom. That hollow sound is how bakers check for doneness, a fully baked roll has an open interior that resonates, while an underbaked roll sounds dull and dense.
Let them cool on a wire rack for at least 10 minutes before eating. I know this is the hardest part. But cutting into hot bread before it has a chance to finish setting up gives you a gummy interior. The 10 minutes is worth it.
Troubleshooting: What If Something Goes Wrong?
Even experienced bakers run into hiccups. Here’s how to solve the most common issues:
- My yeast didn’t foam. Your water was probably too hot or too cold, or the yeast is expired. Check the date on your packet. Start over, you haven’t lost much yet.
- My dough looks way too sticky. This is almost certainly normal for ciabatta. The dough should be sticky and soft. Only add more flour if it’s completely unworkable even after flouring your hands.
- My rolls didn’t rise much. Your kitchen might be too cold. Try placing the covered bowl in a slightly warm oven (preheat to 200°F, then turn it off, then put the dough in). Or just give it more time.
- My rolls spread sideways and look flat. This can happen with very hydrated dough. It’s a texture issue, not a flavor issue, flat ciabatta still tastes incredible. Next time, try a slightly more confident shaping before cutting.
- The crust isn’t crispy enough. Don’t skip the steam pan. Make sure the oven is fully preheated before the rolls go in.
How to Serve Easy Homemade Ciabatta Rolls
Sandwiches
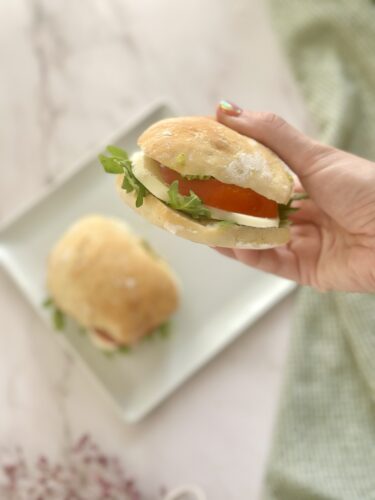
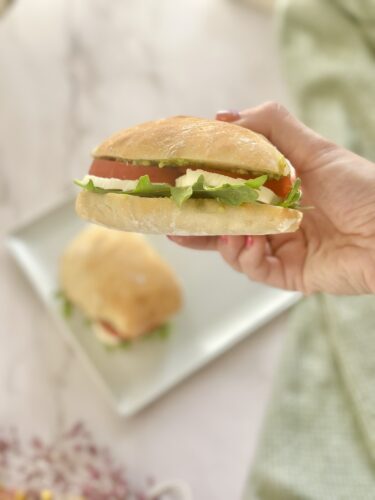
Slice a roll in half and you have the best sandwich vehicle imaginable. The crust holds up to wet fillings without getting soggy, and the open crumb soaks up sauces and spreads beautifully.
My favorites: classic Italian with prosciutto, fresh mozzarella, and roasted red peppers; caprese with thick-sliced tomatoes, buffalo mozzarella, and basil; turkey and avocado with Dijon and arugula; or a morning egg and cheese toasted in the oven with a slice of good cheddar.


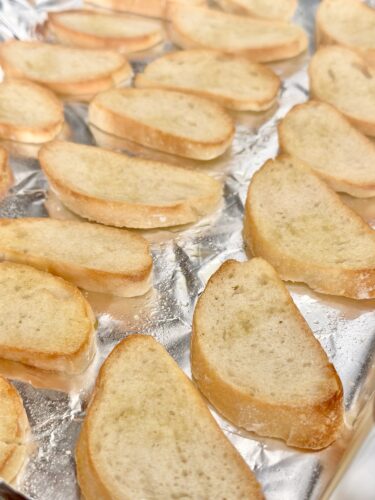
Crostini
Slice leftover rolls thin, about 1/4 inch, brush with olive oil, and toast at 375°F for 10–12 minutes until golden and crisp. Top with whipped ricotta and honey, bruschetta, whipped feta with roasted cherry tomatoes for a perfect dinner party move.
Bread for Soup
There is nothing better than tearing a warm ciabatta roll and dragging it through a bowl of tomato soup or minestrone. This is what bread was invented for.
Just With Butter
Warm from the oven, with really good salted butter. That’s it. Don’t overthink it.
Storage and Freezing
Ciabatta is best the day it’s made, the crust is crispiest within a few hours of baking. That said:
- Room temperature: Store in a paper bag (not plastic, plastic traps moisture and turns the crust soggy) for up to 24 hours. If the crust softens, pop the rolls in a 350°F oven for 5 minutes to revive them.
- Freezing: These freeze beautifully. Once fully cooled, wrap each roll individually and place in a freezer bag. They’ll keep for up to a month. Reheat from frozen in a 350°F oven for 10–12 minutes.
- Make-ahead dough: Mix the dough and let it do its first rise in the refrigerator overnight. The cold fermentation produces even more complex flavor. Take it out the next day, do your folds, let it come to room temperature, shape, proof, and bake.
Easy Homemade Ciabatta Rolls
Ingredients
- 1 packet active dry yeast
- 1¾ cups warm water 100–110°F
- 2 tsp sugar
- 4 cups all-purpose flour
- 2 tsp salt
Equipment
- Large mixing bowl (the dough doubles in size, bigger is better)
- Wooden spoon
- Two forks (for folding the dough)
- Damp kitchen towel, bread bowl cover, or a lid that fits your bowl
- Parchment paper
- baking sheet
- Oven-safe pan (cast iron skillet or roasting pan, goes on the bottom rack to create steam)
- Bench scraper or sharp knife (for cutting the dough)
Method
- Combine warm water, sugar, and yeast. Rest 5–10 min until foamy.
- Add flour and salt. Mix until a shaggy, sticky ball forms. Do not add extra flour.
- Cover with a damp towel or lid. Rise 2 hours in a warm spot.
- Using two forks, fold edges into the center from all four sides. Cover again.
- Rise another 2 hours. Fold again from all four sides.
- Turn onto a floured surface. Gently shape into a rectangle. Cut into 6–8 pieces.
- Place on a parchment-lined sheet. Cover and rest 1 hour.
- Preheat oven to 400°F. Place an oven-safe pan on the bottom rack.
- When ready to bake, fill the hot pan with water to create steam. Bake rolls 20–25 min until lightly golden.
- Cool on a rack for 10 min before serving.
Notes
- Yeast: If it doesn’t foam after 10 min, the water was too hot or the yeast is expired. Start over before adding flour.
- Dough: The dough will look very wet and sticky, that’s correct. Resist adding extra flour or the crumb will be dense.
- Rise: Cold kitchen? Place the covered bowl in an oven with just the light on. Even a few degrees of warmth helps.
- Shaping: Work gently, the dough is full of air bubbles built up over hours. Pressing hard deflates them.
- Steam: Use oven mitts when pouring water into the hot pan. The burst of steam is intense, step back quickly.
- Storage: Store for up to 24 hrs. Freeze individually wrapped for up to 1 month; reheat from frozen at 350°F for 10–12 min.
Enjoy!
I think the reason people are intimidated by bread is that we’ve been told it requires precision, expensive equipment, and years of practice. Some breads do. Easy homemade ciabatta rolls are not those breads. What they require is patience. The ability to walk away and let time do most of the work. The restraint not to add extra flour when the dough looks sticky. And the presence of mind to put a pan of water in your oven.
Once you’ve made these once, you’ll understand intuitively what the dough should look and feel like at each stage. The second time you make them, you’ll do it with confidence. By the third time, you’ll be making them casually on a weekday afternoon and acting like it’s no big deal in front of dinner guests. (It is a big deal. Let them be impressed.)
If you make these, I’d love to hear how they turned out. What did you put in your sandwiches? Did you eat three of them plain, warm from the oven, while standing over the kitchen counter No judgment. That’s exactly what I did too.
With love,
Bri & Cat
Affiliate Disclaimer:
As an Amazon Associate I earn from qualifying purchases. This comes at no additional cost to you. We only recommend products that we believe will add value to our readers.
Leave a Reply