This site contains affiliate links, view the disclaimer page for more information.
Same day baguettes are one of those things I genuinely didn’t believe were possible until I made them myself. I’d been baking bread for years (sourdough, focaccia, sandwich loaves) but baguettes always felt like they belonged in a different category. The kind of thing that required a professional deck oven, a couche linen, and three days of your life. The kind of thing you just buy.
Then one Sunday afternoon I had nothing to do, a bag of bread flour, and a stubborn attitude I decided to give it a try. That was a few years ago. I’ve made this recipe dozens of times since, tweaked it, tested it on people who had no idea it came out of a home oven, and refined the process down to something that is genuinely approachable. No stand mixer. No proofing baskets. No overnight fermentation. Just good ingredients, a little patience, and a few techniques that make all the difference. This is that recipe.

Table of Contents
What Makes a Same Day Baguette Work
Before I give you the recipe, I want to explain what’s actually happening here, because understanding the why makes you a better baker and helps you troubleshoot when things go sideways.
Traditional baguettes rely on a long, cold fermentation (sometimes 24–72 hours) to develop flavor and structure. That extended time lets the yeast work slowly, producing a more complex, slightly tangy crumb. It’s genuinely delicious. It’s also often inconvenient.
Same day baguettes take a different approach. Instead of time, we use:
- A higher hydration dough: more water means more steam inside the loaf, which opens up the crumb and creates that light, airy texture
- A stretch-and-fold technique: this builds gluten structure without kneading, done in three quick rounds over the course of the rise
- A steam-injected oven: this is the single biggest secret to getting a real baguette crust at home
The flavor won’t be quite as complex as a 48-hour cold-fermented baguette. I’ll be honest about that. But will it be wildly better than anything you can buy at a grocery store? Absolutely. Will your family and friends lose their minds? Every single time.
Ingredients for Same Day Baguettes
This recipe makes 4 to 6 baguettes, depending on how you shape them. I usually land on 5, but if you want slightly thicker loaves, go with 4.
- 4 cups bread flour: bread flour is non-negotiable here. It has a higher protein content than all-purpose (around 12–13% versus 10–11%), which means more gluten development, a stronger structure, and that signature chewy interior. I’ve tried all-purpose in a pinch and the results are noticeably softer and more fragile. Use bread flour.
- 2¼ cups warm water: this is what makes the dough high-hydration. It will feel wetter and stickier than bread doughs you may have worked with before. That’s correct.
- 1 packet active dry yeast (2¼ tsp): a standard yeast packet. Make sure yours is not expired. I’ve thrown away more “active” yeast than I care to admit because I ignored the date on the jar.
- 2 tsp salt: flavors the dough and controls fermentation speed. Don’t skip it and don’t add it directly on top of the yeast before mixing, since salt can inhibit yeast activity.
- 2 tsp sugar: not for sweetness. The sugar feeds the yeast to kick-start fermentation and also helps achieve that beautiful deep golden-brown crust through the Maillard reaction.
- Flaky salt for topping: optional, but highly recommended. A pinch on top before baking adds a tiny crunch and a subtle burst of salinity that makes each bite feel finished.
That’s it. Six ingredients. Everything else is technique.
Equipment You’ll Need
Nothing fancy required, but a few tools will make your life easier:
- A large mixing bowl: big enough that the dough has room to double
- Two forks: for the stretch-and-fold (you can use your hands too, but forks keep things tidy with sticky dough)
- A bench scraper: this is my most-used tool in this whole process. A bench scraper lets you divide, lift, and shape the dough without adding extra flour and making it stiff. If you don’t have one, a stiff spatula works, but a bench scraper is worth the $8.
- Parchment paper: the baguettes will bake directly on parchment on a baking sheet
- A sheet pan: one for the baguettes, and one to hold water in the oven (more on that shortly)
- A sharp knife or kitchen scissors: for scoring
No Dutch oven, no baguette pan, no special equipment. Your regular oven and a couple of sheet pans are all you need.
Step-by-Step Instructions
Step 1: Activate the Yeast
In a large mixing bowl, combine the warm water, sugar, and yeast. Give it a gentle stir, then walk away for 5 to 10 minutes.
What you’re waiting for is a foam, a layer of bubbles and froth that forms on the surface of the water. This tells you the yeast is alive and ready to work. If you don’t see foam after 10 minutes, your yeast is dead or your water was too hot (above 115°F kills yeast) or too cold (below 100°F and it won’t activate properly). Toss it and start over with fresh yeast. I know that’s disappointing to hear, but attempting to bake bread with dead yeast is one of the most demoralizing experiences in the kitchen. Save yourself the heartbreak.
I usually use water that’s comfortably warm to my wrist, not hot. Think: bath water. You can use a thermometer if you want precision (100–110°F is ideal), but the wrist test has never failed me.

Step 2: Mix the Dough
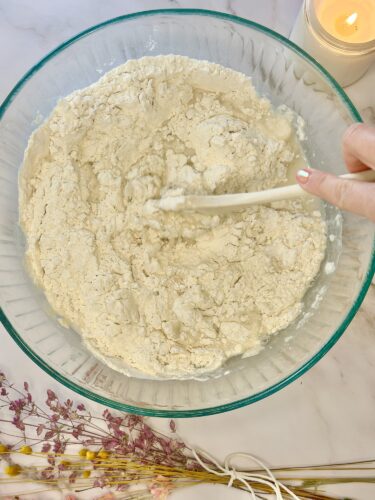
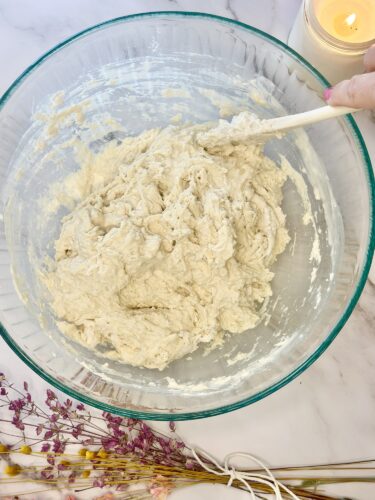
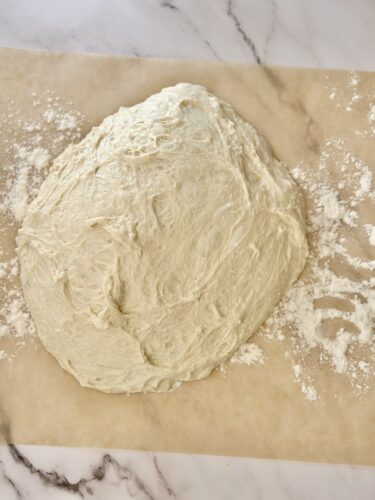
Once your yeast is foamy and active, add the bread flour and salt to the bowl. Mix with a wooden spoon, a rubber spatula, or your hands until a shaggy, rough dough forms and there’s no dry flour left at the bottom of the bowl.
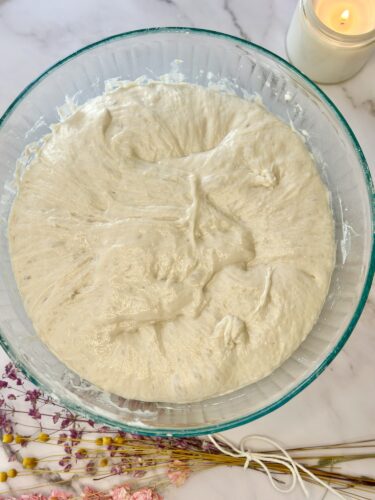
I want to manage expectations here: this dough is going to look messy. It will be sticky, lumpy, and nothing like the smooth, elastic doughs you might be used to. Don’t panic. Don’t add more flour. The high hydration is doing its job. It’s going to give you a light, open crumb and a thin, crispy crust. Trust the process.
Cover the bowl with plastic wrap or a clean kitchen towel and let it rest at room temperature for one hour.
Step 3: Stretch and Fold: Three Rounds
This is the part of the recipe that people always ask me about, because it looks strange the first time you see it. But it’s genuinely clever, and once you understand why it works, you’ll use this technique for all kinds of bread baking.
Traditional bread recipes ask you to knead the dough, to physically work it for 8–10 minutes until the gluten strands align and strengthen. Stretch and fold does the same thing, but slowly, over multiple rounds, letting the gluten relax and develop between each set.
Here’s how it works:
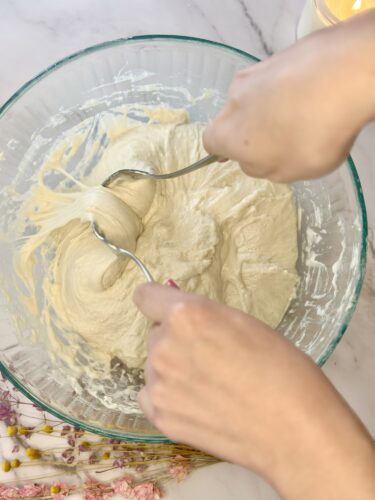
Using two forks (or your fingers), grab the dough from one side of the bowl and pull it up and over toward the center. Do this from all four “sides”: north, south, east, west, pulling each side up and folding it into the middle. That’s one round. Cover and let it rest.
Repeat this two more times, with 60 minutes between each round.
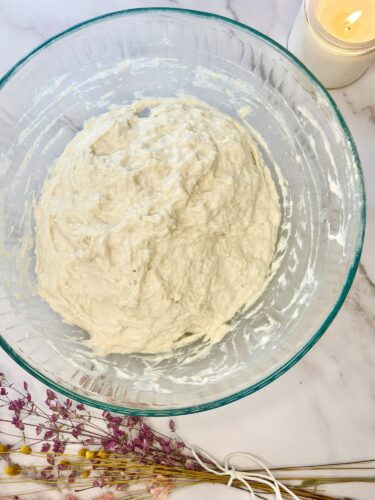
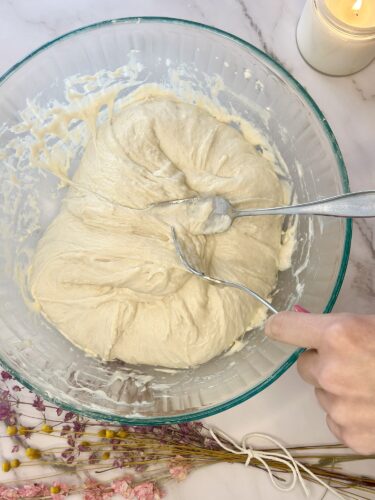
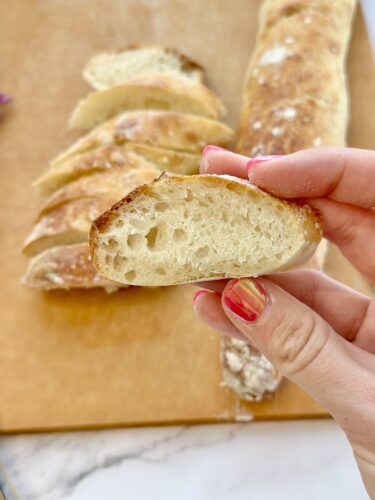
After three rounds of stretching and folding, the dough will noticeably change. It will be smoother, more cohesive, and springier than when you started. You’ll be able to feel the difference in your hands. It resists the stretch a little, which is exactly what you want. That resistance is gluten structure being built.
I usually do my stretch-and-folds at 60 minute intervals during the three-hour rise. Then I move immediately to shaping.
Step 4: Shape the Baguettes
Generously flour your work surface, and I mean generously. Scrape the dough out of the bowl onto the floured surface. It’s going to spread a little; that’s fine.
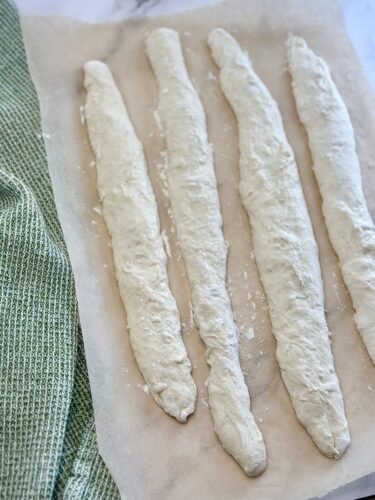
Gently flatten and stretch the dough into a rough rectangle. Don’t aggressively punch it down or degas it. You want to preserve as many of those air bubbles as possible. Now take your bench scraper and cut the dough lengthwise into 4 to 6 equal strips. Each strip is going to become one baguette.
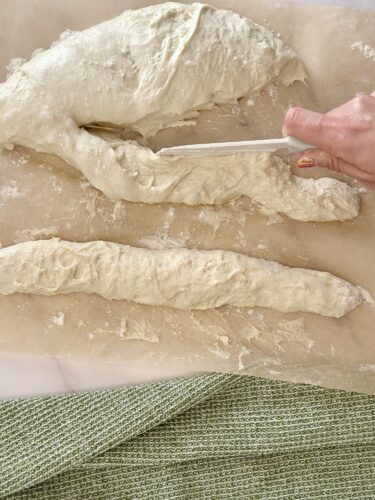
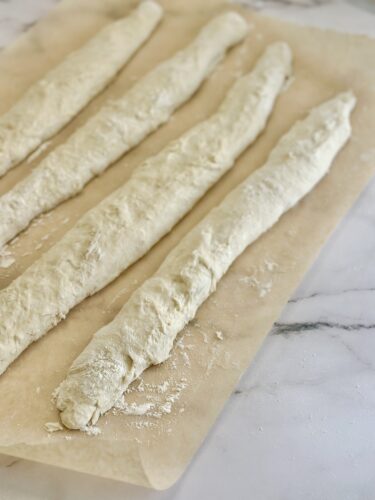
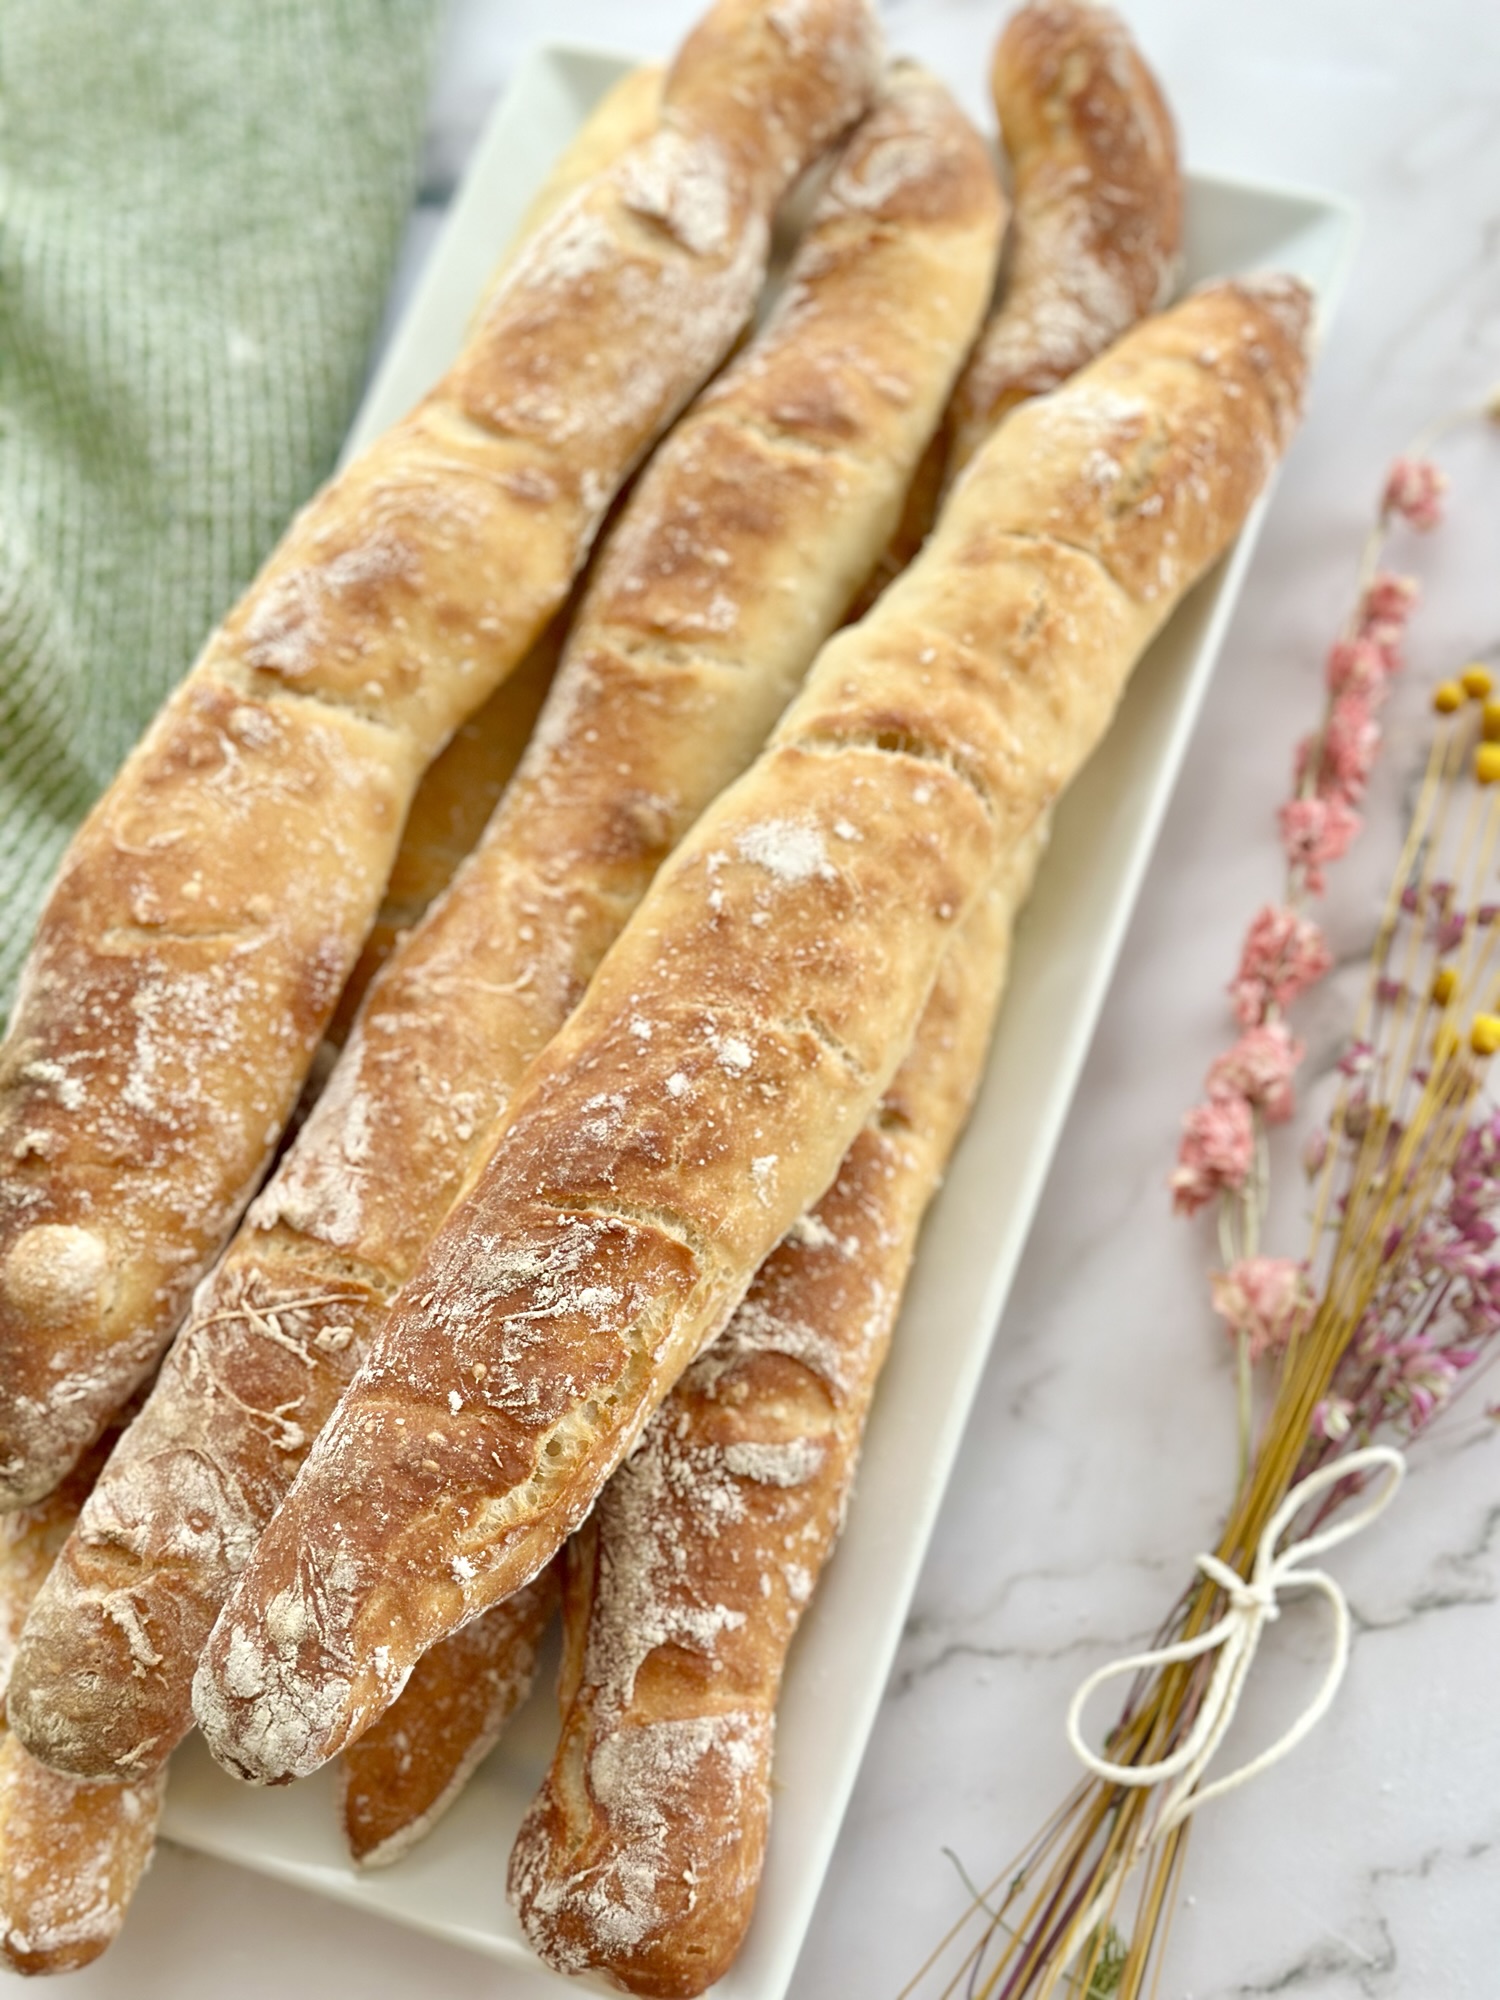
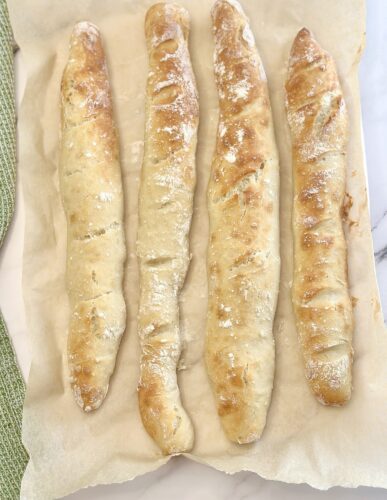
Take each strip and roll it gently to form a log shape, about 12–14 inches long. You may need some extra flour or to use the bench scraper if its sticking too much.You’re not trying to make a perfect cylinder. Rustic is the goal. A few tapered ends, a few bumps. This is homemade bread, and it should look like it.
Place the shaped baguettes on parchment paper on a baking sheet, leaving an inch or two between each one.
Step 5: Score the Tops
Before baking, you need to score each baguette: make 4 to 5 diagonal cuts along the top of each loaf. You can use a sharp knife, a lame (a special bread-scoring blade), or kitchen scissors.
I actually prefer kitchen scissors for same day baguettes. They’re easier to control, require less pressure, and create a slightly more dramatic “open ear” effect on the crust. Just angle the scissors at roughly 45 degrees and snip.
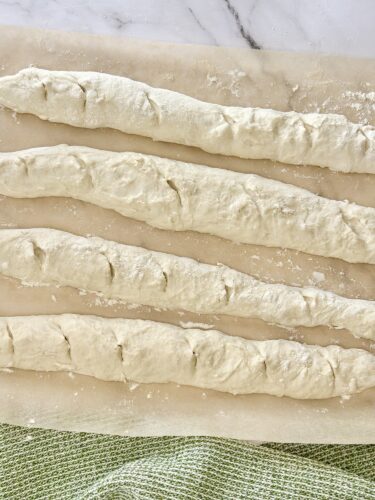
Why do you need to score at all? When the bread goes into a hot oven, the yeast is doing one last burst of activity called oven spring, and the dough expands rapidly. If you don’t score, that expansion has nowhere controlled to go. The bread will crack randomly, usually on the sides or bottom, and it won’t achieve that iconic baguette silhouette. The scores are like relief valves: they direct the expansion exactly where you want it.
Before baking, add some flaky salt on the tops if desired (optional).
Step 6: Set Up the Steam and Bake
This is the step that most home baking recipes skip, and it’s the single biggest reason home baguettes often come out with a soft, bready crust instead of that shattering crunch you get at a bakery.
Take an empty sheet pan and place it on the lowest rack of your oven. Pour 1 to 2 cups of water into it. Then preheat your oven to 450°F with the water-filled pan inside. As the oven heats, that water turns to steam. When you slide your baguettes in, they go into a humid, steamy environment, and that steam does something important.
In the first 10–12 minutes of baking, the steam keeps the outer surface of the dough moist and pliable. This allows the dough to keep expanding freely during oven spring without the surface hardening too quickly. More expansion = more volume = a lighter, airier crumb.
Then, as the steam slowly dissipates during the second half of baking, the surface of the bread begins to dry out and dehydrate. This is where the magic happens. The crust sets and caramelizes under 450°F dry heat, the sugars in the dough undergo the Maillard reaction (the same browning reaction that gives seared meat and toasted coffee their flavors), and you end up with a thin, blistered, crackling crust that sounds like broken glass when you tap it.
No steam = soft crust. Steam = the real thing.
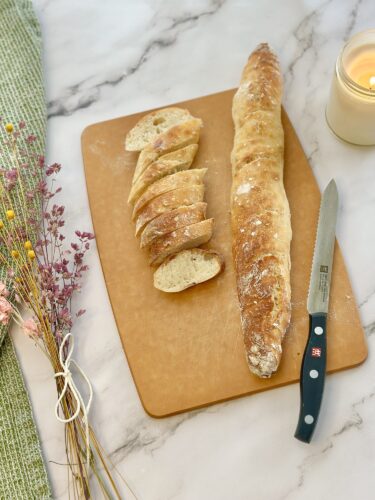
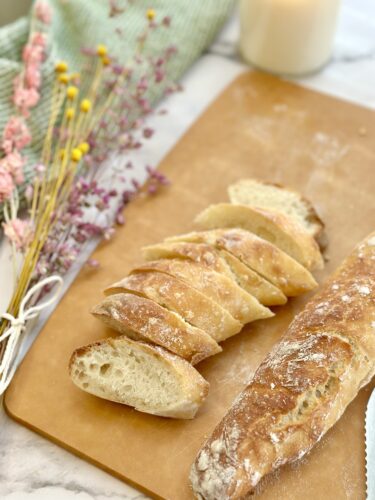
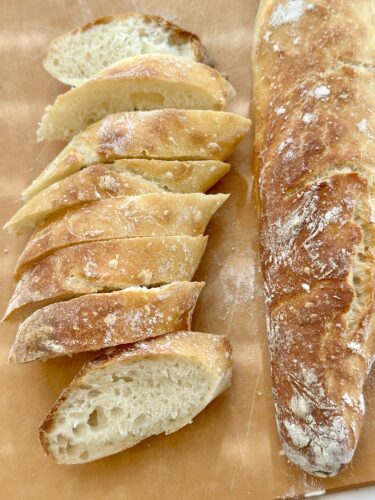
Bake for 20 to 25 minutes, until the baguettes are deep golden brown, darker than you might think is right. Pale baguettes are underbaked baguettes. You want color.
Step 7: Cool Before You Cut
I know. I know how hard this is. The smell coming out of that oven is going to be unreasonable.
But please wait at least 10 minutes before cutting into your baguettes. When bread comes out of the oven, the interior is still setting. The starches are gelatinizing and the crumb is finishing its structure. If you cut too soon, the interior will be gummy and slightly wet, even if the outside looks perfectly done. Ten minutes. You can do it.

Tips for Working with High-Hydration, Sticky Dough
High-hydration dough is the secret weapon in this recipe, but it is also the thing that trips up most first-time bakers. Here’s how to handle it like a pro:
Don’t add more flour to the dough. I’ll say it again because this is the most common instinct and it will ruin your baguettes. Extra flour makes the dough stiffer, the crumb denser, and the crust tougher. The stickiness is supposed to be there.
Use wet or lightly oiled hands for the stretch-and-fold. A little water or oil on your hands prevents the dough from sticking to you without changing the dough’s hydration.
Let the bench scraper do the heavy lifting. On the shaping surface, use your bench scraper to lift, rotate, and move the dough rather than your hands. It prevents tearing and keeps the dough from sticking to the counter.
Work fast when shaping. The longer high-hydration dough sits on the counter, the more it spreads. Get your baguettes shaped and onto the parchment quickly, and don’t fuss over them.
If the dough feels unmanageable, chill it. On a hot day, or if your kitchen runs warm, you can slide the shaped baguettes into the fridge for 15–20 minutes before scoring and baking. The cold firms them up slightly and makes them easier to handle. It won’t hurt the final product at all.

Why the Crust Gets So Crunchy: The Science Explained Simply
I find that when people understand what’s happening in the oven, they stop being afraid of the process. So let me break this down.
A baguette’s crust is thin. Thin enough that it can blister, crack, and shatter. Getting there requires two things working in sequence: steam and high heat.
Steam (first 10–15 minutes): Keeps the surface elastic and flexible. The dough can expand to its full potential without the exterior hardening and trapping the loaf in a shell. Without steam, the crust would form too early and you’d end up with a thick, dense, bready exterior.

High dry heat (remaining 10–15 minutes): Once the steam has done its job and starts to dissipate, the 450°F oven goes to work dehydrating the surface. Water evaporates from the outer layers of the crust, leaving behind concentrated starches and sugars that toast and caramelize. This is the Maillard reaction, a chemical reaction between amino acids and reducing sugars that produces hundreds of flavor compounds and that deep mahogany color.
How to Serve Same Day Baguettes
Let me tell you about the best thing I’ve ever eaten with a fresh baguette: good salted butter, a pinch of flaky salt, and absolutely nothing else. No plate required.
Beyond that, here are my favorite ways to serve them:
- Torn into pieces alongside a pot of French onion soup
- Sliced thin with a soft cheese board: brie, camembert, a tangy goat cheese
- Cut lengthwise and loaded into sandwiches (these hold up beautifully to fillings because the crust is structural)
- Served with olive oil and balsamic for dipping, the kind you get at Italian restaurants
- Sliced and toasted for crostini the next day
Storage: These are best on the day they’re made. That’s just the nature of a high-crust bread with no preservatives. If you have leftovers, wrap them in a clean kitchen towel (not plastic, which traps moisture and softens the crust) and reheat in a 350°F oven for 5 minutes the next morning. They’ll come back to life beautifully.
A Few Variations Worth Trying
Once you’ve made this recipe a couple of times and you’re comfortable with the dough, here’s how I like to play with it:
- Herbed baguettes: Add 1 tsp of dried rosemary, thyme, or herbes de Provence to the flour before mixing
- Garlic baguettes: Brush the tops with garlic butter in the last 5 minutes of baking
- Seeded tops: Sprinkle sesame seeds, everything bagel seasoning, or poppy seeds over the scored baguettes before they go in the oven. The crust holds them beautifully
- Smaller rolls: Cut the dough into 8 pieces instead of 4–6 and shape into petite baguette rolls, great for dinner parties
Enjoy!
Same day baguettes are one of those recipes that permanently expand what you think is possible in a home kitchen. The first time you pull these out of the oven and hear that crust crackle as it cools, you’re going to feel genuinely proud, and then immediately text someone about it.
The techniques here (high hydration dough, stretch and fold, steam baking) apply far beyond this single recipe. Once they’re in your toolkit, you’ll use them for other breads, for focaccia, for ciabatta. They’re foundational skills that make everything easier.
Don’t be intimidated by the sticky dough or the high heat or the scoring. None of it is as tricky as it sounds. Read through the recipe once before you start, gather your ingredients, and just make them. The worst case scenario is you learn something. The best case scenario is warm bread, good butter, and a kitchen that smells like a Paris boulangerie on a Sunday morning. That’s worth showing up for.
With love,
Bri and Cat

Same Day Baguettes
Ingredients
- 4 cups bread flour
- 2¼ cups warm water 100–110°F
- 1 packet active dry yeast 2¼ tsp
- 2 tsp salt
- 2 tsp sugar
- Flaky salt for topping optional
Equipment
- Large mixing bowl
- Two forks
- Bench scraper
- Parchment paper
- Two sheet pans
- Sharp knife or kitchen scissors
Method
- Combine warm water, sugar, and yeast in a large bowl. Let sit 5–10 minutes until foamy.
- Add flour and salt. Mix until a shaggy dough forms with no dry flour remaining. Cover and rest at room temperature.
- At the end of hours 1, 2, and 3, do a stretch and fold: using two forks or your fingers, pull the dough from each of the four sides up and over to the center rotating the bowl as you go. Cover and let rise again after each round.
- After the hour 4 rise, scrape dough onto a well-floured surface and gently flatten into a rough rectangle.
- Use a bench scraper to cut the dough lengthwise into 4 to 6 strips, it will be pretty sticky so sprinkle extra flour on your workspace if needed.
- Roll each strip into a log about 12–14 inches long. Place on parchment-lined baking sheet.
- Cut 4 to 5 diagonal slits along the top of each baguette using a sharp knife or kitchen scissors. Sprinkle with flaky salt if desired before baking
- Place an empty sheet pan on the lowest oven rack and pour in 1 to 2 cups of water. Preheat oven to 450°F.
- Bake 20–25 minutes until deep golden brown. Cool on a wire rack for at least 10 minutes before slicing.
Notes
The water pan is not optional. Steam in the first half of baking is what creates a thin, crackling crust.
Baguettes are best eaten the same day. Reheat day-old loaves at 350°F for 5 minutes.
Affiliate Disclaimer:
As an Amazon Associate I earn from qualifying purchases. This comes at no additional cost to you. We only recommend products that we believe will add value to our readers.
Leave a Reply