This site contains affiliate links, view the disclaimer page for more information.
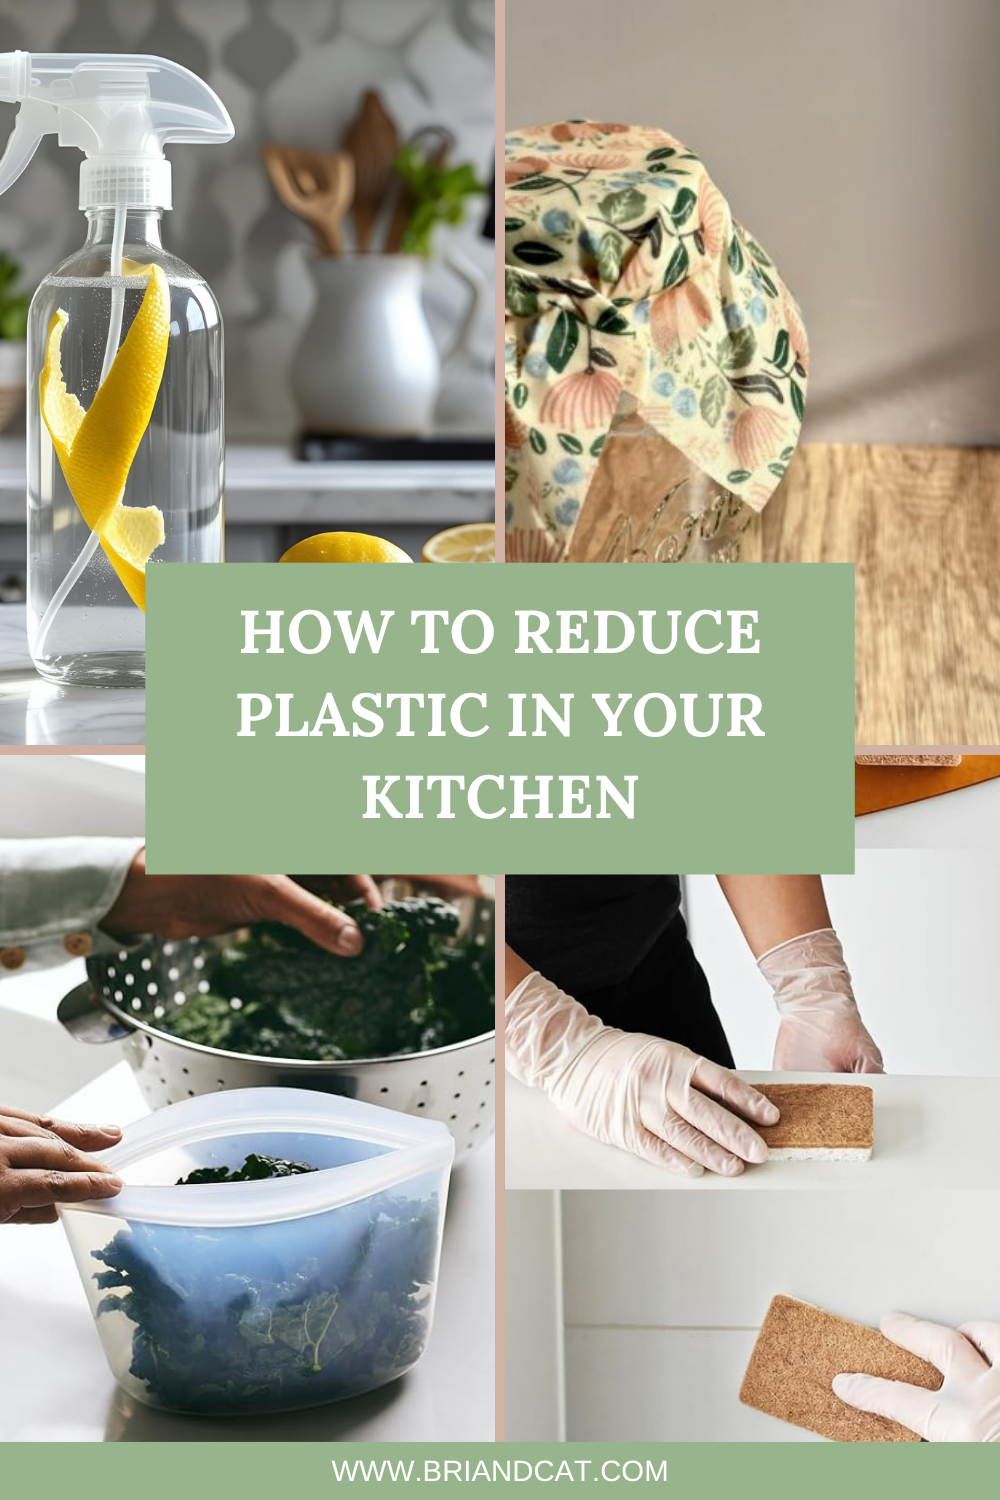
When I decided I needed to reduce plastic in my home, the kitchen felt like the biggest challenge. Everything, from food packaging to cleaning supplies, seemed to involve plastic in some form. But over time, I discovered that it doesn’t have to be overwhelming. If you’re starting your own sustainability journey, here are five easy DIY swaps to cut plastic from your kitchen without sacrificing convenience or functionality.
These DIY ideas aren’t just about saving the environment (though that’s a great bonus), they’ve also saved me money, reduced clutter, and made my kitchen a more mindful space.

Table of Contents
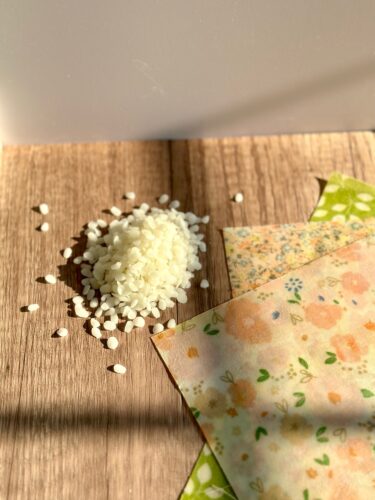
1. Ditch the Plastic Wrap: Make Your Own Beeswax Wraps
One of the first things I stopped buying was plastic wrap. It always ended up in the trash after a single use. Now, I use beeswax wraps that I made myself, and they’ve lasted for months. You can also buy beeswax wraps too if thats easier.
Why It Works:
Beeswax wraps mold around bowls or directly onto food like cheese or bread. They’re breathable, so produce lasts longer compared to being suffocated in plastic.
What You’ll Need:
- 100% cotton fabric squares (Quilting squares work great)
- Beeswax pellets or grated beeswax
- Optional: pine resin and jojoba oil for added stickiness and flexibility
- Parchment paper
- Iron or oven
Step-by-Step Instructions (Iron Method):
- Lay parchment on an ironing board or heatproof surface.
- Place the cotton fabric on top, then sprinkle beeswax evenly.
- Cover with a second piece of parchment.
- Iron slowly until the wax melts and fully saturates the fabric.
- Hang or lay flat to cool.
You can also bake the fabric in the oven at 200°F for 5–10 minutes if you prefer.
Don’t overdo the wax. Too much can make the wrap flaky and hard to mold. I ruined my first batch this way but adjusted on the next try.

Cleaning + Storage:
- Rinse with cold water and mild soap
- Air dry and store folded in a drawer
Check our our full post on how to make these beeswax wraps! How to Make Beeswax Wraps at Home (Best Step-by-Step DIY Guide)
Each wrap lasts around 6–12 months, and at the end of its life, it’s compostable. I now only use plastic wrap in rare cases, like with raw meat, and one roll lasts me over a year.
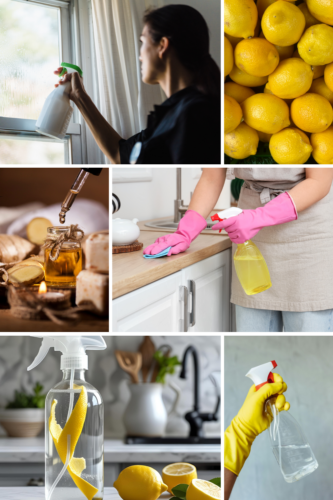
2. DIY All-Purpose Kitchen Cleaner: Refill Forever
Plastic spray bottles of cleaning products used to be a regular item in my grocery cart. Once I realized how easy it is to make my own, I stopped buying them entirely.
The Recipe:
- 1 cup white vinegar
- 1 cup water
- 10–15 drops essential oil (I like lemon or tea tree)
- Optional: citrus peels for extra scent and oil
Directions:
- Add the citrus peels to a jar of vinegar and let it sit for a week or two (optional, but adds natural cleaning power).
- Strain and mix vinegar with water.
- Add essential oils.
- Pour into a glass spray bottle or reuse an old plastic one.
Why It Works:
Vinegar is a natural disinfectant. Tea tree oil adds antibacterial properties. Lemon or orange oils help cut through grease.
I use this on:
- Countertops
- Fridge interiors
- Stove surfaces
- Cabinet fronts
Avoid using vinegar on granite, marble, or stone, it’s too acidic. For those areas, use castile soap diluted with water instead.
3. Say Goodbye to Zip Bags: Use Reusable Storage Instead
Plastic zipper bags were my go-to for snacks, freezer meals, and leftovers. But they added up fast in both cost and waste.
What I Use Now:
- Silicone food bags (Stasher and other brands)
- Mason jars and repurposed glass jars
- Cloth snack bags (Can DIY- easy to sew from scrap fabric)

DIY Fabric Snack Bags:
- Cut two rectangles of cotton fabric and sew three sides.
- Add Velcro or fold-over flap for closure.
- Use for dry snacks like crackers, trail mix, or chips.
For the Freezer:
- Silicone bags seal well and survive extreme cold and heat.
- Glass jars work for soups, chopped veggies, and even sauces (just leave headroom to avoid cracking).
Cleaning Tip:
Silicone bags can go in the dishwasher. Just open them up wide so they fully dry. I keep a drying rack just for reusable food storage.
Swapping out plastic zip bags reduced my single-use plastic waste by about 80%, and I no longer run out of bags because I just wash and reuse what I already have.
4. Replace Plastic Sponges with Compostable Alternatives
I never thought about where my sponges went after they wore out. Turns out, those cheap yellow-and-green plastic sponges shed microplastics and aren’t recyclable or biodegradable.
Plastic-Free Alternatives:
- Loofah sponges (plant-based, biodegradable)
- Wood and natural fiber scrub brushes
- DIY rag system (I cut up worn-out towels or t-shirts)
My Favorite Swap:
- A Plant-Based Kitchen Sponge made with hemp and sisal. It’s perfect for scrubbing pots and pans and lasts several months.
- For everyday dishes, I use a Swedish dishcloth, think of it as a cross between a sponge and a paper towel. It’s reusable, washable, and compostable.

Cleaning:
- Dishcloths can be washed with laundry or in the dishwasher.
- Loofahs and coconut scrubbers go into the compost bin when worn out.
These swaps also prevent that gross mildew smell you get with synthetic sponges. Win-win.
5. Refill Dish Soap or Make Your Own
Plastic soap bottles were one of the hardest things to quit because I didn’t love most bar dish soaps at first. But I’ve found ways to make it work, and I’m not going back.

Three Options:
- Refill dish soap in bulk
- Bar dish soap: Look for unscented or lemon-scented versions. Brands like Zero Wastely work well.
- DIY liquid dish soap:
DIY Dish Soap Recipe:
- 1/4 cup castile soap (Dr. Bronner’s works great)
- 1 cup warm water
- 1 tbsp white vinegar
- 1 tsp baking soda (optional)
- 10 drops essential oil (lemon, grapefruit)
Mix in a reused pump bottle or glass pump bottle. Shake before use.
Bar dish soap does take adjustment. It doesn’t foam like liquid soap, and some brands leave residue if your water is hard. I use it mostly with a stiff brush or a sponge-style dish wand.
For bigger cleanup jobs, I keep a small squeeze bottle of diluted castile soap handy.
Tips to Cut Even More Plastic
Once you have the five main swaps down, these extras are easy wins:
- Switch to Swedish dishcloths, cloth napkins and cleaning rags. I haven’t bought paper towels in over two years.
- Buy in bulk with your own jars or cloth produce bags.
- Use metal or glass straws (or just skip them entirely).
- Compost food scraps to reduce plastic trash bag use.
- Choose loose produce over plastic-packaged fruit/veg whenever possible.
Start with One Change
These easy DIY swaps to cut plastic from your kitchen don’t need to happen all at once. My own shift away from plastic took over a year. I started with beeswax wraps because I was using so much cling film, then slowly replaced one thing at a time.
If you’re new to DIY, try one swap that feels approachable and build momentum. Maybe it’s vinegar spray or silicone bags. You’ll be surprised how fast your kitchen habits evolve.
The goal isn’t perfection. The goal is progress.
With Love,
Bri & Cat
Affiliate Disclaimer:
As an Amazon Associate I earn from qualifying purchases. This comes at no additional cost to you. We only recommend products that we believe will add value to our readers.
Leave a Reply