This site contains affiliate links, view the disclaimer page for more information.
If you’ve ever wondered how to make beeswax wraps at home, you’re in for a treat. This DIY beeswax wrap tutorial is not only beginner-friendly, it’s also incredibly satisfying, like the kind of project that makes you feel equal parts creative, thrifty, and eco-conscious.
A few years ago, I got tired of constantly throwing away plastic wrap. It felt wasteful, especially when I was just covering half an avocado or wrapping up a sandwich for lunch. I started looking for an eco-friendly kitchen swap that was practical and pretty. That’s when I discovered the magic of beeswax wraps. And once I realized how easy it was to make them myself (and customize the fabric to match my kitchen), I never went back.
Let’s walk through everything you need to know, from materials to storage tips, and yes, I’ll share a few lessons learned from my own mistakes, too.
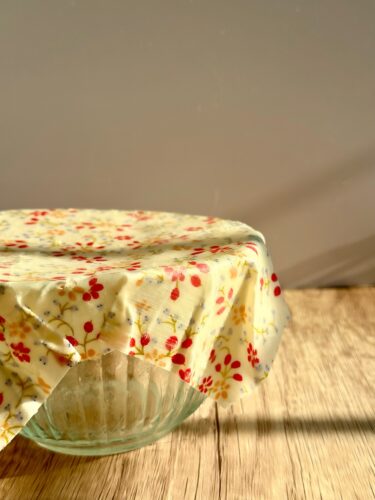
Table of Contents
Why Switch to Beeswax Wraps?
Before we dive into the how-to, let’s talk about why beeswax wraps are worth making in the first place.
Here’s what I love about them:
- They’re reusable – I’ve had some of mine for over a year, and they’re still going strong.
- They reduce waste – No more buying roll after roll of plastic wrap.
- They smell amazing – That light honey scent? So good.
- They’re customizable – Use any cotton fabric you like (hello, cute avocados or lemons!).
- They make great gifts – I’ve given bundles of them to teacher friends, new moms, and eco-minded coworkers.
Beeswax wraps are the kind of plastic wrap alternative that makes sustainable living actually feel fun. Plus, you only need a few simple ingredients to get started.
Supplies You’ll Need for This DIY Beeswax Wrap Tutorial
When I first tried to make beeswax wraps, I spent way too much time scrolling Pinterest and trying to figure out which recipe to trust. The good news? You don’t need much. And once you have the basics, you can make batch after batch.

Here’s what you’ll need:
Materials
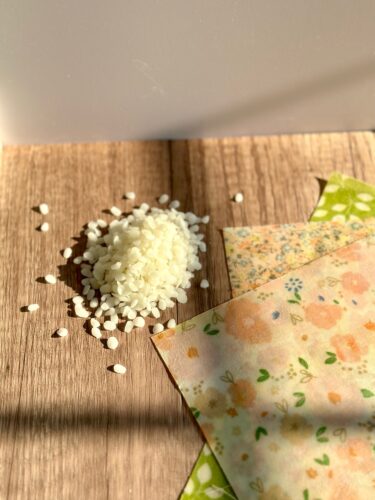
- 100% cotton fabric (washed and cut into sizes you’ll use: think sandwich-size, bowl-covering size, and snack-size) Quilting squares work great- These are the fabric squares I use.
- Beeswax pellets or grated beeswax (pellets melt faster and are easier to work with)
- Optional: Jojoba oil (adds flexibility)
- Optional: Pine resin (helps wraps stick better to surfaces)
Tools
- Parchment paper
- An old baking sheet
- Paintbrush (optional, but helpful for spreading melted wax)
- Oven OR iron
- Scissors or pinking shears (for cute, no-fray edges)
What’s the Deal with Pine Resin and Jojoba Oil?
You might be wondering: Do I really need pine resin and jojoba oil to make beeswax wraps? The short answer is no, you can make wraps with just beeswax, especially for a beginner-friendly batch. But if you want that professional, grippy texture, especially for wrapping things like sandwiches or the tops of bowls, adding some pine resin and jojoba oil makes a big difference.
Here’s a closer look and some tips for working with each:
Pine Resin (aka Gum Rosin)
Why use it:
Pine resin is what gives your beeswax wraps that slightly tacky, cling-wrap feel. It helps them stick better to bowls, jars, and themselves, creating a tighter seal.
Tips for using pine resin:
- Grind it up first. It usually comes in chunks, so use a mortar and pestle or seal it in a bag and gently hammer it into smaller bits. The smaller the pieces, the faster it melts.
- Melt it low and slow. Pine resin has a higher melting point than beeswax, so be patient. Stir frequently when melting it in a double boiler to avoid clumps.
- Prevent clumping by mixing the beeswax and jojoba oil first, then slowly stirring in the pine resin once everything is fully liquefied. This helps it dissolve more evenly into the blend.
- It’s sticky! Use a dedicated pot or glass bowl for melting, resin can be tough to clean off. Same goes for your paintbrush.
- Handle with care. It gets stringy and hot when melted, so don’t try to touch or scrape it while it’s still warm. Let your tools cool before cleaning or discarding.
Personal tip: The first time I used pine resin, I didn’t crush it first, and it took forever to melt. Lesson learned. Now I pre-grind a small jar of it to have ready whenever I want to make wraps.
Jojoba Oil
Why use it:
Jojoba oil helps keep your wraps flexible and less prone to cracking over time. It conditions the fabric and wax, kind of like a natural moisturizer for your wrap.
Tips for using jojoba oil:
- A little goes a long way! Use about ½ teaspoon per medium wrap (or a 1:3 ratio to beeswax if you’re mixing a larger batch).
- Don’t overdo it, too much oil can make the wrap greasy or less tacky.
- Choose golden jojoba oil if you want something with more nutrients, but clear/filtered jojoba oil works just as well and won’t affect fabric color.
Personal tip: I noticed my older wraps stayed in better shape when I added some jojoba oil. Without it, they started to dry out and crack after a few months of use and washing.
Suggested Beeswax Blend Recipe (Per Medium Wrap):
- 1 tablespoon beeswax pellets
- 1 teaspoon crushed pine resin
- ½ teaspoon jojoba oil
Melt them all together using the double boiler method or sprinkle and bake with the oven method. Once you get your ideal ratio, you can scale up or down for batches.
Beeswax Wraps: Double Boiler + Paintbrush Method
If you prefer a hands-on DIY beeswax wrap tutorial that lets you control every brushstroke, the double boiler method is your best friend. This technique involves melting your wax mixture on the stovetop and painting it directly onto your fabric with precision. It’s a bit more involved but super satisfying, especially if you’re making small batches or customizing each wrap.
This was actually the second method I tried when I realized I wanted more control over where the wax went (and less cleanup in the oven!). It’s also ideal if you’re making gifts and want your wraps to have the perfect finish.
You’ll Need:
- A double boiler setup: a heat-safe glass bowl over a saucepan of simmering water
- Your wax blend:
- Beeswax pellets or grated beeswax
- Jojoba oil (optional, for flexibility)
- Pine resin (optional, for tackiness)
- Cotton fabric, pre-cut and ironed
- Old paintbrush (don’t plan to reuse it for art, it’ll be wax-coated)
- Parchment paper
- Baking sheet or a protected work surface like a silicone mat
Step-by-Step:
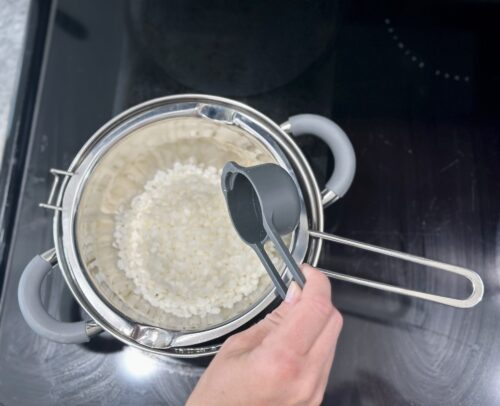
Step 1: Melt the Wax
Set up your double boiler and add your beeswax pellets to the top bowl. If you’re using jojoba oil and pine resin, prevent clumping by mixing the beeswax and jojoba oil first, then slowly stirring in the pine resin once everything is fully liquefied.
Let everything slowly melt over medium heat. Stir occasionally with a disposable wooden stick or spoon.
Tip: Resin takes a bit longer to melt, be patient and don’t crank the heat.
Step 2: Prep Your Fabric
Lay your cotton fabric flat on a piece of parchment paper or a baking sheet. Make sure it’s wrinkle-free and fits your work surface.
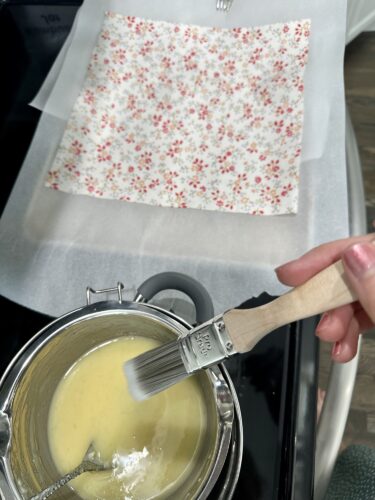
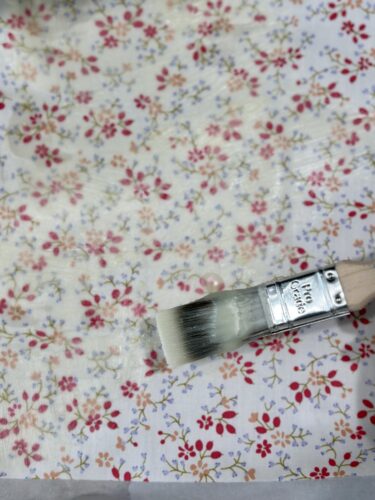
Step 3: Paint It On
Using a dedicated paintbrush, dip into the melted wax mixture and brush it evenly over the fabric. Start at the center and work outward. It should soak through the fabric as it’s applied.
Don’t worry if the wax cools or thickens a little, it will re-melt with a bit of oven or iron touch-up if needed.
Step 4: Heat to Even It Out
To ensure even coverage:
- Place a second sheet of parchment on top of the painted fabric.
- Gently iron over it or pop it into a 200°F oven for a few minutes until the wax remelts and spreads evenly.
Step 5: Dry and Cure
Just like the other methods, lift the wrap, wave it for a few seconds, then hang it or lay it flat to finish drying. Once cool, it’s ready to use!
Why I Love This Method:
- Great for small-batch crafting
- You get control over wax distribution
- Less mess in the oven
- A go-to if you’re re-waxing old wraps!
Bonus Tip: When using this method for gifts, I like to brush a little extra wax toward the edges for a tidy, finished look. And if you’re trying to match colors to your kitchen, this method makes it easy to do a small test square first.
Beeswax Wraps: Oven Method
There are two popular ways to make wraps: using your oven or using an iron. I personally prefer the oven method because it allows me to make several wraps at once without worrying about wax getting on my iron. Here’s the full step-by-step.
Step 1: Preheat and Prep
Set your oven to 200°F (93°C). While it’s warming up, line a baking sheet with parchment paper (not wax paper, it will melt!).
Place your cut cotton fabric on the parchment. If it’s wrinkled, give it a quick iron beforehand for the smoothest result.
Step 2: Sprinkle Beeswax
Sprinkle a light, even layer of beeswax pellets over the fabric. It’s better to start with less and add more later than to go overboard.
If you’re using pine resin and jojoba oil, here’s the mix I use:
- 1 tablespoon beeswax pellets
- 1 teaspoon crushed pine resin
- ½ teaspoon jojoba oil
(Adjust amounts based on the size of the wrap.)
Step 3: Bake and Watch the Magic
Pop the tray into the oven for 4–8 minutes, depending on the thickness of your wax. Keep an eye on it, the wax melts quickly!
Once the wax is melted, pull the tray out and use a paintbrush to gently spread the wax over any uncovered spots. Be fast, the wax sets quickly as it cools.
Step 4: Lift and Dry
Using tongs (or your fingers if you’re careful), lift the wrap by the corners and wave it in the air for a few seconds. It’ll dry and stiffen almost instantly.
Hang it over a rack, line, or chair back to finish curing for a few minutes. That’s it!

Beeswax Wraps: Iron Method
If you don’t want to use the oven or only plan to make one or two wraps, the iron method works well.
Step-by-step:
- Place a sheet of parchment paper on a hard surface or ironing board.
- Lay your fabric on top.
- Sprinkle beeswax (and other ingredients if using) over the fabric.
- Cover with a second sheet of parchment.
- Gently press with a medium-hot iron, moving in circular motions to melt and spread the wax.
- Once fully melted, lift the wrap and air-dry.
Tip: Don’t use your good iron! Wax can seep out. I bought a $10 thrift-store iron for this exact reason.
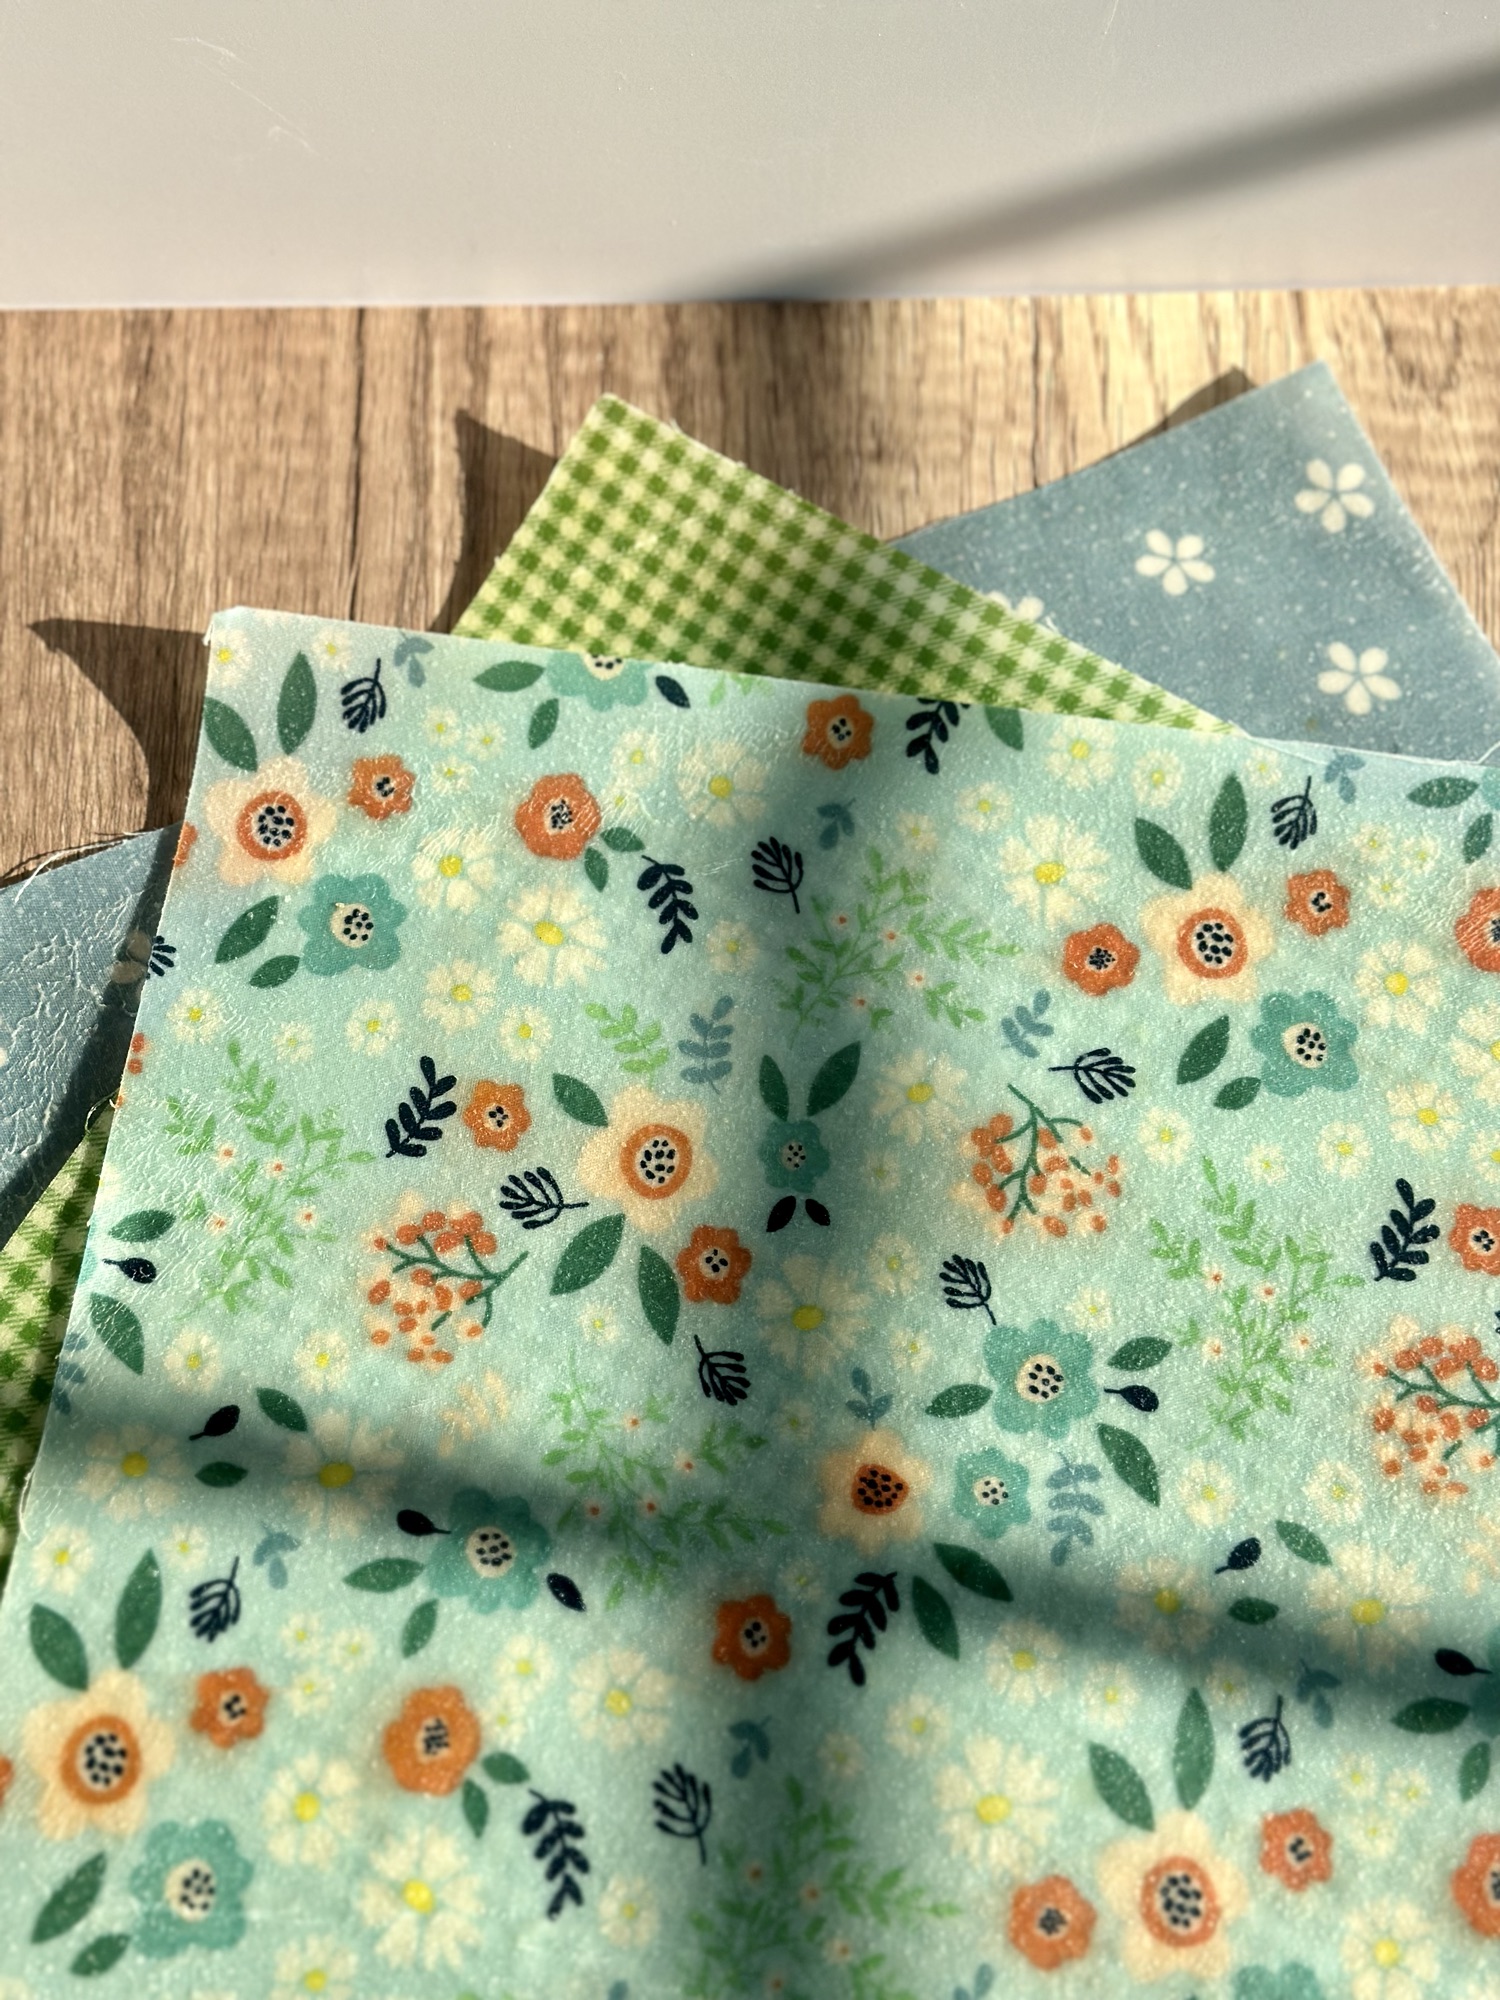
Choosing the Right Fabric
Fabric is half the fun. I recommend:
- Tightly woven 100% cotton – Think quilting cotton or old button-down shirts.
- Light to medium weight – Too thick and it won’t soak in the wax well.
- Pre-washed and ironed – Helps the wax adhere.
I love choosing seasonal prints: florals for spring, lemons or peaches for summer, autumn leaves for fall. I even made a “gingerbread” holiday wrap set with red gingham and cookie patterns last Christmas. Adorable and useful!
Quilting squares work great- These are the fabric squares I use.
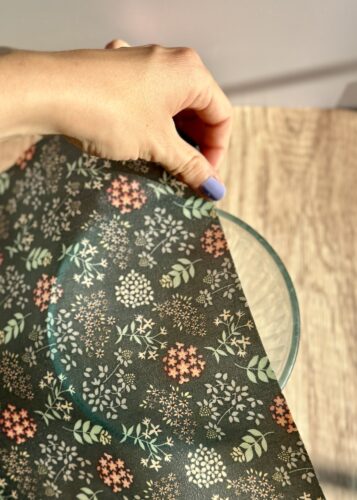
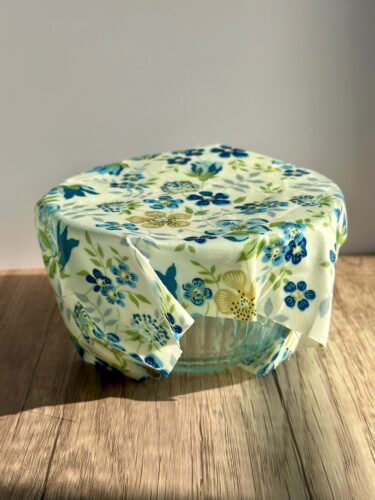
How to Use Beeswax Wraps
These wraps are super versatile. Use them to:
- Cover bowls and plates
- Wrap cheese, fruit, or veggies
- Fold into a snack pouch for nuts or crackers
- Keep herbs fresh
- Wrap a sandwich for lunch
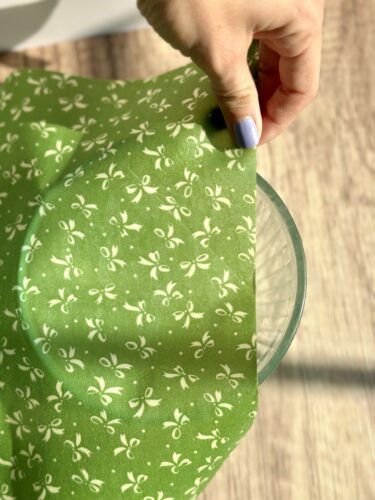
To seal them, just use the warmth of your hands to press the wrap against the container or food. It molds easily and holds shape after a few seconds.
How to Care for Your Wraps
Proper care = long life. Here’s how I keep mine looking fresh:
- Hand wash in cool water with mild soap
- Air dry and store flat or rolled
- Avoid hot water, dishwashers, or microwaves (they’ll melt the wax!)
- Refresh by adding a bit more wax and popping in the oven
With good care, wraps last 6–12 months. Once they look a little tired, you can refresh them, or compost them completely.
Gift Idea: Beeswax Wrap Bundles
Want to turn this sustainable living DIY into a gift? Wrap up a few in brown paper and twine, and add a tag like: “Reusable Beeswax Wraps – Handmade with Love”
Perfect for:
- Hostess gifts
- Teacher appreciation
- Zero-waste gift baskets
- Stocking stuffers
- Earth Day giveaways
You can even include care instructions or tie a wooden butter knife to the bundle. I’ve sold little sets like these at craft fairs, and they always go quickly.

Troubleshooting Common Mistakes
Here are a few hiccups I’ve had over the years, and how to fix them:
- Too waxy or uneven? Use the iron method to re-melt and smooth it out.
- Not sticky enough? Add a pinch of pine resin and reheat.
- Wax flakes off? Your fabric might be too thick, or it wasn’t hot enough when applying wax.
And if one just doesn’t turn out? No big deal. Just re-melt it, smooth it, and try again.
Why I Love This DIY
Learning how to make beeswax wraps at home completely changed how I approach food storage. What started as an experiment turned into a regular kitchen ritual, and even inspired me to ditch other disposables, like paper towels and plastic snack bags.
Making your own wraps is the kind of DIY beeswax wrap tutorial that’s equal parts practical and fun. You can make a whole afternoon of it: put on a podcast, grab some friends, and turn it into a craft day. There’s something deeply satisfying about folding a wrap you made yourself around a block of cheese or sandwich, knowing you’re cutting waste and adding beauty to your everyday.
So whether you’re a beginner or a seasoned crafter, I hope this plastic wrap alternative becomes a staple in your home too.
With love,
Bri & Cat
Affiliate Disclaimer:
As an Amazon Associate I earn from qualifying purchases. This comes at no additional cost to you. We only recommend products that we believe will add value to our readers.
Leave a Reply