
This site contains affiliate links, view the disclaimer page for more information.
If you’re curious about starting to mill your own flour at home, you’re not alone- I’ve been right where you are. And I’m here to tell you: it’s worth it. Milling your own flour is one of the best things I’ve done for our family’s health, our homemade bread, and our connection to real food. In this post, I’ll walk you through the 5 best grain millers, including the one I personally use and love (spoiler: it’s the NutriMill), plus all the other tools and essentials you need to get started.
Let’s get into it, because if you’re going to start grinding your own flour, you’re going to want to do it right the first time.
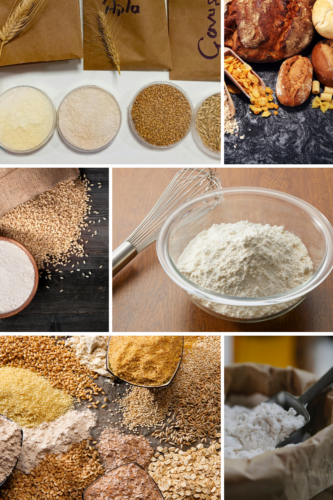
Table of Contents
Why I Started Milling My Own Flour
A few years ago, I wouldn’t have known a wheat berry if it hit me in the face. I was buying bags of all-purpose flour from the grocery store like everyone else. But once I started digging into bread baking, whole grain nutrition, and the real differences between store-bought vs. freshly milled flour, I couldn’t unsee what I’d learned.
The nutrient loss in store-bought flour? Yikes.
The shelf-life of whole grain flour? Surprisingly short.
The taste of homemade bread with fresh flour? Unbeatable.

So, I took the plunge and bought a grain mill.
When I first started thinking about milling my own flour, I didn’t want to invest a lot of money right away- especially not knowing if it was something I’d stick with. I already had a KitchenAid stand mixer, so the grain mill attachment seemed like an easy, affordable place to start. It was simple to use, and I was excited to dive in. But… my first loaves were a disaster.
The flour looked okay at first glance, but my bread turned out dense, heavy, and barely rose at all. I kept trying, tweaking recipes and hydration, but nothing helped. I was honestly discouraged and started second-guessing whether this whole fresh-milled flour thing was worth it.
After doing more research, I found out the KitchenAid attachment doesn’t mill the flour fine enough for yeast breads. It’s better suited for coarser grinding- think cracked grains, seeds, or nuts- not soft, fluffy whole wheat flour. Now, I use that attachment for grinding flaxseed, sunflower seeds, or even small batches of oats and nuts. It still has a place in my kitchen, just not for bread-making.
Once I switched to the NutriMill, everything changed.
I bought my NutriMill grain mill, and I haven’t looked back. Now, milling flour is part of my weekly rhythm- and honestly, it feels good to know exactly what’s going into our bodies.
Top 5 Best Grain Millers for Home Flour Milling
In my opinion, these are the most reliable, widely loved grain mills available. I’ll share their pros, cons, and a few thoughts to help you choose what’s best for your home kitchen.
1. NutriMill Classic Grain Mill (My personal go-to)

Price Range: Mid-range
Type: Electric, impact mill
Grinds: Wheat, rice, oats, corn, beans, and more (not oily seeds or nuts)
Why I Love It:
This is the grain mill I use every week. It’s powerful, quick, and makes super fine flour with zero fuss. It’s also not too loud for how strong it is. I’ve milled everything from hard red wheat to soft white wheat berries for cookies, pancakes, muffins, and our weekly bread loaves. It stores easily in a cabinet and hasn’t let me down yet.
Pros:
- Fast flour output
- Large hopper (can grind over 20 cups in one session!)
- Durable and low maintenance
- Easy to clean
Cons:
- Doesn’t do oily seeds
- Some coarseness control, mostly fine flour
If you’re starting out and want a dependable mill you’ll grow into, I can’t recommend this one enough.
This miller sells out often, I ordered mine from Generation Acres Farms as linked above. Highly recommend following her and checking out her site as she has many wonderful recipes, and tips and tricks for milling too! (No affiliate here, just a mama supporting another mama!)
2. CGOLDENWALL Electric Grain Mill Grinder

Price Range: Mid
Type: Electric, stainless steel high-speed grinder
Grinds: Dry grains, spices, herbs, and more
Why It’s Great:
If you want ultra-fine flour fast, this high-speed grinder does the job. It’s smaller than other countertop mills, but it packs a punch and can grind flour in just seconds. It’s great for small batch use or anyone with limited space.
Pros:
- Very fine flour texture
- Compact and fast
- Multipurpose (also grinds herbs, spices, even coffee)
- Budget-friendly
Cons:
- Smaller capacity
- Louder than some other mills
- Not ideal for large batch baking
This one’s perfect for beginners who want to test fresh-milled flour without committing to a big machine right away.
3. Country Living Grain Mill

Price Range: High
Type: Manual, metal burr mill
Grinds: Wheat, corn, rice, beans, and more
Why It’s Great:
This mill is for the die-hards or off-grid homesteaders. It’s manually operated but can be motorized. It’s built like a tank- people pass these down to their kids. If you lose power, you can still mill your own flour. I keep dreaming about getting one of these for emergencies or our someday cabin.
Pros:
- Manual operation, no electricity needed
- Extremely durable
- Adjustable grind size (coarse to ultra-fine)
- Can be motorized later
Cons:
- Pricey
- Labor-intensive without motor
- Takes up more space
4. NutriMill Harvest Grain Mill

Price Range: Mid to high
Type: Electric, stone mill (ceramic corundum stones)
Grinds: All dry grains- wheat, rice, oats, quinoa, spelt, and more
Why It’s Great:
If you’re looking for something that’s not just powerful but also beautiful on your countertop, the NutriMill Harvest is where form meets function. It uses real stone milling heads to gently grind your grains at a low temperature, which helps preserve the nutrients and flavor. Plus, that wood housing? Gorgeous. It feels like something that belongs in a cozy, real-food kitchen.
I haven’t used this one personally (I have the Classic), but I’ve heard so many good things about it, especially from people who want both nutrient-rich flour and something aesthetically pleasing that can stay out on the counter full-time.
Pros:
- Stone-ground flour = better nutrient retention
- Adjustable coarseness settings (cracked grain to fine flour)
- Quieter than most electric mills
- Beautiful wood finish in multiple color options
- Great for everyday milling and small-batch baking
Cons:
- Smaller hopper than the NutriMill Classic
- Slower milling speed compared to impact mills
- Not for oily grains, seeds, or nuts
If you want a mill that’s gentle on your grains and your eyes, this is the one. You can grab it here from Generation Acres Farm and support a small business while you’re at it.
5. KitchenAid Grain Mill Attachment

Price Range: Low to mid
Type: Burr mill attachment
Grinds: Wheat, oats, corn, rice, nuts and more
Why It’s Great:
Already have a KitchenAid mixer? This is a budget-friendly way to test the waters before investing in a standalone mill. It works best for nuts and seeds. As above, its not the best for milling fine enough for making breads and pastries.
Pros:
- Compact and affordable
- Uses equipment you already own
- Great for beginners
Cons:
- Slower
- Can overheat your mixer if overused
- Not ideal for bread/pastry making
What You Need to Start Milling Your Own Flour
Okay, now that you’ve picked your mill (I’m rooting for NutriMill, but any of these will serve you well), let’s talk about everything else you’ll need to get started.

1. Grains (aka Wheat Berries)
You can’t mill flour without grains! Start with these basics:
- Hard red wheat – great for hearty sourdough or sandwich loaves
- Hard white wheat – mild flavor, perfect for everyday baking
- Soft white wheat – ideal for muffins, pancakes, zucchini bread and cookies
- Spelt or einkorn – ancient grains with great flavor and nutrition
- Rye – for that classic tangy sourdough
- Corn – grind for cornmeal or grits
I like to buy mine in bulk or local co-ops when possible. Store them in food-safe buckets to keep them fresh and bug-free.

2. Fine Mesh Sieve (Optional)
If you’re baking delicate pastries or want to sift out some of the bran, a sieve can help. I usually keep the bran for most recipes, but sometimes I sift just a bit for a fluffier finish.
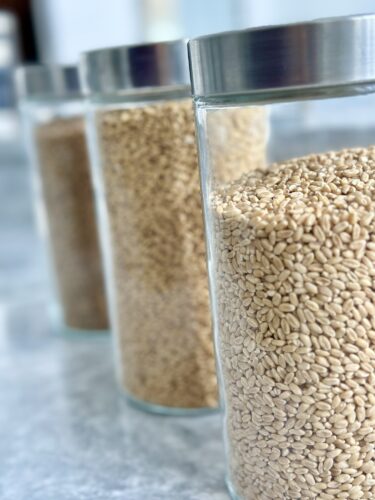
3. Labels and Storage Jars
Fresh flour doesn’t last forever like store-bought stuff. I label the jars or containers with the date I milled it and use it within 1–2 week.
4. A Good Bread Recipe or Two
Milling your own flour is just the beginning. You’ll want a solid sourdough or yeast bread (check out my go to bread recipe here!) recipe that’s designed for whole grain flour. I can’t tell you how many times I tried to swap fresh flour 1:1 and ended up with a brick. It’s a learning curve, but a fun one. Definitely check out Generation Acres Farms Freshly Milled Made Simple Guide. This is where I started and learned so much!
Other books I would recommending starting with are below:
- The Homemade Flour Cookbook
- The Essential Home-Ground Flour Book
- Home Flour Milling & Baking Techniques Bible
Tips I’ve Learned Along the Way
- Grind just what you need – Fresh flour spoils faster. I mill 3–4 cups at a time unless I’m batch baking.
- Start simple – Try pancakes, muffins, or zucchini bread first. These are more forgiving than loaves.
- Blend flours – Mix hard white and soft white for a versatile all-purpose blend.
- Keep a notebook – Track what grain you used, how much water, how your dough behaved, and how it baked up. You’ll learn fast.
- Trust your hands – Fresh flour behaves differently. It might be thirstier. It might rise slower. Use your senses and give yourself grace.
Why It’s Worth It
There’s something incredibly satisfying about milling your own flour. It’s not just about the nutrition (which, by the way, is significantly higher than shelf-stable flour). It’s the feeling of taking one more step toward self-sufficiency. It’s the taste- nutty, fresh, and full of life. It’s knowing exactly what’s in your food, where it came from, and how it was handled.
And it’s something I can share with my kids. My 4-year-old loves pouring the wheat berries in and seeing it turn into fine flour at the end. He thinks it’s magic. And honestly? It kind of is.

Whether you go with the NutriMill, the manual mill, or even just dip your toes in with the KitchenAid attachment, you’re going to notice a difference in your baking, your health, and maybe even your mindset. Milling flour at home connects you with your food in the most hands-on way.
And hey, if I can do it with two wild little boys underfoot and a million distractions in the kitchen, you can too.
If you’re ready to get started, grab your grain mill, stock up on a few types of wheat berries, and just go for it. You’ll never want to go back to store-bought flour again.
Read more about grain milling and fresh flour:
With love,
Bri & Cat
Affiliate Disclaimer:
As an Amazon Associate I earn from qualifying purchases. This comes at no additional cost to you. We only recommend products that we believe will add value to our readers.
Leave a Reply