This site contains affiliate links, view the disclaimer page for more information.
Every time I bring feta tomato basil crostinis to a party, the same thing happens: they’re gone before I even set down my bag.
I’ve been making this recipe for years, and I still get texts the next day asking for it. There’s something about the combination of creamy whipped feta, jammy slow-roasted tomatoes, and fresh basil piled onto a golden, crispy crostini that just stops people in their tracks. It looks like something you’d order at a wine bar. It tastes even better than that. And the secret? It’s almost embarrassingly simple to make.
If you’ve been looking for a go-to appetizer, one you can make ahead, one that travels well, one that genuinely impresses people without requiring you to spend your entire Saturday in the kitchen, this is it. Let me walk you through every single component, share some hard-won tips I’ve picked up along the way, and make sure you never show up to a party empty-handed again.

Table of Contents
Why Feta Tomato Basil Crostinis Deserve a Permanent Spot in Your Recipe Rotation
I’ll be honest. I used to overthink appetizers. I’d spend hours on complicated dips, fussy little bites that required assembly-line precision, or something that looked beautiful for exactly four minutes before falling apart on the platter. Sound familiar? Then I landed on this combination, and everything changed.

Feta tomato basil crostinis work because every single component punches above its weight. Whipped feta sounds fancy, but it’s just feta, yogurt, olive oil, and garlic blended until smooth. Slow-roasted tomatoes sound like a weekend project, but they go in the oven and you forget about them for an hour while you do literally anything else. Homemade crostini sounds impressive, but it’s sliced bread, a drizzle of oil, and fifteen minutes of your time.
Together, they create something that tastes like the sum of much more than their parts. The saltiness of the feta balanced against the sweetness of the roasted tomatoes. The cool creaminess against the crispy crunch. The bright, herbaceous pop of fresh basil cutting through it all. It’s a genuinely perfect bite.
And then there’s the practical magic: you can make every single component ahead of time. We’re talking day-of assembly that takes less than five minutes. For anyone who hosts, or anyone who’s ever tried to juggle cooking and socializing at the same time, that is everything.
The Ingredients: Simple, Purposeful, and Worth Seeking Out
Before we get into the how, let’s talk about the what. Here’s what you’ll need:
- 8 oz block of feta cheese
- ½ cup plain yogurt
- 1 tablespoon olive oil (for the whipped feta)
- 1 clove of garlic
- 1 baguette, sliced into ¼-inch rounds
- 10 oz package of cherry tomatoes
- 1 tablespoon olive oil (for roasting the tomatoes)
- Salt and pepper
- 10 fresh basil leaves (about 0.5 oz)
- Olive oil for the crostini (a drizzle or spray)
A few quick notes on ingredients, because the details matter more than you’d think.
On the feta: Please, please buy a block of feta, not the pre-crumbled stuff. I know it’s tempting. The crumbles are right there, pre-portioned, ready to go. But crumbled feta is drier, less creamy, and packed with anti-caking agents that actively work against you when you’re trying to blend it smooth. A block of feta, packed in brine, is what gives you that lush, silky whipped texture. It’s usually the same price, and the difference is dramatic.
On the yogurt: Plain yogurt is the secret weapon here. It lightens the feta’s density, adds a subtle tang, and makes the whole mixture blendable without adding any liquid that might water it down. Full-fat plain yogurt gives you the richest result, but even low-fat works well here.
On the tomatoes: Cherry tomatoes are ideal because their size-to-surface-area ratio is perfect for slow roasting. They caramelize evenly and don’t turn to complete mush in the oven. A standard 10 oz package gives you exactly the right amount for one batch of crostini with maybe a few leftover for snacking, which fair warning, will happen.
On the basil: Use fresh. Always fresh. Dried basil does not belong anywhere near this recipe.
Whipped Feta, The Foundation of Everything
Let’s start with the whipped feta, because if you take nothing else from this post, take this: whipped feta will change your life. I’m only slightly exaggerating. The first time I made it, I stood at the food processor eating it with a spoon and questioning all my previous life choices. It’s that good.
Here’s how to make it.
Add your block of feta, the tablespoon of olive oil, the garlic clove, and the plain yogurt to a food processor. That’s it, four ingredients, all in at once. Then blend. And keep blending. Don’t stop when it looks chunky and think “that’ll do.” Let it run for a full minute or two until it’s completely, silky smooth. The transformation from crumbly block to cloud-like cream is genuinely satisfying to watch.


Once it’s blended, taste it. Depending on your feta (some brands are saltier than others), you might want a tiny pinch of salt or a little extra olive oil. Trust your palate here.
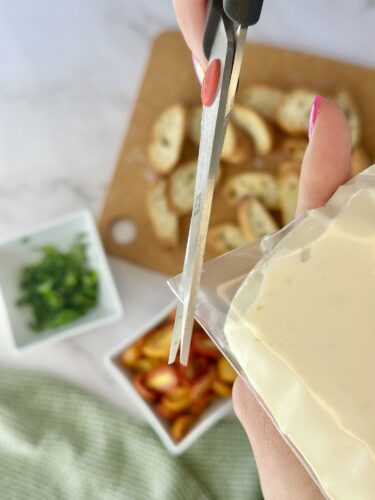
Then, and this is the move that makes assembly later so effortless, transfer the whipped feta into a ziplock bag. Seal it, press the mixture into one corner, and refrigerate. You’ve essentially just made your own piping bag for zero additional effort or cost. When you’re ready to serve, all you do is snip a small hole in the corner and pipe. It looks professional. It looks intentional. No one needs to know it’s a Ziploc bag.
A few extra tips I’ve learned:
- Let the feta sit at room temperature for about 10 minutes before blending. Cold feta doesn’t blend as smoothly.
- The whipped feta gets better after a night in the fridge. The garlic mellows, the flavors meld, and the texture becomes even more uniform. Make it a day or two ahead and you’ll actually be happier with the results.
- It keeps well for up to three days refrigerated, so there’s really no reason not to make it in advance.
Slow Roasted Tomatoes, The Part Worth Every Minute
Okay. I need you to trust me on this one.
I know that roasting tomatoes at 200°F for a full hour sounds like an unnecessary commitment when you could just slice a cherry tomato in half and call it a day. And listen, you absolutely can do that. I’ll give you the shortcut version later. But if you have any extra time at all, the slow roasted tomatoes are the thing that takes these feta tomato basil crostinis from “really good” to “wait, where did they all go?”

Here’s what happens when you slow roast a cherry tomato: the oven draws out the moisture gently, without forcing it, and the natural sugars in the tomato concentrate and deepen. The flesh goes jammy and almost melts at the edges. The flavor becomes something between fresh tomato and sun-dried tomato, more complex, sweeter, richer, and a little bit caramelized. It’s the same tomato, but it’s not the same tomato.
I started slow roasting tomatoes after a trip to a small restaurant in Italy years ago where they served them alongside cheese and bread. I couldn’t figure out what made them taste so different from anything I’d had before, and when I asked the waiter, he just said “slow.” That was the entire explanation. Slow.
He was right.
How to make slow roasted tomatoes:
Start by preheating your oven to 200°F. While it heats, halve each cherry tomato lengthwise, cut from stem to tip, not across the equator. This gives you a flatter cut surface that sits stably on the pan and caramelizes more evenly.
Toss the halved tomatoes in a bowl with a tablespoon of olive oil and a generous pinch of salt and pepper. Don’t be shy with the seasoning. The tomatoes are going to concentrate as they roast, and the seasoning needs to be there from the start to permeate the whole thing.


Arrange them cut-side up on a rimmed baking sheet. This is important: cut-side up means the juices stay inside the tomato as it roasts instead of running out onto the pan. You want those juices to reduce inside the tomato, not evaporate into your oven.
Roast at 200°F for one hour. That’s it. You don’t need to flip them, check on them, or babysit them. Go do something else. Come back in an hour and your kitchen will smell incredible and your tomatoes will look like tiny, glistening jewels.


Let them cool completely before assembling. Warm tomatoes on your crostini will steam the bread and make it soggy. Give them time. They’re worth waiting for.
The shortcut: If you’re short on time, maybe it’s a weeknight and you’re squeezing this together between work and dinner, fresh halved cherry tomatoes are genuinely delicious here too. They’re bright and juicy and they complement the rich feta beautifully in a completely different way. The slow-roasted tomatoes are the elevated version; fresh tomatoes are the weeknight version. Both are great. No judgment.
The Crostini, Don’t Skip the Double Flip
Crostini seems like the least interesting part of this recipe. It’s bread. You toast it. What’s to discuss? More than you’d think, actually.
The difference between a good crostini and a great crostini comes down to two things: the thickness of the slice and the oil on both sides. A ¼-inch slice is the sweet spot, thin enough to get genuinely crispy all the way through, thick enough to hold the weight of everything you’re piling on top without snapping in half the second someone picks it up. Trust me, I’ve had the too-thin crostini disaster. You end up with a pile of whipped feta and tomatoes in your palm and a fragment of bread somewhere in the mix. Not the vibe.

Here’s exactly how to make perfect crostini:
Slice your baguette into ¼-inch rounds. Lay them out on a sheet pan. It’s fine if they’re touching slightly; they’ll crisp up regardless. Lightly drizzle or spray olive oil on one side, then flip each piece and oil the other side too. Both sides need oil. This is non-negotiable if you want even golden browning rather than one pale side and one bronzed side.
Bake at 350°F for 5 to 6 minutes, then flip every piece and bake for another 5 to 6 minutes. You’re looking for golden brown and completely crisp. If they feel soft or bendy when you pull them out, give them another two minutes. They should have a satisfying crunch when you bite them.
Let them cool fully before assembling. Cool crostini plus cold whipped feta equals the ideal textural contrast you’re going for.

Crostini store beautifully in an airtight container at room temperature for up to a day. Make them the night before, pack them away, and they’ll be just as crispy when you pull them out to assemble.
Putting It All Together: The Assembly That Makes It All Click
This is the part that feels like magic, because it takes maybe four minutes and the result looks like something you’d order for twelve dollars at a wine bar.

Pull your whipped feta from the fridge. Lay out your crostini on a flat platter or board. Snip a small hole, about a quarter inch, in the corner of the ziplock bag. Then pipe. Hold the bag at a slight angle, apply gentle pressure, and move in a small swirl or spiral on each crostini. You don’t need perfection here. An imperfect swirl still looks intentional and beautiful because the feta is so white and bright against the golden bread.


Next, place one slow-roasted (or fresh) cherry tomato half on top of each crostini, cut-side up. Press it in gently so it nestles into the whipped feta rather than rolling off when someone picks it up.
Finally, the basil. Take your leaves and slice them into a chiffonade: stack them on top of each other, roll them into a loose cylinder, and then slice thinly crosswise. You get these beautiful, thin ribbons of bright green herb that drape over the tomato and feta. It looks elegant, it smells incredible, and it adds that crucial fresh, peppery note that lifts the whole bite.

A few assembly tips:
- Assemble right before serving. This is the one thing you cannot do ahead of time. Once assembled, the crostini will start to soften within 30 to 45 minutes. They’re still good, but they lose that perfect crunch.
- If you’re serving at a party, consider setting out the components separately, a bowl of whipped feta, a tray of crostini, a bowl of tomatoes, and letting guests build their own. People love a DIY moment, and it means everything stays fresh for longer.
- Don’t overload. One tomato per crostini. A generous but controlled swirl of feta. A few ribbons of basil. The restraint is part of what makes each element taste like itself.
The Make-Ahead Game Plan for Stress-Free Entertaining
This is where the recipe truly earns its place in your entertaining arsenal. Here’s your full timeline:
Up to 3 days ahead: Make the whipped feta. Blend, bag, refrigerate. Done.
Up to 1 day ahead: Slow roast the tomatoes. Let cool, transfer to an airtight container, refrigerate.
Up to 1 day ahead: Make the crostini. Cool completely, store in an airtight container at room temperature.
Day of, before serving: Pull everything out. Slice your basil. Assemble.

That’s it. You can walk into a gathering having done 95% of the work already, assemble in under five minutes, and set down a platter that looks like you spent your entire afternoon in the kitchen. No one needs to know. That’s between you and the crostini.
Variations Worth Trying
Once you’ve made these feta tomato basil crostinis a few times and the base recipe feels like second nature, here are a few directions worth exploring:

- Add a drizzle of honey over the top right before serving. The sweet-salty contrast with the feta is extraordinary.
- Swap the basil for mint in the summer. It’s a slightly different flavor profile but equally fresh and bright.
- Add a pinch of red pepper flakes to the tomatoes before roasting if you like a little heat. It adds a subtle warmth that works beautifully with the cool, creamy feta.
- Try it with heirloom cherry tomatoes if you can find them at a farmers market in season. The variety of colors makes the platter visually stunning.
- Add a thin slice of prosciutto under the whipped feta for a more substantial bite if you’re serving these as a light meal rather than a starter.
Enjoy!!
I think the best recipes are the ones that make you feel capable and creative and generous all at once. This one does that.
Feta tomato basil crostinis are not complicated. They don’t require any special equipment, any hard-to-find ingredients, or any technical skill. What they require is a little patience, the kind it takes to let tomatoes roast slowly, to let bread cool properly, to not rush the assembly because you’re excited to eat them. That patience pays off in a way that feels disproportionate to the effort involved.

And there’s something genuinely satisfying about setting down a platter of these at a table and watching them disappear. About someone taking a bite and pausing mid-conversation because the flavor caught them off guard. About getting that text the next morning asking “okay, seriously, how did you make those?”
You’re going to love making these. More importantly, you’re going to love watching other people eat them. Now go get a block of feta. You’ve got some crostinis to make.
With love,
Bri and Cat
Affiliate Disclaimer:
As an Amazon Associate I earn from qualifying purchases. This comes at no additional cost to you. We only recommend products that we believe will add value to our readers.

Whipped Feta Tomato Basil Crostinis
Ingredients
- 8 oz block of feta cheese
- ½ cup plain yogurt
- 1 tablespoon olive oil
- 1 clove garlic
- 10 oz package of cherry tomatoes
- 1 tablespoon olive oil
- Salt and pepper to taste
- 1 baguette sliced into ¼-inch rounds
- Olive oil for drizzling or spraying
Equipment
- Food processor
- Rimmed baking sheet
- 1 Quart size ziplock bag
- Scissors (for the piping bag)
- Serving platter
Method
- Add feta, olive oil, garlic, and yogurt to a food processor.
- Blend for 1 to 2 minutes until completely smooth and creamy.
- Transfer to a ziplock bag, press into one corner, seal, and refrigerate until ready to serve.
- Preheat oven to 200°F.
- Halve each cherry tomato lengthwise and toss with olive oil, salt, and pepper.
- Arrange cut-side up on a rimmed baking sheet.
- Roast for 1 hour. Do not flip.
- Remove from oven and let cool completely.
- Preheat oven to 350°F.
- Arrange baguette slices on a baking sheet.
- Drizzle or spray olive oil on both sides of each slice.
- Bake for 5 to 6 minutes, flip each slice, then bake for another 5 to 6 minutes until golden brown and crisp.
- Let cool completely.
- Snip a ¼-inch hole in the corner of the whipped feta ziplock bag.
- Pipe a swirl of whipped feta onto each crostini.
- Top each with one slow-roasted tomato half, cut-side up.
- Stack basil leaves, roll tightly, and slice thinly into ribbons.
- Garnish each crostini with a pinch of basil ribbons and serve immediately.
Notes
- Buy block feta, not pre-crumbled. It blends smoother and tastes creamier.
- Let feta sit at room temperature for 10 minutes before blending for the silkiest result.
- The whipped feta tastes even better the next day as the garlic mellows overnight.
- Always arrange tomatoes cut-side up so the juices concentrate inside rather than running out onto the pan.
- Oil both sides of the baguette slices for even, golden browning on every piece.
- Let the crostini cool fully before assembling or they will soften under the feta.
- Assemble right before serving to keep the crostini crisp.
- Short on time? Fresh halved cherry tomatoes work beautifully in place of roasted.
- Whipped feta: up to 3 days ahead, refrigerated in the ziplock bag
- Slow roasted tomatoes: up to 1 day ahead, refrigerated in an airtight container
- Crostini: up to 1 day ahead, stored at room temperature in an airtight container
- Basil: slice fresh the day of for the brightest color and flavor
Leave a Reply