
This site contains affiliate links, view the disclaimer page for more information.
Olive artisan bread has quickly become one of my favorite things to bake, and once you try this recipe, I think it will become one of yours too. There is something so satisfying about pulling a golden, crackly loaf out of the oven and knowing you made it yourself, no stand mixer, no kneading, and no fancy equipment required beyond a dutch oven.
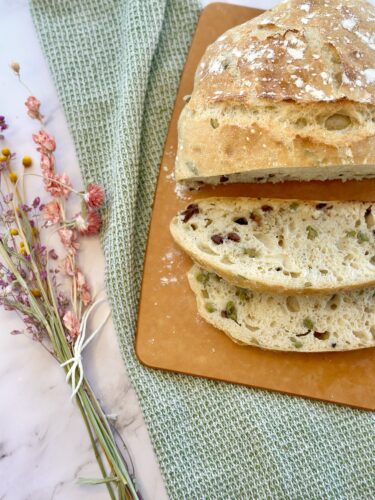
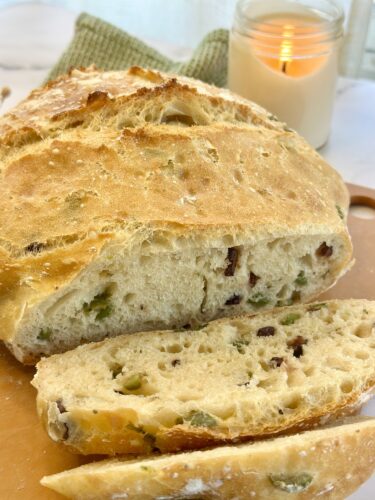
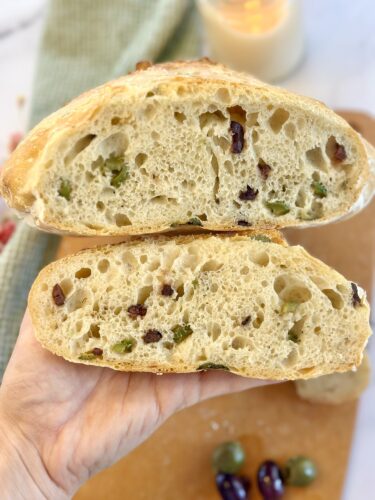
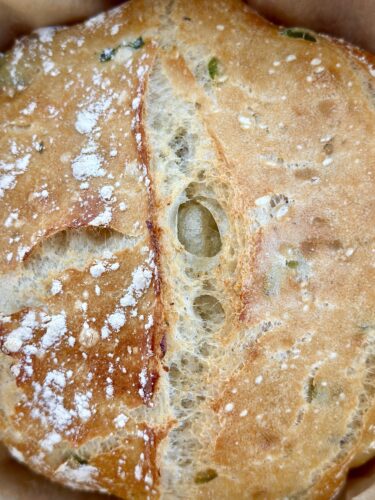
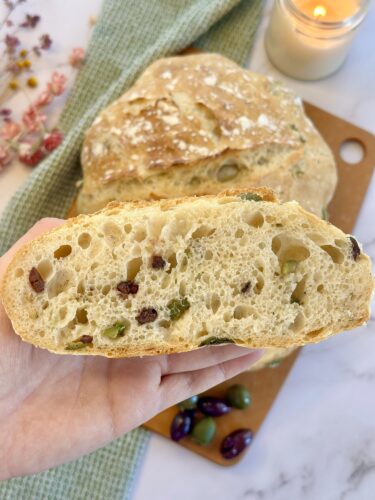
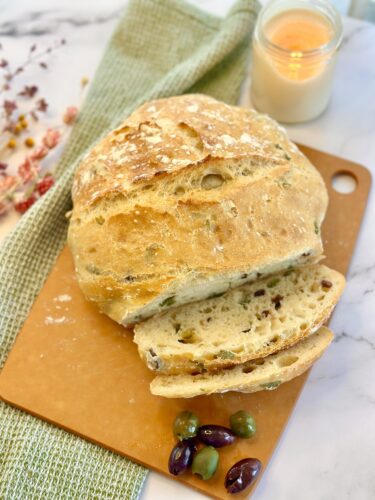
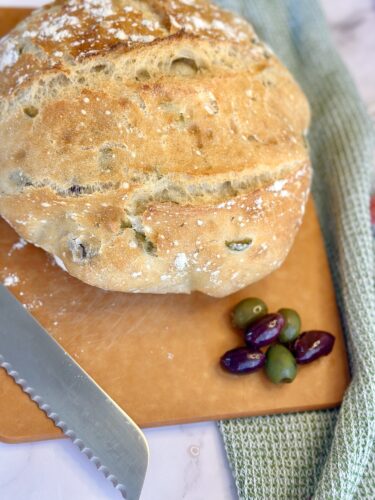
I have made a plain version of this artisan loaf plenty of times, and it is always a hit. But once I started experimenting with mix ins, I knew I had to try adding olives. I am a huge olive lover, and combining that briny, salty flavor with warm notes of oregano and garlic powder took this bread to a completely different level. The olive artisan bread that comes out of this recipe has little pockets of green and kalamata olives throughout, a chewy interior, and a crust that shatters when you cut into it.
If you have ever been intimidated by homemade bread, I want you to set that fear aside for a minute. This recipe is same day, which means you do not need to plan a day in advance or let dough sit in the fridge overnight. It is also no knead, which means your hands barely touch the dough until the very end. All you really need is a little patience and a few rounds of stretching and folding.
Table of Contents
My Journey to This Olive Artisan Bread Recipe
I did not start out as a confident bread baker. My first few attempts at homemade bread were dense, flat, and honestly a little discouraging. I remember pulling a loaf out of the oven that looked more like a brick than anything I would want to serve to guests. It took me a while to understand that bread baking is less about precision and more about patience.
Once I started making the plain version of this artisan loaf, something clicked. I finally understood how the dough was supposed to feel at each stage, how long to let it rise, and what a properly developed dough looks like before it goes into the oven. That plain loaf became my baseline, something I could make confidently anytime.
From there, I started thinking about how I could make it my own. I have always loved olives, whether they are on a charcuterie board, tossed into a salad, or eaten straight out of the jar as a snack. So it felt natural to try folding them into my bread dough. The first time I made this olive artisan bread, I was honestly a little nervous the olives would make the dough too wet or too heavy. Instead, they added the perfect amount of flavor and texture without weighing the loaf down at all.
Since then, this has become one of my most requested recipes. Friends ask me to bring it to get togethers, and family members request it around the holidays. It has earned a permanent spot in my baking rotation.
Why You Will Love This Olive Artisan Bread
I have made this loaf multiple times now, and every single time it disappears fast. Here is why I think you will love it as much as I do.
- It is beginner friendly. If you have never made bread before, this is a great place to start.
- The olive artisan bread flavor is bold without being overwhelming. The oregano and garlic powder add warmth, and the olives add saltiness and texture.
- It looks impressive but is genuinely simple to make. Nobody needs to know how easy it actually was.
- It works for so many occasions, from casual weeknight dinners to entertaining guests.
- The dutch oven method gives you that bakery style crust without needing a professional oven.
- It requires very little hands on time. Most of the work happens while the dough rises on its own.
I actually served this bread at a girls night not too long ago, and my friends could not believe I made it myself. One of them asked if I picked it up from a bakery down the street. That is exactly the kind of reaction you want when you set a warm loaf of bread on the table.
Have you ever brought something homemade to a gathering and had people assume you bought it? There is a certain kind of pride in that moment. It is one of the reasons I keep coming back to this recipe again and again.
What You Need to Make Olive Artisan Bread
Let me walk you through the ingredients so you know exactly what role each one plays.
Ingredients:
- 3 cups flour
- 1 3/4 cups warm water (around 110 degrees)
- 1 teaspoon sugar
- 1 packet active yeast
- 1 teaspoon salt
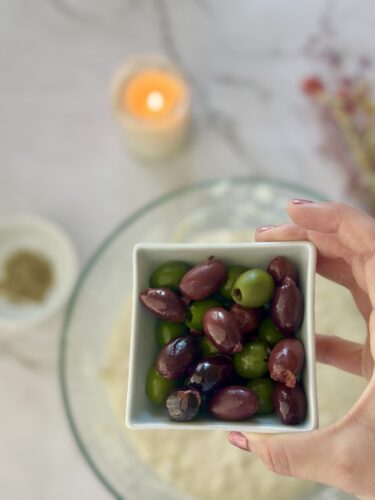
- 1/4 cup sliced olives (a mix of green and kalamata)
- 1 teaspoon oregano
- 1 teaspoon garlic powder
A few notes on these ingredients before you get started.
The water temperature actually matters more than people think. You want it warm, around 110 degrees, similar to a warm bath. If the water is too hot, it can kill the yeast before it even gets a chance to activate. If it is too cold, the yeast will take much longer to wake up. I always test mine with a thermometer just to be safe, though after making this a few times you will start to get a feel for it.
The sugar is there to feed the yeast and help jump start the activation process. It is a small amount, and you will not taste sweetness in the final bread. Its whole job is to give the yeast something to work with early on.
For the olives, I like using a combination of green and kalamata. The green olives bring a brighter, slightly tangy flavor, while the kalamata olives are richer and more intense. Together they create a really nice balance throughout the loaf. You can absolutely use just one type if that is what you have on hand, but I do think the combination is what makes this bread special.
As for the oregano and garlic powder, these two ingredients are doing a lot of quiet work in this recipe. They are not overpowering, but they add just enough warmth and savoriness that you notice them in every bite. I have thought about experimenting with fresh herbs instead of dried, and I think that could be a fun variation to try down the line.

How to Make Herby Olive Artisan Bread
Now let’s get into the process. I promise this looks more complicated written out than it actually feels while you are doing it. Once you make it once, the rhythm of stretching, folding, and resting becomes second nature.
Step One: Activate the Yeast
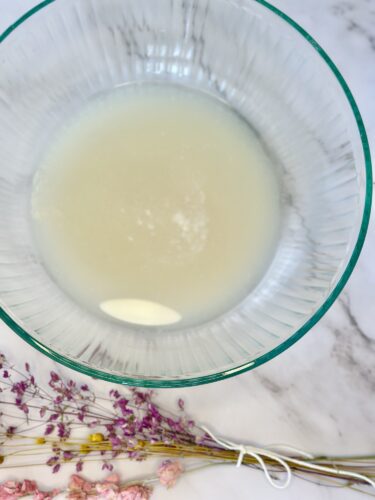
In a large mixing bowl, add your warm water, sugar, and the packet of active yeast. Give it a gentle stir and then let it sit for about 10 minutes.
This step is important because it lets you confirm your yeast is alive and working. After about 10 minutes, you should see the mixture get foamy and bubbly on top. If it does not foam up at all, your yeast may be expired, or your water may have been too hot or too cold. It is always better to catch that now than after you have already added your flour.
I like to use this 10 minute window to gather the rest of my ingredients and clear off my counter space. It keeps the whole process feeling organized rather than rushed.
Step Two: Mix the Dough
Once your yeast mixture is foamy, add in the flour and salt. Mix everything together until it is fully incorporated. The dough will be shaggy and a little sticky at this point, and that is exactly what you want. This is a wet dough, not a smooth, tight ball like you might be used to with other bread recipes.
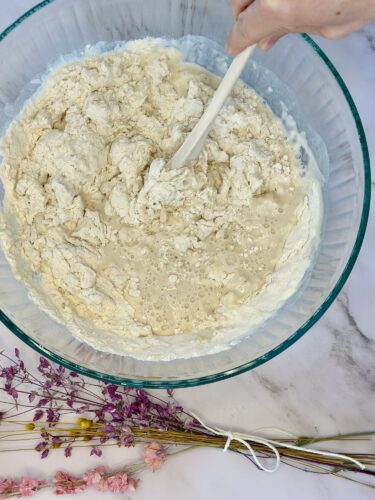
I use a wooden spoon or a sturdy spatula for this part, though you can absolutely use your hands if you do not mind them getting a bit messy. If the dough looks uneven or a little shaggy with dry patches, that is normal. It will come together more as it rests.
Step Three: First Rise
Cover your bowl and let the dough rise for one hour, or until it has doubled in size.
This is a great time to clean up your kitchen, prep your olives, or just relax for a bit. The dough is doing all the work on its own thanks to the yeast. I usually place my bowl near a warm spot in my kitchen, like near the stove or on top of the fridge, to help the rise along.
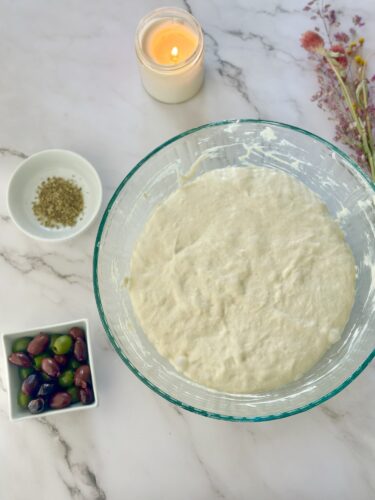
If your kitchen tends to run cold, do not worry if the rise takes a little longer than an hour. The goal is doubling in size, not hitting a specific clock time.
Step Four: First Fold with Olives and Spices
Once the dough has doubled, it is time for the first fold. This is where the magic really starts to happen. Add your sliced olives, oregano, and garlic powder directly onto the dough.
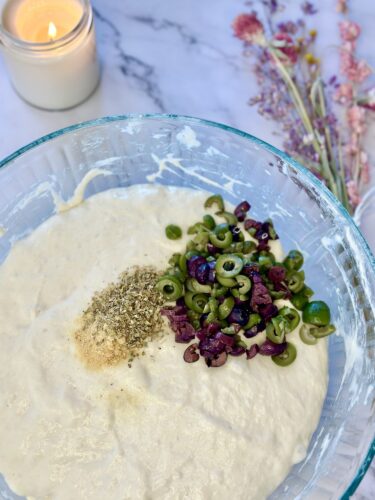
Using two forks, take each of the edges of the dough and fold them into the center. Work your way around the bowl, folding each side in toward the middle. This helps distribute the olives and spices evenly throughout the dough while also building a little structure.
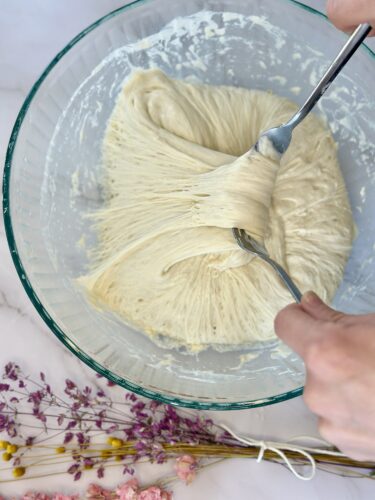
I like using two forks for this step because it keeps the sticky dough from clinging to my hands, and it makes the folding process feel much cleaner. Let the dough rest for one hour after this fold.
Step Five: Second Fold and Stretch and Folds
After the hour rest, pull in each of the sides again using a fork, just like before.
Then, with wet hands, perform several stretch and folds. To do this, wet your hands so the dough does not stick to you, grab one side of the dough, stretch it upward, and fold it over the top toward the center. Rotate the bowl a quarter turn and repeat this several times.
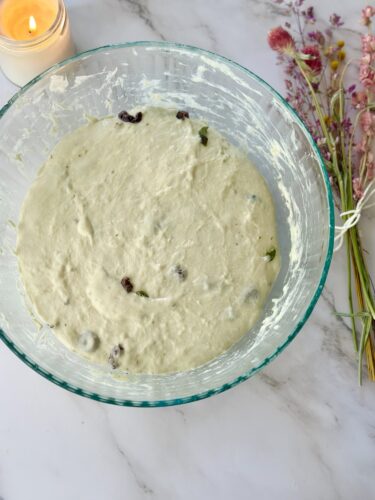
You will notice the dough starting to hold its shape more and more with each fold. That is a good sign, and it is honestly one of my favorite parts of the process. You can feel the dough transforming right under your hands. Let the dough rest for another hour.
Step Six: Final Stretch and Folds
Repeat the stretch and fold process one more time. By now, your dough should feel much more elastic and cohesive compared to when you first mixed it. This final round of folds helps develop the gluten structure that gives artisan bread its signature chew and open crumb.
At this point, the dough should hold together well when you lift it, and it should feel noticeably smoother than it did during the earlier folds.
Step Seven: Preheat the Oven and Dutch Oven
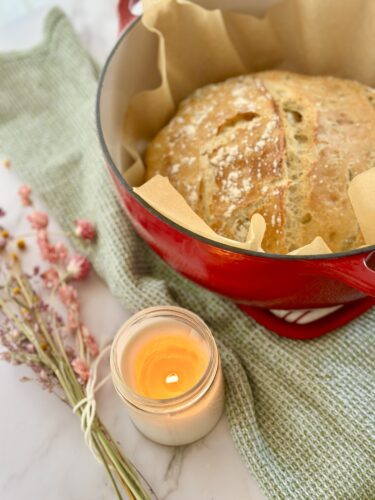
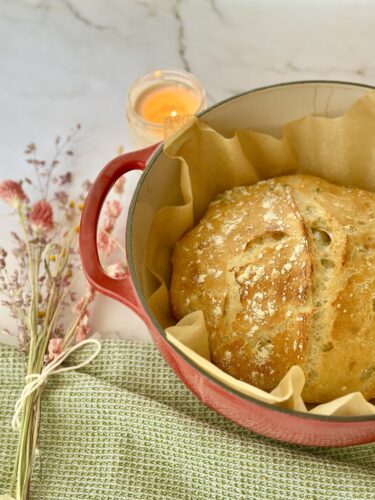
Preheat your oven to 450 degrees, and place your empty dutch oven inside while it preheats. This step is key for getting that crispy, bakery style crust. A hot dutch oven creates a steamy environment as the bread bakes, which helps the crust develop that beautiful crackly texture.
I recommend giving your dutch oven at least 20 to 30 minutes to fully preheat along with your oven. A cold or lukewarm dutch oven will not give you the same results.
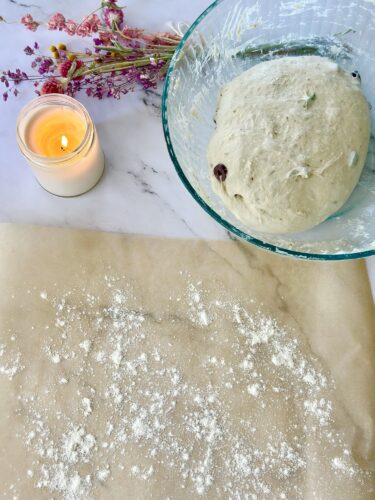
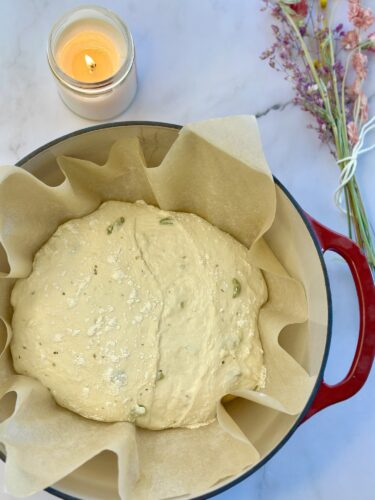
Step Eight: Shape the Dough
While the oven is preheating, sprinkle flour onto a large piece of parchment paper. Perform one more series of stretch and folds, then place the dough ball onto the parchment paper.
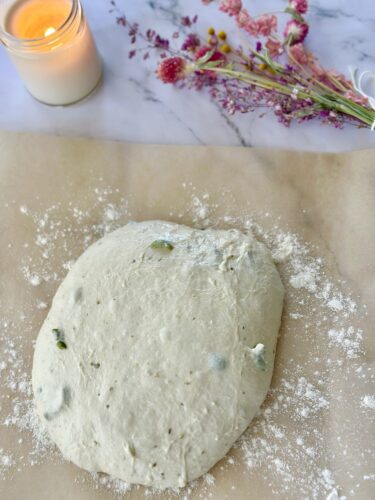
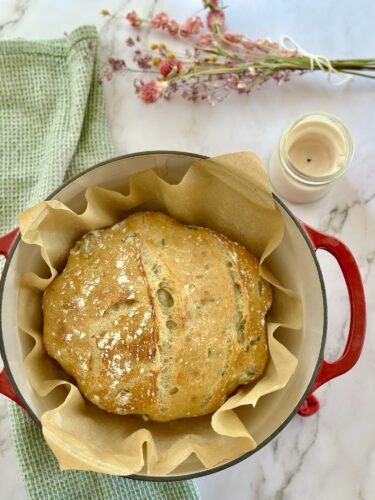
Sprinkle a little more flour over the top of the dough, and then score the bread down the side with a sharp knife or bread lame. Scoring is not just for looks, it actually helps control how the bread expands in the oven, giving it a nicer shape and preventing random cracks from forming.
Do not overthink your score. A single clean line down the side works beautifully and gives the loaf that classic artisan bread look.
Step Nine: Bake
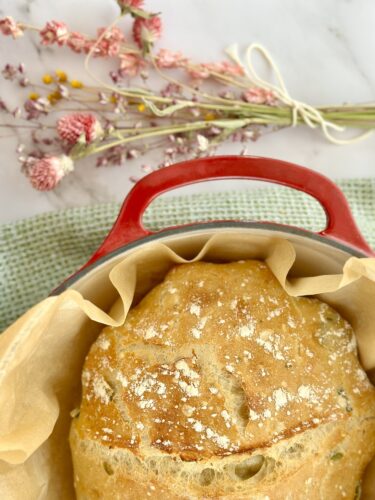
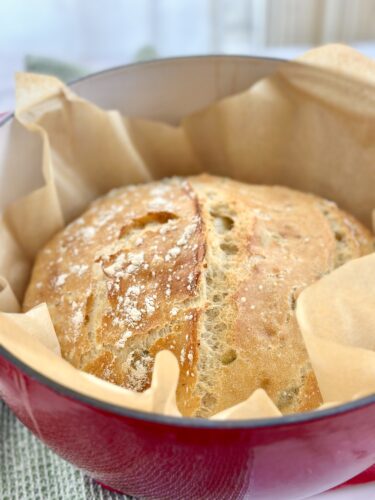
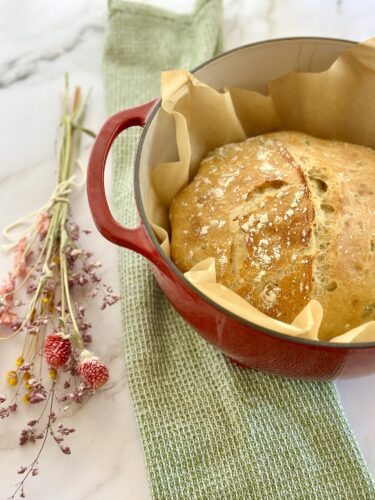
Once the oven and dutch oven are fully preheated, carefully lift the dough by the parchment paper and drop it, parchment and all, into the hot dutch oven.
Cover with the lid and bake for 30 minutes. After 30 minutes, remove the lid and bake for an additional 10 minutes to let the crust turn deep golden brown.
Your kitchen is going to smell incredible during this part. The combination of baking bread, garlic, and oregano is one of my favorite smells to fill a house with, especially when I know I have people coming over.
Step Ten: Cool
This is the hardest step for me every single time, but it truly matters. Take the bread out of the dutch oven and let it cool for at least 10 to 15 minutes before slicing.
I know how tempting it is to cut into a warm loaf right away, but the bread is still finishing its cooking process as it cools. Cutting too early can lead to a gummy texture instead of that light, airy crumb you are looking for. I usually set a timer for myself because otherwise I know I will cut into it too soon.
Tips for the Best Olive Artisan Bread
After making this loaf several times, here are a few things I have picked up along the way.
- Do not rush the rise times. If your kitchen is on the cooler side, the dough may need a little extra time to double in size.
- Wet hands are your best friend during the stretch and fold process. Dry hands will stick to the dough and make the process much messier.
- Feel free to adjust the amount of olives based on your preference. I have used a bit more than 1/4 cup before and it turned out great.
- A thermometer for your water is a small investment that makes a big difference in yeast activation.
- Trust the process even when the dough looks shaggy and messy in the early steps. It comes together beautifully by the end.
- If you want an even deeper flavor, try adding a small amount of fresh cracked pepper along with the oregano and garlic powder.
- Keep your parchment paper generously floured before shaping so the dough does not stick when you transfer it into the dutch oven.
Common Questions About This Olive Artisan Bread
I get a lot of questions about this recipe whenever I share it, so I wanted to address a few of the most common ones here.
Can I use a different type of olive? Absolutely. While I love the combination of green and kalamata, you can use whatever olives you enjoy most. Just keep in mind that different olives have different levels of saltiness, so you may want to adjust slightly if you use a very salty variety.
Do I need a dutch oven for this recipe? The dutch oven is what helps create that steamy environment for a crispy, bakery style crust. If you do not have one, you can experiment with a heavy oven safe pot with a lid, though results may vary slightly.
Why is my dough so sticky? This is completely normal for this recipe. Artisan bread dough is meant to be wetter and stickier than sandwich bread dough. The stretch and fold technique helps develop structure without needing to knead a drier dough by hand.
Can I make this ahead of time? While this recipe is designed to be same day, you could experiment with a longer, slower rise in the refrigerator if you want to develop even more flavor. I have not personally tested that version yet, but it is on my list to try.
Ways to Serve Olive Artisan Bread
One of my favorite things about this bread is how versatile it is. Here are some of the ways I love to enjoy it.
With a generous spread of butter, still slightly warm, this bread is simple perfection. The saltiness from the olives paired with creamy butter is such a satisfying combination.
As a sandwich bread, it holds up beautifully. The sturdy crust and chewy interior make it perfect for a hearty sandwich, especially something with fresh vegetables, cheese, and deli meat.
With olive oil and balsamic vinegar for dipping, this bread turns into an appetizer worthy of any dinner party. I love setting this out when I have friends over, and it always gets compliments.
Speaking of friends, like I mentioned earlier, I brought this to a girls night and nobody believed I actually made it myself. There is something really special about sharing homemade bread with people you love. It feels like a small act of care, and it always sparks conversation. People inevitably ask for the recipe, and I love being able to walk them through it, especially because it really is more approachable than it looks.
Storing Your Olive Artisan Bread
If you have leftovers, and that is a big if because this bread tends to go fast, store it in a paper bag or wrapped loosely in a clean kitchen towel at room temperature. This helps maintain the crust without trapping too much moisture.
Avoid storing it in an airtight plastic bag if you want to preserve that crispy exterior. If you do need to store it longer term, you can slice the loaf and freeze it, then toast individual slices as needed.
To bring back some of that fresh baked crispness, pop a slice or the whole loaf into a warm oven for a few minutes before serving again. This trick works especially well if you are serving the bread the next day and want it to taste freshly baked.
Try This Olive Artisan Bread Recipe
I truly believe this olive artisan bread recipe is a great entry point into bread baking, even if you have never made a loaf from scratch before. The process teaches you the fundamentals of working with yeast and dough, while the olives, oregano, and garlic powder make the final result feel special and elevated.
Every time I make this bread, I am reminded of how much I enjoy the process just as much as the result. There is something meditative about the stretching and folding, checking on the dough as it rises, and finally hearing that crackle as the crust cools.
If you give this recipe a try, I would love to hear how it turns out for you. Whether you enjoy it with butter, turn it into a sandwich, or serve it alongside olive oil and balsamic vinegar, I hope this olive artisan bread becomes a new favorite in your kitchen too.
Check out our plain artisan loaf bread recipe:
With love,
Bri and Cat
Affiliate Disclaimer:
As an Amazon Associate I earn from qualifying purchases. This comes at no additional cost to you. We only recommend products that we believe will add value to our readers.
Herby Olive Artisan Bread
Ingredients
- 3 cups flour
- 1 3/4 cups warm water about 110 degrees
- 1 teaspoon sugar
- 1 packet active yeast or 2 1/4 teaspoons
- 1 teaspoon salt
- 1/4 cup sliced olives green and kalamata
- 1 teaspoon oregano
- 1 teaspoon garlic powder
Equipment
- Large mixing bowl
- Two forks
- Dutch oven with lid
- Parchment paper
- Sharp knife or bread lame (for scoring)
- Kitchen thermometer (optional, for water temp)
Method
- In a large mixing bowl, combine warm water, sugar, and yeast. Let sit 10 minutes until foamy.
- Add flour and salt. Mix until fully incorporated. Dough will be shaggy and sticky.
- Cover and let rise 1 hour, or until doubled in size.
- Add olives, oregano, and garlic powder to the dough. Using two forks, fold each edge into the center to distribute. Let rest 1 hour.
- Pull in each side again with a fork, then perform several stretch and folds with wet hands until the dough starts holding its shape. Let rest 1 hour.
- Perform another round of stretch and folds.
- Preheat oven to 450 degrees with the Dutch oven inside.
- On floured parchment paper, do a final stretch and fold, then shape into a ball. Sprinkle with flour and score down the side.
- Carefully lower the dough, on the parchment, into the hot Dutch oven. Cover and bake 30 minutes.
- Remove the lid and bake 10 more minutes, until deep golden brown.
- Remove bread and let cool at least 10 to 15 minutes before slicing.
Notes
- Test your water temperature; too hot will kill the yeast, too cold will slow it down.
- Wet hands prevent sticking during the stretch and fold steps.
- Don’t skip the cooling time, or the inside will turn gummy.
- Adjust olive quantity to taste; a little extra never hurts.
- Store leftovers in a paper bag or loosely wrapped towel to keep the crust crisp.
Leave a Reply