This site contains affiliate links, view the disclaimer page for more information.
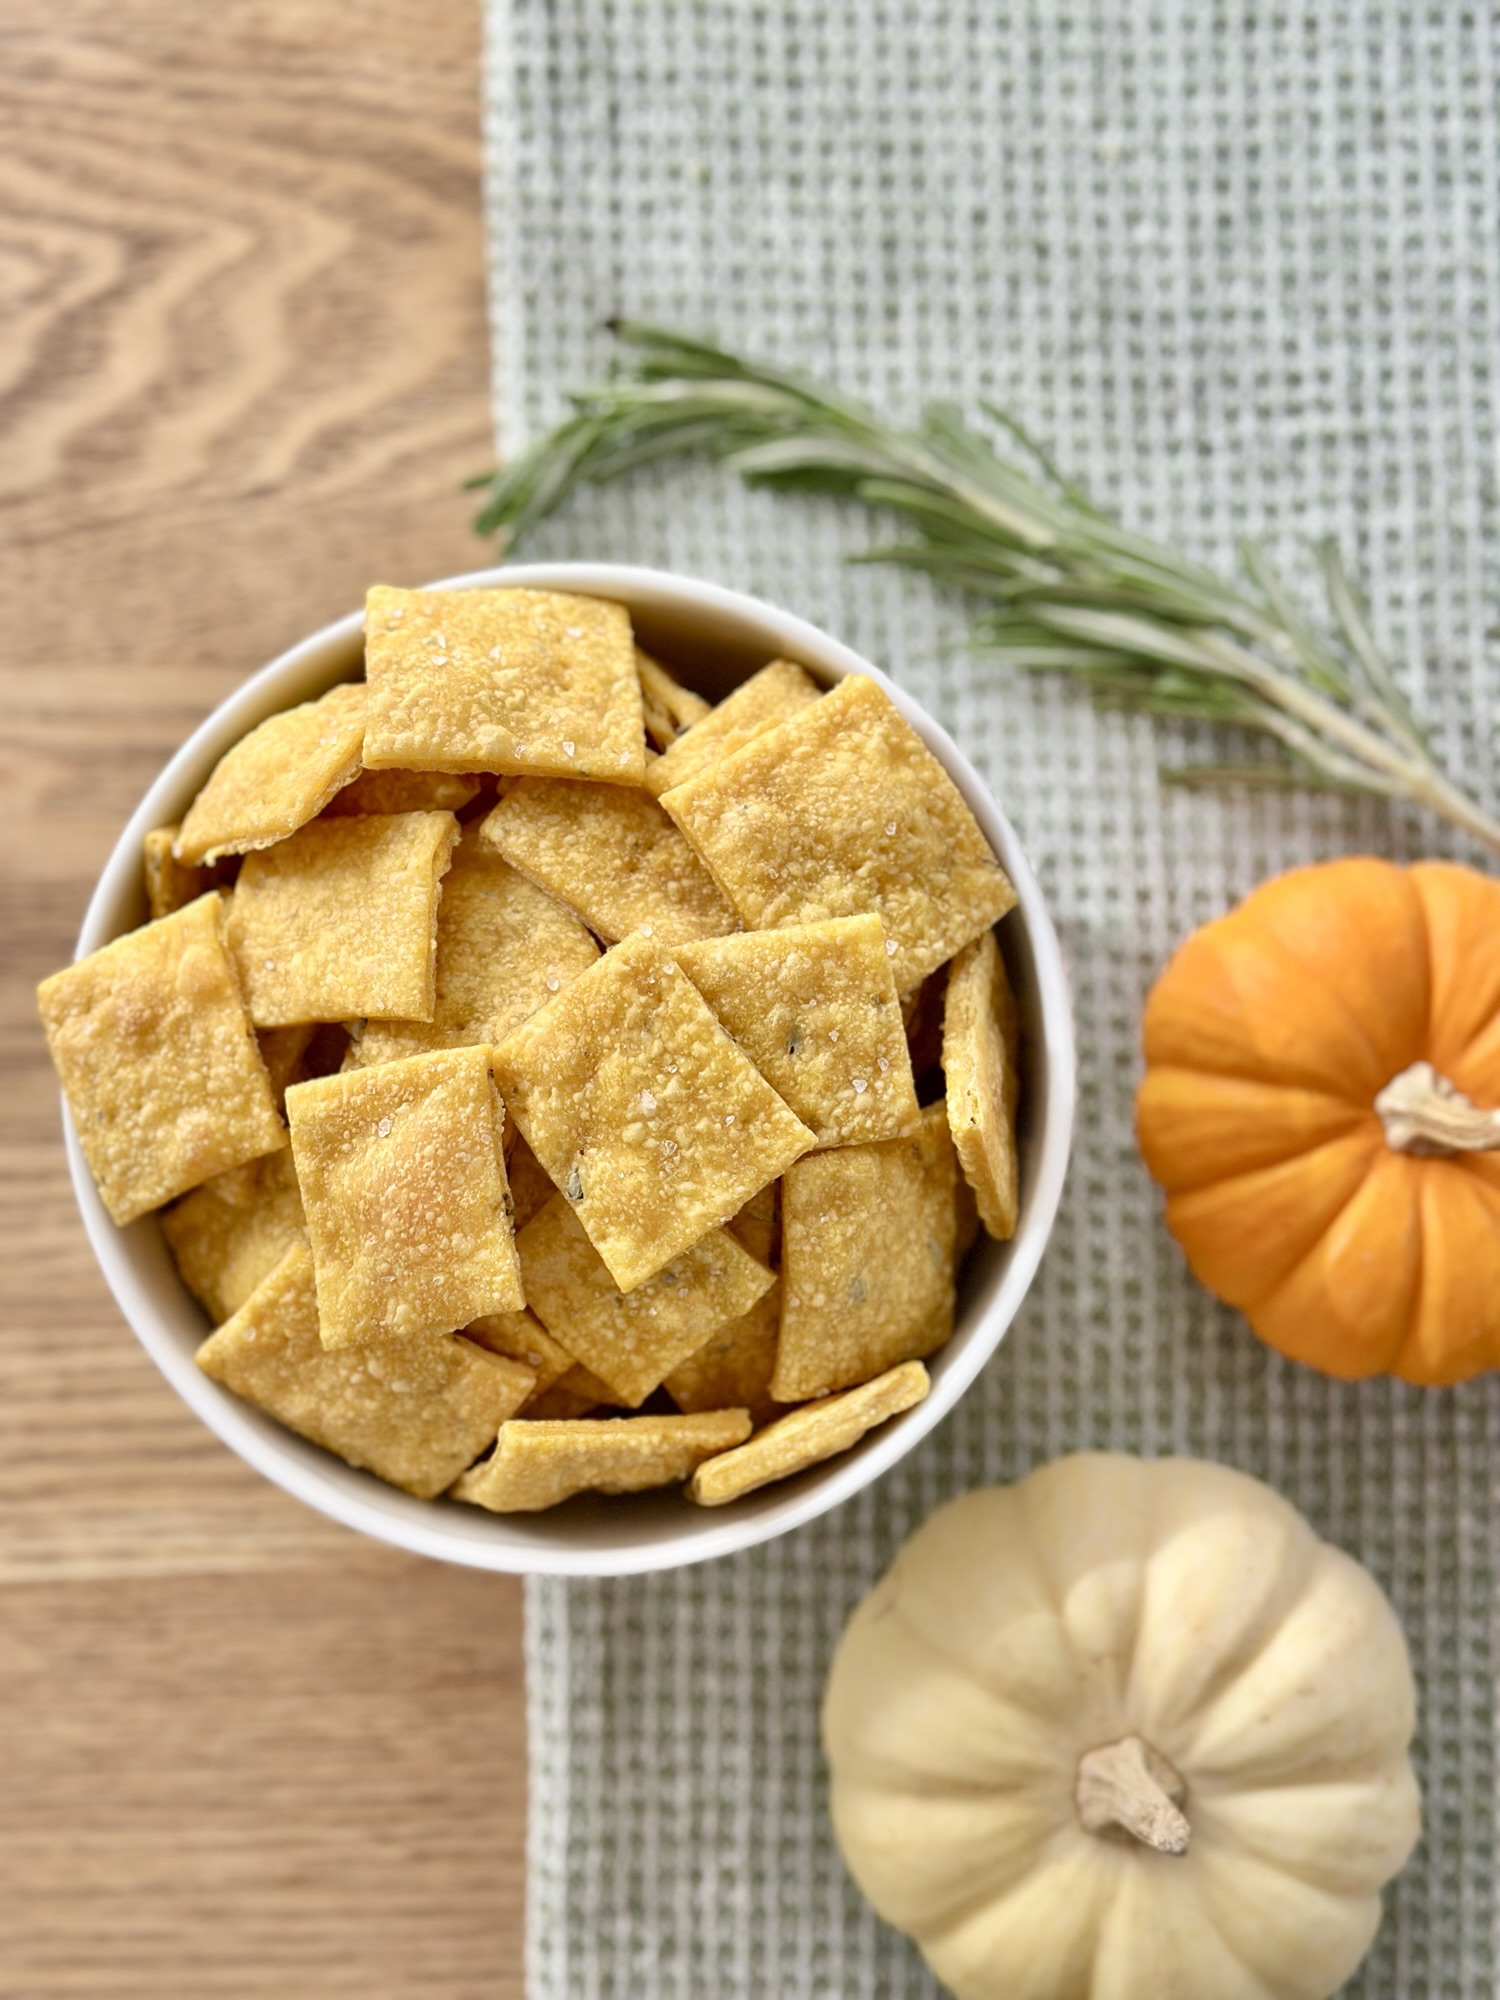
If you’re craving a seasonal snack that’s crisp, aromatic, and surprisingly simple, you’ll love these Pumpkin Rosemary Crackers. Pumpkin Rosemary Crackers balance earthy herbs with subtle sweetness, and once you learn the method, you’ll be able to adapt the technique to countless cracker variations.
Homemade crackers sound like something only artisan bakeries do, but this recipe proves otherwise. With a few pantry staples and a straightforward technique, you can create thin, crunchy, bakery-style crackers in under an hour. Think of this as both a recipe and a mini lesson in cracker-making fundamentals, so you not only get a great snack today, but you can use the knowledge for future recipes too.

Table of Contents
Why Make Homemade Crackers?
There’s something extremely satisfying about making your own crackers. They take far less time than bread, they’re fully customizable, and they elevate everything you pair them with. Plus, the entire process teaches useful culinary skills:
- How to work with low-hydration doughs
- How to roll dough evenly for crispness
- How toppings and surface oil affect texture
- How flavor carriers (like herbs, spices, cheeses, and purees) alter a cracker’s final bite
Pumpkin Rosemary Crackers, in particular, are perfect if you want a fall-inspired option that isn’t overly sweet. They’re great for charcuterie boards, holiday parties, cozy evenings with a cheese tray, or simply for snacking.

Ingredients:
Before you start mixing, here’s the core ingredients and what each brings to the Pumpkin Rosemary Crackers.

Flour (2 cups)
Creates the cracker’s structure. All-purpose flour rolls thin easily and bakes crisp. You can swap in up to ½ cup whole-wheat flour for a more rustic texture.
Rosemary (1 tablespoon, fresh or dried)
Adds an aromatic, herbal flavor that pairs naturally with pumpkin.
- Fresh rosemary: brighter, more vibrant, chop finely
- Dried rosemary: stronger, earthier (crush it between your fingers for better distribution)
Salt (½ teaspoon + topping)
Enhances flavor inside the dough, while coarse sea salt on top adds crunch and a satisfying salty finish.
Pumpkin Purée (½ cup)
Provides moisture, subtle sweetness, and a warm hue. Its natural softness means rolling the dough thin is essential for crispness.
Water (½ cup)
Hydrates the dough and brings it together. If your dough feels dry, add a teaspoon more at a time.
Olive Oil (3 tablespoons)
Two tablespoons go into the dough for richness and tenderness; one tablespoon is brushed on top to promote even browning and help the salt stick.
Coarse Sea Salt (for topping)
Adds texture and final seasoning. Optional additions include cracked pepper, more rosemary, or sesame seeds.
Understanding the Dough
This dough is considered a “low-hydration seasoned dough.”
In practical terms, that means:
- It comes together quickly
- It’s not sticky
- It can roll very thin without tearing
- It benefits from a brief rest period
Resting allows the gluten to relax, which makes rolling smoother and reduces shrinkage in the oven. The combination of pumpkin and oil keeps the dough softer than traditional unleavened crackers, which is why rolling evenly is crucial for consistent crispness.

Step-by-Step Recipe: Pumpkin Rosemary Crackers
Ingredients
- 2 cups flour
- 1 tablespoon chopped fresh rosemary or dried rosemary
- ½ teaspoon salt
- ½ cup pumpkin puree
- ½ cup water
- 3 tablespoons olive oil (set 1 tablespoon aside for brushing)
- Coarse sea salt for topping
Instructions
1. Combine Your Dry Ingredients
In a medium bowl, whisk together:
- Flour
- Rosemary
- Salt
Whisking evenly distributes the rosemary so the herbal flavor is consistent throughout the cracker.


2. Add the Wet Ingredients
Add:
- Pumpkin puree
- Water
- 2 tablespoons olive oil


Mix with a spatula or your hands until the dough forms a cohesive ball. You want it smooth and firm, not sticky. If it feels too dry, add 1 teaspoon of water at a time. If too sticky, add a sprinkle of flour.


3. Divide and Rest
Split the dough into two equal balls.
Rest 15–20 minutes.
This rest period allows gluten strands to relax. Without it, the dough can spring back as you roll it, making it uneven or thicker than desired.

4. Roll the Dough Thin
Roll each ball out on parchment paper or a lightly floured surface with a rolling pin.
Aim for:
- 1/16 inch for ultra-thin, crisp crackers
- 1/8 inch for a slightly sturdier bite
Each dough sheet should be roughly the size of a cookie sheet. Rolling on parchment makes it easy to transfer directly to the baking sheet.

5. Brush With Olive Oil
Brush the surface lightly with the remaining olive oil.
This encourages browning and helps the coarse sea salt adhere.


6. Add Fork Stabs and Toppings
Puncture the dough with a fork in even 1 inch areas. This is to prevent large bubbles in your crackers.
Sprinkle coarse sea salt evenly across the top.
You can also incorporate optional toppings like:
- Cracked black pepper
- More rosemary
- Sesame seeds
- Flaky salt

7. Score the Dough
Use a pizza cutter or sharp knife to create cracker shapes.
Scoring before baking ensures the crackers break cleanly once cooled.


8. Bake at 400°F for 8–10 Minutes
Bake until the edges turn lightly golden.
Note:
Thinner areas may brown faster, you can remove the sheet early or snap off browned edges and return the remaining sheet to the oven for 1–2 minutes.


9. Cool Completely
Let the crackers cool for at least 10 minutes.
Cooling fully is essential to achieving maximum crispness, as steam evaporates and the structure sets.

Serving Ideas
Here are dependable pairing ideas that highlight the flavor of Pumpkin Rosemary Crackers:
- Soft cheeses: brie, herbed goat cheese, whipped ricotta
- Hard cheeses: aged gouda, manchego, asiago
- Dips: white bean dip, rosemary hummus, sundried tomato spread
- Proteins: smoked salmon, cured meats
- Seasonal boards: pair with roasted nuts, dried cranberries, or fig jam
Their balanced flavor works in both savory and lightly sweet applications, so they’re extremely versatile.

Tips for Cracker Success
Roll thin and even
Thickness consistency is the number one factor in whether crackers bake uniformly.
Use parchment
It prevents sticking and helps you transfer the dough without distortion.
Watch carefully near the end
Crackers can go from perfect to overdone quickly because they’re thin.
Let them cool fully
This is when they crisp up.
Store correctly
Keep in an airtight container up to one week. If they soften, put them back in the oven for 2–3 minutes.
Season the surface generously
Surface seasoning boosts flavor, don’t rely only on salt inside the dough.
How to Make Pumpkin Rosemary Crackers Gluten-Free
If you need a gluten-free option, the good news is that this recipe adapts surprisingly well with just a few adjustments. Because crackers rely so heavily on crispness and structure, choosing the right gluten-free flour blend, and adjusting hydration, is the key to success.
Here’s how to create gluten-free Pumpkin Rosemary Crackers that still bake up crisp, flavorful, and golden.

Choose the Right Flour Blend
Use a 1:1 gluten-free all-purpose baking blend that already contains:
- Rice flour
- Starch (tapioca, potato, or cornstarch)
- Xanthan gum
A blend with xanthan gum included is important. It provides elasticity and prevents the dough from cracking when rolled thin.
Brands that work well:
- King Arthur Measure for Measure
- Bob’s Red Mill 1:1
- Cup4Cup (produces the smoothest dough, but is higher in starch)
Adjust Hydration
Gluten-free flour absorbs liquid differently. Try adding 1–2 extra tablespoons of water to the dough if it feels dry or crumbly.
You want:
- A smooth, cohesive ball
- Slightly softer than traditional dough
- Easy to roll without breaking at the edges
If the dough cracks while rolling, add another teaspoon of water.
Let the Dough Rest Longer
Resting gluten-free dough allows the flour to hydrate fully.
Instead of 15–20 minutes, rest the dough for 25–30 minutes. This reduces cracking, improves texture, and helps the pumpkin integrate evenly.
Roll Between Sheets of Parchment
Gluten-free dough is more delicate. Rolling between two sheets of parchment or using a silicone baking mat helps maintain even thickness without tearing.
Aim for the same thinness:
- 1/16 inch for extra crispness
- 1/8 inch for a slightly sturdier gluten-free cracker
Bake and Cool Thoroughly
Gluten-free crackers tend to:
- Brown slightly faster
- Crisp up more during cooling
Check at 7–8 minutes, especially along edges.
Allow a full 10–15 minutes of cooling before breaking apart.
Texture Expectations
Gluten-free Pumpkin Rosemary Crackers will be:
- Very crisp
- Light
- Slightly more delicate than the original version
- Still aromatic, savory, and perfect for cheeses and dips
Storage Notes
Store as usual in an airtight container for up to 5–6 days.
If they soften, crisp them back up at 300°F for 2–4 minutes.

Troubleshooting Guide
Crackers too soft?
- They were rolled too thick
- They need an extra 1–2 minutes in the oven
- They didn’t cool fully
Edges burning before the center is done?
- Roll more evenly
- Remove edges early and finish baking center
Dough springing back while rolling?
- Rest it longer, gluten needs time to relax
Crackers not crispy after storing?
- Re-crisp at 300°F for 3–5 minutes

Flavor Variations to Try
Once you understand the base method for Pumpkin Rosemary Crackers, changing flavors becomes easy.
Try:
- Pumpkin Garlic Crackers: add ½ teaspoon garlic powder
- Pumpkin Parmesan Crackers: add ¼ cup finely grated parmesan
- Spicy Pumpkin Crackers: add ¼–½ teaspoon chili flakes
- Sweet Pumpkin Spice Crackers: omit rosemary, add cinnamon + nutmeg
This recipe functions as a neutral base, allowing you to adjust herbs, spices, cheese, and seeds to your liking.
Check out my other cracker recipes:
How to Use Pumpkin Rosemary Crackers on Seasonal Boards
Pumpkin Rosemary Crackers pair beautifully with fall and winter ingredients, which makes them an easy upgrade for charcuterie boards, grazing tables, or even a simple snack tray. Their crisp texture and herbal pumpkin notes act as a bridge between sweet, savory, and earthy flavors, something not all crackers can do.
Here are a few combinations that work exceptionally well:
Cheese Pairings
- Soft cheeses: goat cheese with honey, brie, camembert, triple-cream cheeses
- Aged cheeses: aged cheddar, manchego, asiago
- Herbed cheeses: rosemary goat cheese or garlic herb Boursin complement the cracker’s savory profile
Protein Pairings
- Smoked salmon with a dill crème fraîche
- Sliced prosciutto or serrano ham
- Spiced nuts or rosemary-marinated almonds for texture contrast
Fruit & Vegetable Pairings
- Thinly sliced pear or apple
- Fig jam or dried figs
- Roasted red pepper strips
- Marinated olives or artichokes
Dip Pairings
- White bean rosemary dip
- Pumpkin hummus (yes, double pumpkin works)
- Sundried tomato and basil spread
- Classic or whipped ricotta

Why These Pairings Work
The pumpkin adds mild sweetness, the rosemary adds aroma, and the olive oil adds richness, a combination that complements fatty, creamy, salty, and lightly sweet components. You’re essentially working with a cracker that serves as both a flavor enhancer and a neutral foundation.
This makes Pumpkin Rosemary Crackers especially useful for:
- Holiday gatherings
- Autumn-themed dinner parties
- Thanksgiving appetizer boards
- Cozy winter snack trays
- Homemade hostess gifts
Recipe:
Pumpkin Rosemary Crackers
Prep Time: 25 minutes (includes resting)
Cook Time: 8–10 minutes
Total Time: ~35 minutes
Yield: 2 full sheet pans of crackers

Ingredients
- 2 cups all-purpose flour
- 1 tablespoon chopped fresh rosemary or dried rosemary
- ½ teaspoon salt
- ½ cup pumpkin puree
- ½ cup water
- 3 tablespoons olive oil (set aside 1 tbsp for brushing)
- Coarse sea salt, for topping
Instructions
- Mix dry ingredients:
In a medium bowl, whisk together the flour, rosemary, and salt. - Add wet ingredients:
Add the pumpkin puree, water, and 2 tablespoons of olive oil. Mix until a firm dough forms. - Divide and rest:
Split the dough in half. Let both dough balls rest for 15–20 minutes to relax the gluten. - Roll thin:
Roll each dough ball on parchment paper until very thin, about 1/16 to 1/8 inch thick. Each rolled sheet should be roughly the size of a cookie sheet. - Brush and top:
Brush the surface with the remaining tablespoon of olive oil. Sprinkle with coarse sea salt. - Stab and Score the dough:
Stab the dough with a fork evenly every 1 inch or so, then use a pizza cutter or knife to score into cracker-sized shapes. - Bake:
Bake at 400°F (205°C) for 8–10 minutes, or until lightly golden around the edges. - Cool:
Let the crackers cool for 10 minutes before breaking apart. Cooling helps them crisp fully.
Storage
Store in an airtight container for up to 1 week.
If they soften, bake for 2–3 minutes at 300°F to re-crisp.
Notes
- For extra flavor, add black pepper, more rosemary, or sesame seeds on top.
- If using dried rosemary, crush between your fingers for better texture.
- Roll as evenly as possible for uniform crispness.

Try These Homemade Crackers
Pumpkin Rosemary Crackers prove that homemade crackers can be simple, customizable, and incredibly rewarding. With a short ingredient list and a reliable technique, you can create crisp, flavorful crackers perfect for snacking, entertaining, and seasonal boards.
This recipe combines approachable home cooking with professional culinary insights, giving you a result that looks and tastes like something you’d buy at a gourmet market, but made entirely in your kitchen.
With Love,
Bri & Cat
Affiliate Disclaimer:
As an Amazon Associate I earn from qualifying purchases. This comes at no additional cost to you. We only recommend products that we believe will add value to our readers.

Pumpkin Rosemary Crackers
Ingredients
- 2 cups all-purpose flour
- 1 tablespoon chopped fresh rosemary or dried rosemary
- ½ teaspoon salt
- ½ cup pumpkin puree
- ½ cup water
- 3 tablespoons olive oil set aside 1 tbsp for brushing
- Coarse sea salt for topping
Equipment
- Rolling Pin
- Mixing Bowl
- pizza cutter or knife
- fork
Method
- Mix dry ingredients: In a medium bowl, whisk together the flour, rosemary, and salt.
- Add wet ingredients: Add the pumpkin puree, water, and 2 tablespoons of olive oil. Mix until a firm dough forms.
- Divide and rest: Split the dough in half. Let both dough balls rest for 15–20 minutes to relax the gluten.
- Roll thin: Roll each dough ball on parchment paper until very thin, about 1/16 to 1/8 inch thick. Each rolled sheet should be roughly the size of a cookie sheet.
- Brush and top: Brush the surface with the remaining tablespoon of olive oil. Sprinkle with coarse sea salt.
- Stab and Score the dough: Stab the dough with a fork evenly every 1 inch or so, then use a pizza cutter or knife to score into cracker-sized shapes.
- Bake at 400°F (205°C) for 8–10 minutes, or until lightly golden around the edges.
- Cool: Let the crackers cool for 10 minutes before breaking apart. Cooling helps them crisp fully.
Notes
Store in an airtight container for up to 1 week.
If they soften, bake for 2–3 minutes at 300°F to re-crisp. Notes
For extra flavor, add black pepper, more rosemary, or sesame seeds on top.
If using dried rosemary, crush between your fingers for better texture.
Roll as evenly as possible for uniform crispness.
Leave a Reply