
This site contains affiliate links, view the disclaimer page for more information.
If you’ve ever walked into a bakery and immediately locked eyes with a giant bakery style cookie, you know the one, that thick, golden-edged, perfectly domed, barely-held-together masterpiece sitting under the glass then you already know nothing from a grocery store bag comes close. I’ve been chasing that cookie for years. Not just eating them, but obsessively trying to recreate them at home. And after a lot of failed batches, too much butter, and more than a few cookies I’m not proud of, I finally cracked the code.
This recipe is the one. And I’m going to walk you through every single detail, because the difference between a good homemade cookie and a truly great bakery style cookie comes down to technique just as much as ingredients.
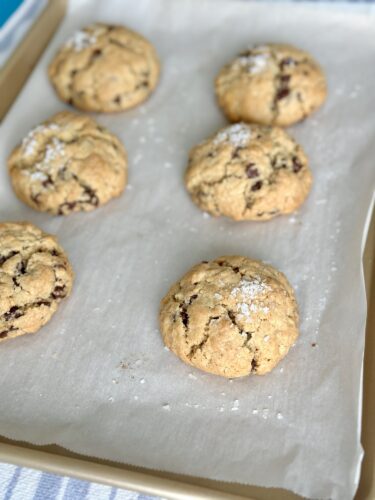
Table of Contents
Why Most Homemade Chocolate Chip Cookies Fall Short
Let’s be honest for a second. Most homemade chocolate chip cookie recipes- even the beloved ones passed down through generations- produce cookies that are fine. They’re sweet, they’re chocolatey, and people eat them happily. But they’re flat. Or they’re cakey. Or they spread into thin, crispy discs that nobody asked for. They don’t have that thick, slightly underdone center. They don’t have those gorgeous craggly edges. They don’t have that bakery pull.
I used to think it was equipment. Maybe I needed a better oven. Then I thought it was ingredients maybe higher-end chocolate would fix everything. And while quality ingredients absolutely matter, the real secrets are hiding in the technique. Specifically:
- How you handle the butter
- The order in which you mix your ingredients
- What you do with the dough before it ever sees the oven
Once I understood those three things, everything changed. And now I’m sharing it all with you.
What Actually Makes a Cookie “Bakery Style”
Before we get into the recipe, I want to talk about what we’re actually going for here, because I think it’s worth defining. When I say giant bakery style cookies, I mean a very specific thing.
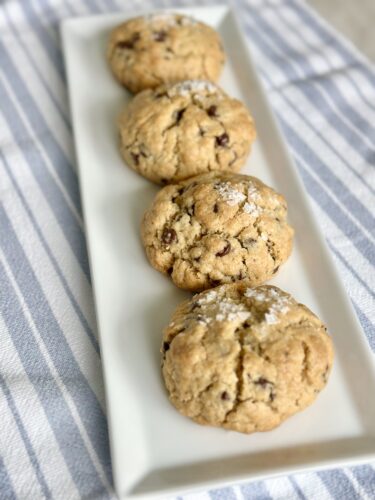
I mean a cookie that is large, genuinely large, half a cup of dough per cookie large. I mean a cookie with a crispy, slightly caramelized edge that gives way to a chewy, dense middle that’s almost fudgy. I mean a cookie that looks imperfect in the most beautiful way, with chocolate chips peeking out and slightly melted from every angle. I mean a cookie with a tiny hit of flaky salt on top that makes the chocolate taste more like chocolate.
That’s the goal. And every decision in this recipe – from the cold butter to the freezer step, exists to get us there.
The Ingredients and Why Each One Matters
I’m a big believer that if you understand why something is in a recipe, you bake it better. You pay more attention. You don’t skip steps. So let’s talk through what’s going into these cookies and what job each ingredient is doing.
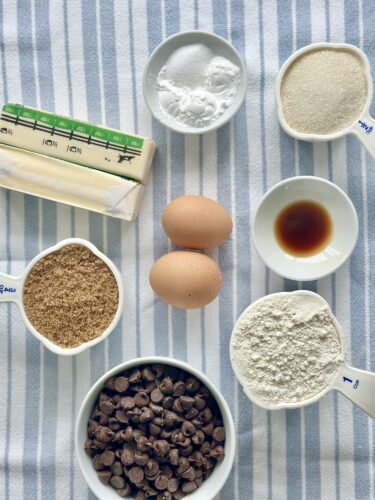
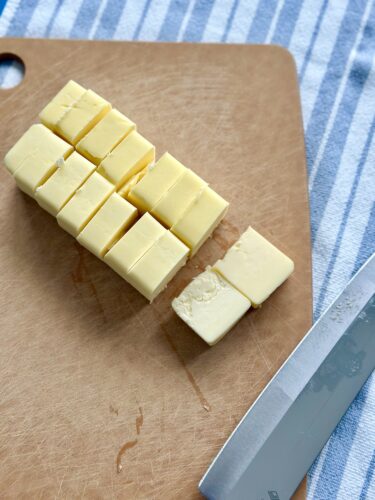
2 sticks of cold unsalted butter, cut into ½-inch pieces
This is the most important ingredient on the list, and not just because it’s butter. It’s cold butter. Not softened. Not room temperature. Cold, straight from the fridge, cut into small cubes. This single detail is what separates this recipe from 90% of cookie recipes out there.
When you cream softened butter with sugar, you’re incorporating air. That makes for a fluffy, cakey cookie. We don’t want fluffy and cakey. We want dense and chewy. Cold butter, handled gently, gives us that. It also means less spread in the oven, which is exactly why these cookies stay thick and tall instead of melting into a flat puddle.
¾ cup brown sugar, packed, and ½ cup granulated sugar
The combination of both sugars is intentional. Brown sugar brings moisture and a deep, almost caramel-like flavor because of the molasses in it. It’s responsible for that chewy texture we love. Granulated sugar, on the other hand, promotes spread and helps create those crispy edges. Together, they give you the best of both worlds: crispy outside, chewy inside.
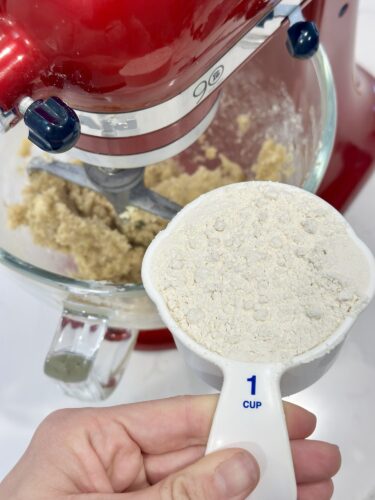
3 cups all-purpose flour
Standard all-purpose flour is exactly what you want here. Nothing fancy, nothing substituted. Just make sure you’re measuring correctly, spoon the flour into your measuring cup and level it off. Don’t scoop directly from the bag, because you’ll pack it in and end up with more flour than the recipe calls for, which leads to dry, crumbly cookies.
2½ teaspoons baking powder and ½ teaspoon baking soda
I know, that’s a lot of baking powder. But for cookies this size, you need that lift to get that domed, bakery-style top. The baking soda is there in a smaller amount to assist with browning and a tiny bit of spread. Don’t swap one for the other, and don’t reduce the amounts. Trust the recipe.
1 teaspoon salt
Salt in baked goods isn’t about making things taste salty. It’s about making everything taste more like itself. Salt sharpens and balances sweetness, and it makes chocolate taste more deeply chocolatey. Don’t skip it. Don’t reduce it. It matters.
1½ cups chocolate chips
Use good ones. I’m not saying you need to spend a fortune, but this is not the place for the bargain bag. I love a semi-sweet chip here, but a combination of semi-sweet and dark chocolate chunks is genuinely incredible. You want real chocolate flavor in every bite, so use something you’d happily eat straight from the bag.
2 large eggs and 1½ teaspoons vanilla extract
Eggs give structure and richness. Vanilla rounds everything out and adds warmth. We whisk these together separately before adding them to the dough, and there’s a reason for that, it helps them incorporate evenly into what is, at that point, a very dry, crumbly mixture. More on that in a moment.
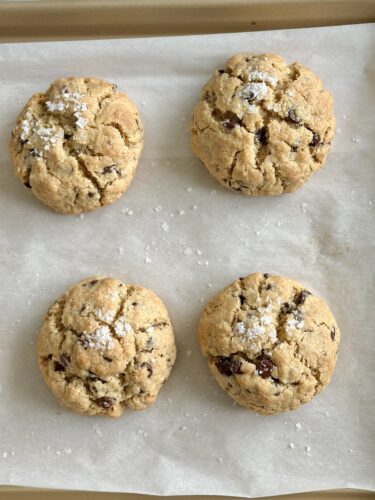
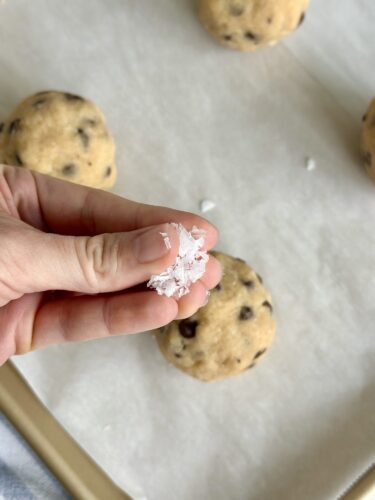
Flaky sea salt for finishing
This is non-negotiable for me. A generous pinch of flaky sea salt on top of each cookie right before baking is the thing that makes people ask, “What is in these?” I use Maldon, but any good flaky salt works. It doesn’t melt into the cookie the way fine salt would, it sits on top and gives you these little bursts of salty contrast against the sweet, melted chocolate. It’s magic. Don’t skip it.
How to Make Giant Bakery Style Cookies: Step by Step
Alright. Let’s get into it.
Step 1: Beat the cold butter, but not too much
Using an electric stand mixer fitted with the paddle attachment, add your cold, cubed butter and beat on low speed. You’re not trying to cream it. You’re not trying to make it fluffy. You just want it to slightly break down and lose its rigid shape, maybe 30 to 45 seconds. It should still look chunky and rough. That’s exactly right. Scrape down the sides of the bowl.
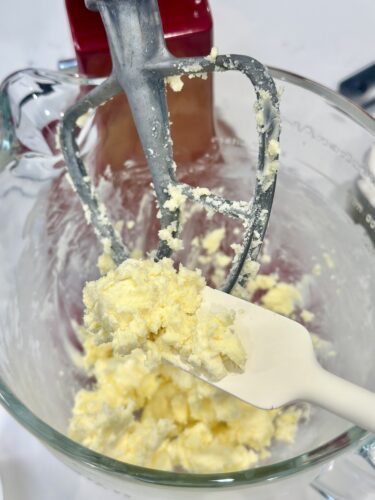
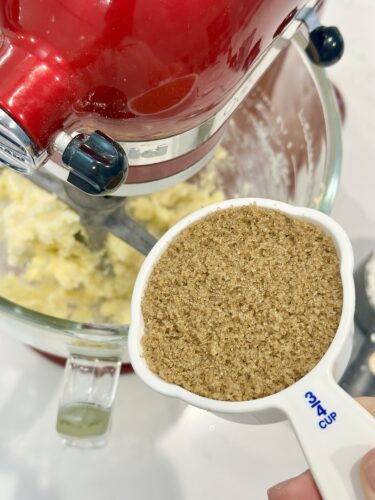
Step 2: Add the sugars
Add both the brown sugar and granulated sugar to the butter and mix on low until they’re just combined. Again, not creaming. Not whipping. Just bringing it together. Scrape the bowl again.
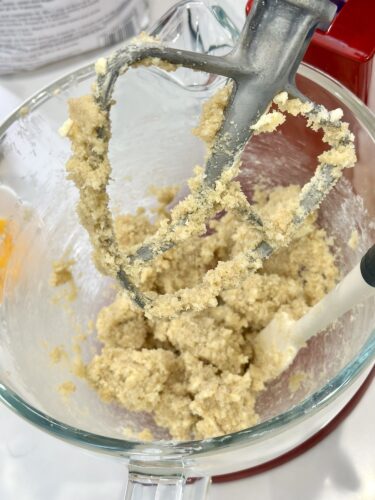
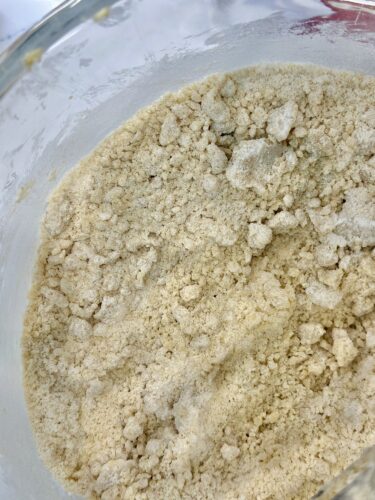
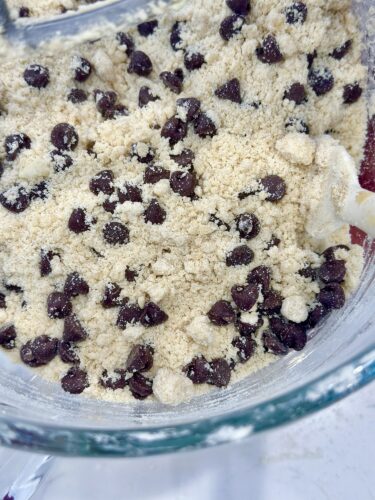
Step 3: Add the dry ingredients all at once
Here’s where things look a little unusual. Add the flour, baking powder, baking soda, and salt all at once and mix on low until everything is incorporated. When it’s done, the mixture is going to look like a dry, sandy crumble, almost like a streusel topping. It will not look like cookie dough. That is completely normal and completely correct. Don’t panic. Don’t add liquid. Don’t keep mixing hoping it will come together. This is exactly where it should be.
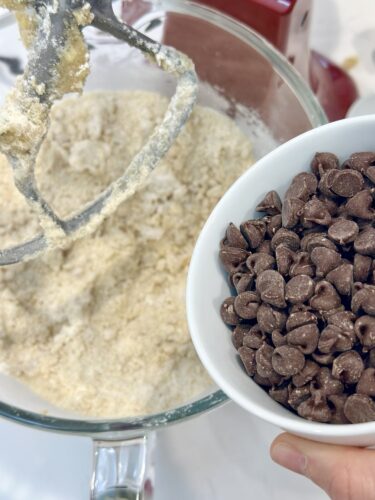
Step 4: Add the chocolate chips
Toss in your chocolate chips and mix briefly until they’re evenly distributed throughout the crumble. They won’t really stick to anything at this point, but that’s fine.
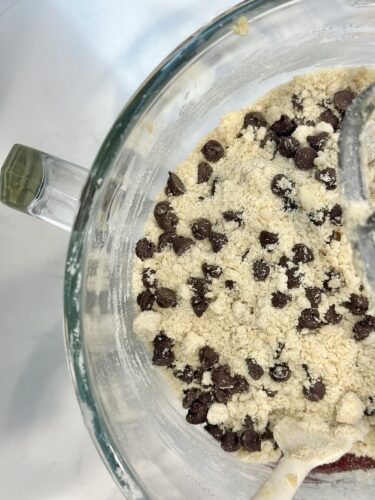
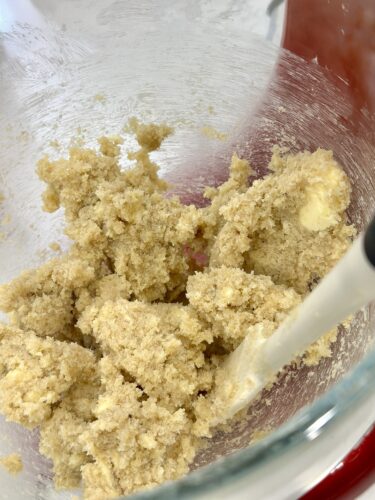
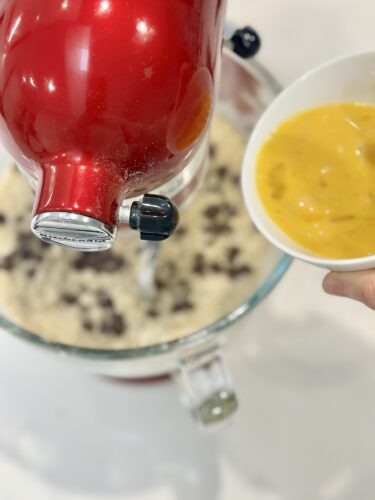
Step 5: Whisk the eggs and vanilla, then add to the mixer
In a separate small bowl, whisk together the two eggs and the vanilla extract until combined. With the mixer running on low, pour the egg mixture in slowly. And here is where something kind of incredible happens, within a minute or so, that dry, crumbly mess transforms into actual, proper cookie dough. It comes together beautifully. It looks thick and studded with chocolate and it smells incredible and you will want to eat it immediately. Resist.

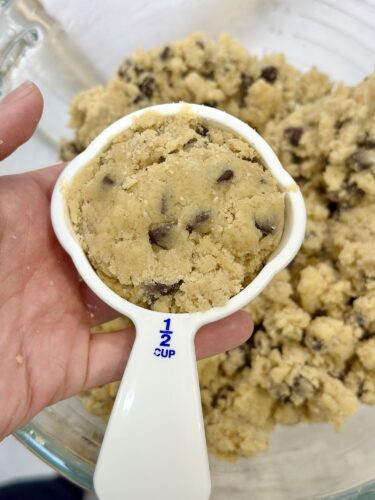
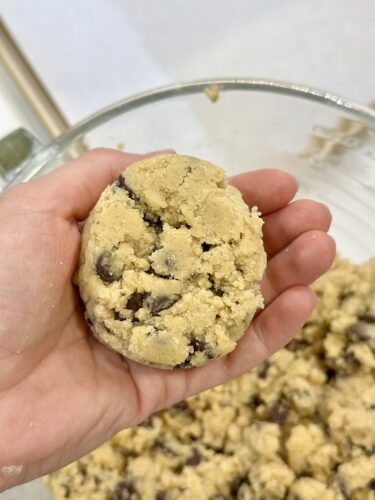
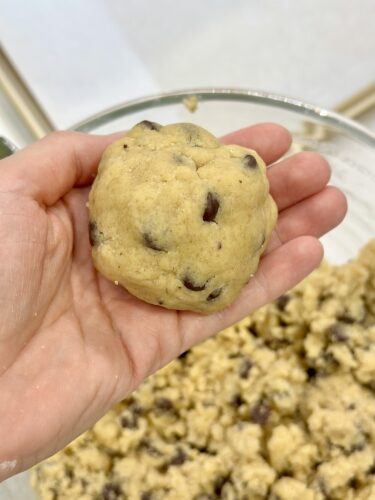
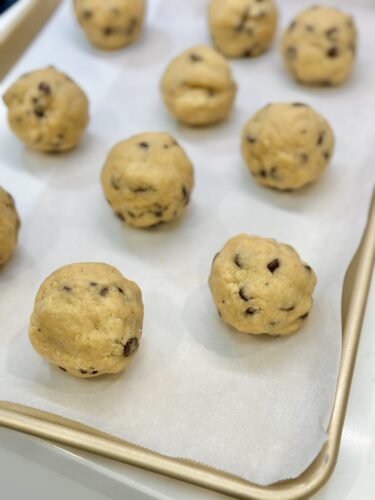
Step 6: Scoop and freeze
Using a half-cup measuring cup or a large cookie scoop, portion the dough into balls. Each ball should be about the size of a large lemon. Place them on a parchment-lined sheet pan or a plate, anything that fits in your freezer, and freeze until fully frozen. This typically takes about 2 hours minimum, but honestly, overnight is better.
Why freeze? Because frozen dough bakes slower and more evenly. The outside sets before the inside has fully cooked through, which is exactly how you get that gooey, bakery-style center. If you bake these from room temperature, they spread too much and cook too fast. The freezer step is not optional. It’s the secret.
The good news? You can freeze the dough balls in a zip-lock bag for up to one month and bake them off whenever you want. Future you will be very grateful.
Step 7: Bake
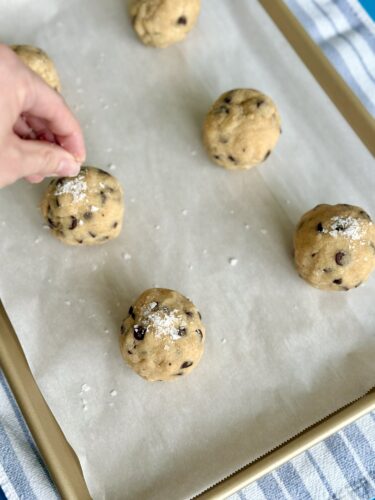
When you’re ready to bake, preheat your oven to 350°F. Line a rimmed baking sheet with parchment paper or lightly coat it with non-stick spray. Arrange your frozen dough balls on the pan, leaving about 2 inches of space between each one (I usually do 6 cookies per cookie sheet). Don’t crowd them, these are big cookies and they need room. Sprinkle the top of each frozen dough ball with a generous pinch of flaky sea salt. Generous. Don’t be shy.
Slide them into the oven and bake for 20 minutes. Then, without taking them out, rotate the pan 180 degrees and bake for another 10 minutes. Thirty minutes total. Your kitchen is going to smell absolutely unreal.
Step 8: Cool before you cut in
I know. I know. But let the cookies cool on the pan for 10 to 15 minutes before eating. This is important. The center will look underdone when they come out, and that’s intentional. As they cool, the center sets up into that perfect, fudgy, chewy texture. If you cut into one immediately, it’ll be a gooey mess. Give it time. It’s worth it.

Pro Tips That Make a Difference
After making these more times than I can count, here are a few things I’ve learned along the way:
- Use a mix of chocolate. Half semi-sweet chips, half dark chocolate chunks is my personal favorite combination. The chunks melt differently and create these gorgeous pools of chocolate.
- Don’t overbake. I can’t stress this enough. The cookies should look slightly underdone in the center when you pull them out. They will continue to cook on the hot pan as they cool. Golden edges, pale and slightly puffed center, that’s what you want to see.
- Rotate the pan. Most home ovens have hot spots. Rotating 20 minutes through ensures even browning. Don’t skip this step.
Frequently Asked Questions
Can I bake these without freezing first? Technically yes, but the results won’t be the same. You’ll get more spread, a flatter cookie, and a less gooey center. If you’re in a hurry, chill the dough balls in the freezer for at least an hour. But for the full bakery experience, freeze them completely.
Can I use salted butter instead of unsalted? Yes, but reduce the added salt in the recipe to about half a teaspoon. Unsalted butter gives you more control over the total salt level, which is why most baking recipes call for it.
Why is my dough so dry and crumbly before the eggs go in? That’s exactly right. It’s supposed to look that way. Keep going, the eggs bring it all together beautifully.
Can I make smaller cookies? Absolutely. Use a standard 2-tablespoon scoop for regular-sized cookies and reduce the bake time to about 12 to 14 minutes. You’ll still want to freeze them first.
How do I store leftover cookies? Store them in an airtight container at room temperature for up to 4 days. To revive them, pop one in the microwave for 15 to 20 seconds and they’ll taste freshly baked again.
The Bottom Line
Giant bakery style cookies are not complicated, but they are specific. They reward attention to detail and patience, especially when it comes to keeping that butter cold and letting those dough balls fully freeze before they go anywhere near an oven. Every step in this recipe exists for a reason, and when you follow it, what comes out of your oven is genuinely, legitimately bakery quality. Thick. Chewy. Crispy edged. Gooey centered. Deeply chocolatey with that perfect little crunch of flaky salt on top.
Make them once and you’ll understand why this is the only chocolate chip cookie recipe you’ll ever need. And the next time someone walks into your kitchen when these are baking, watch their eyes. They’ll have the same look you get standing in front of that bakery case. That look that says: I need one of those right now.
Giant Bakery Style Chocolate Chip Cookies
Ingredients
- 2 sticks Cold unsalted butter (1 Cup)- cut into ½-inch cubes
- 3/4 cup brown sugar packed
- 1/2 cup granulated sugar
- 3 cups all-purpose flour
- 2.5 tsp baking powder
- 1/2 tsp baking soda
- 1 tsp salt
- 1.5 cups semi-sweet chocolate chips
- 2 eggs
- 1.5 tsp vanilla extract
- 1 pinch flaky sea salt for topping
Equipment
- Stand mixer with paddle attachment
- Large rimmed baking sheet
- Parchment paper or non-stick spray
- Measuring cups and measuring spoon
- Small mixing bowl
- Plate or sheet pan that fits in your freezer
Method
- Add the cold, cubed butter to the bowl of a stand mixer fitted with the paddle attachment. Beat on low speed until the butter just begins to break down and lose its shape, about 30 to 45 seconds. Do not cream the butter. you want it slightly softened but still rough and chunky. Scrape down the sides of the bowl.
- Add the brown sugar and granulated sugar to the bowl. Mix on low speed until just combined. Scrape down the sides of the bowl again.
- Add the flour, baking powder, baking soda, and salt all at once. Mix on low until fully incorporated. The mixture will look dry and crumbly, similar to a streusel or sandy texture. This is normal and correct.
- Add the chocolate chips and mix briefly on low until evenly distributed throughout the dough crumble.
- In a separate small bowl, whisk together the eggs and vanilla extract until combined. With the mixer running on low, slowly pour the egg and vanilla mixture into the dough. Mix until the dough fully comes together and looks like traditional cookie dough, about 1 minute.
- Using a half-cup measuring cup or large cookie scoop, portion the dough into balls. Place the dough balls on a plate or sheet pan and transfer to the freezer. Freeze until completely solid, at least 2 hours or overnight.
- When ready to bake, preheat the oven to 350°F. Line a large rimmed baking sheet with parchment paper or lightly coat with non-stick spray.
- Arrange the frozen dough balls on the prepared baking sheet, spacing them about 2 inches apart. Sprinkle the top of each dough ball with a generous pinch of flaky sea salt.
- Bake for 20 minutes, then rotate the pan 180 degrees and bake for an additional 10 minutes, for a total of 30 minutes. The edges should be golden and set while the centers still look slightly underdone. This is correct.
- Remove from the oven and let the cookies cool on the pan for 10 to 15 minutes before eating. The centers will continue to set as they cool.
Notes
- Frozen dough balls can be stored in a zip-lock freezer bag for up to 1 month. Bake directly from frozen, no need to thaw.
- For best results, do not skip the freezing step. It is what keeps these cookies thick, tall, and gooey in the center.
- Leftover baked cookies can be stored in an airtight container at room temperature for up to 4 days. Microwave for 15 to 20 seconds to refresh.
Enjoy!
With love,
Bri and Cat
Affiliate Disclaimer:
As an Amazon Associate I earn from qualifying purchases. This comes at no additional cost to you. We only recommend products that we believe will add value to our readers.
Leave a Reply