This site contains affiliate links, view the disclaimer page for more information.
If you have ever wanted to master yeast bread recipes at home, you are in the right place. I am going to walk you through five of my absolute favorites, the ones I come back to again and again, the ones that have made my kitchen smell incredible on a Sunday afternoon and made my family hover around the oven waiting for that first slice. These are not intimidating, fussy recipes reserved for professional bakers. These are real, approachable, deeply satisfying breads that you can make in your own kitchen with ingredients you probably already have.
I will be honest with you. I was nervous about yeast baking for a long time. I thought it was too technical, too unpredictable, too easy to mess up. And then I made my first loaf of artisan bread and everything changed. The crust crackled when I pulled it out of the oven. The inside was chewy and open and absolutely perfect. I stood in my kitchen and thought, I cannot believe I made that. That feeling is exactly what I want for you. So let’s get into it.
Table of Contents
Why Yeast Bread Is Worth Learning
Before I get into the recipes, I want to take a minute to talk about why yeast baking is such a worthwhile skill to develop. I know it can feel like a big commitment compared to throwing together a quick soda bread or a batch of muffins. But here is the thing: yeast bread is not actually hard. It just requires a little patience and a willingness to trust the process.
Yeast is a living organism, and when you give it warmth, water, and something to feed on, it does the heavy lifting for you. You mix, you wait, you shape, you wait again, and then the oven does the rest. Most of the time you spend making bread is completely hands off. You are just letting time and fermentation work their magic.
Once you understand the basic rhythm of yeast baking, every recipe starts to make sense. You stop second guessing yourself and start reading the dough, noticing how it feels, how it smells, how it looks when it has risen properly. It becomes intuitive in a way that feels genuinely exciting.
The five yeast bread recipes I am sharing today run the gamut from a classic artisan loaf to pillowy focaccia to sandwich bread that will make you never want to buy a store loaf again. Each one has its own personality, its own best uses, and its own little learning curve. Together they will give you a really solid foundation in yeast baking and a repertoire you will be proud of.
Each recipe is linked below with full step by step instructions, so I am not going to walk through the how-to in this post. Instead, I want to tell you about these breads. What they taste like, what they are best for, who they are perfect for, and why I love them enough to bake them on repeat.
A Few Things to Know Before You Start Baking With Yeast
I promise I will keep this short because I do not want to overwhelm you before we even get to the good stuff. But there are a few foundational things that will make every single one of these yeast bread recipes more successful.
First, use room temperature ingredients unless a recipe specifies otherwise. Cold water or cold eggs can slow your yeast down and throw off your timing. I learned this the hard way when my dough barely rose after two hours and I could not figure out why. It turned out my water was too cold straight from the tap.
Second, do not rush the rise. I know it is tempting to crank up the oven or set your dough somewhere blazing hot to speed things up, but a slow rise actually develops better flavor. Some of my favorite breads have a long, slow fermentation period for exactly that reason.
Third, a kitchen scale is genuinely a game changer for bread baking. Flour especially is incredibly easy to over or under measure when you use cups. Too much flour and your bread will be dense and dry. Too little and it will not hold its shape. Weighing your ingredients takes the guesswork out completely.
And finally, trust yourself. Yeast is more forgiving than you think. If your dough looks a little shaggy at first, keep kneading. If your rise takes longer than expected, give it more time. Bread is not as delicate as its reputation suggests. Now, let’s talk about the recipes.
Get the yeast packets I typically use for my bread recipes: HERE
1. Artisan Loaf Bread
There is a reason this is the bread that converted me into a full blown yeast baker. The artisan loaf is the one that made me feel like I actually knew what I was doing in the kitchen. It has a deeply golden, crackly crust, a chewy open crumb, and a flavor that is complex and slightly tangy in the best possible way. It looks like something you would pay twelve dollars for at a farmers market, and you made it at home.
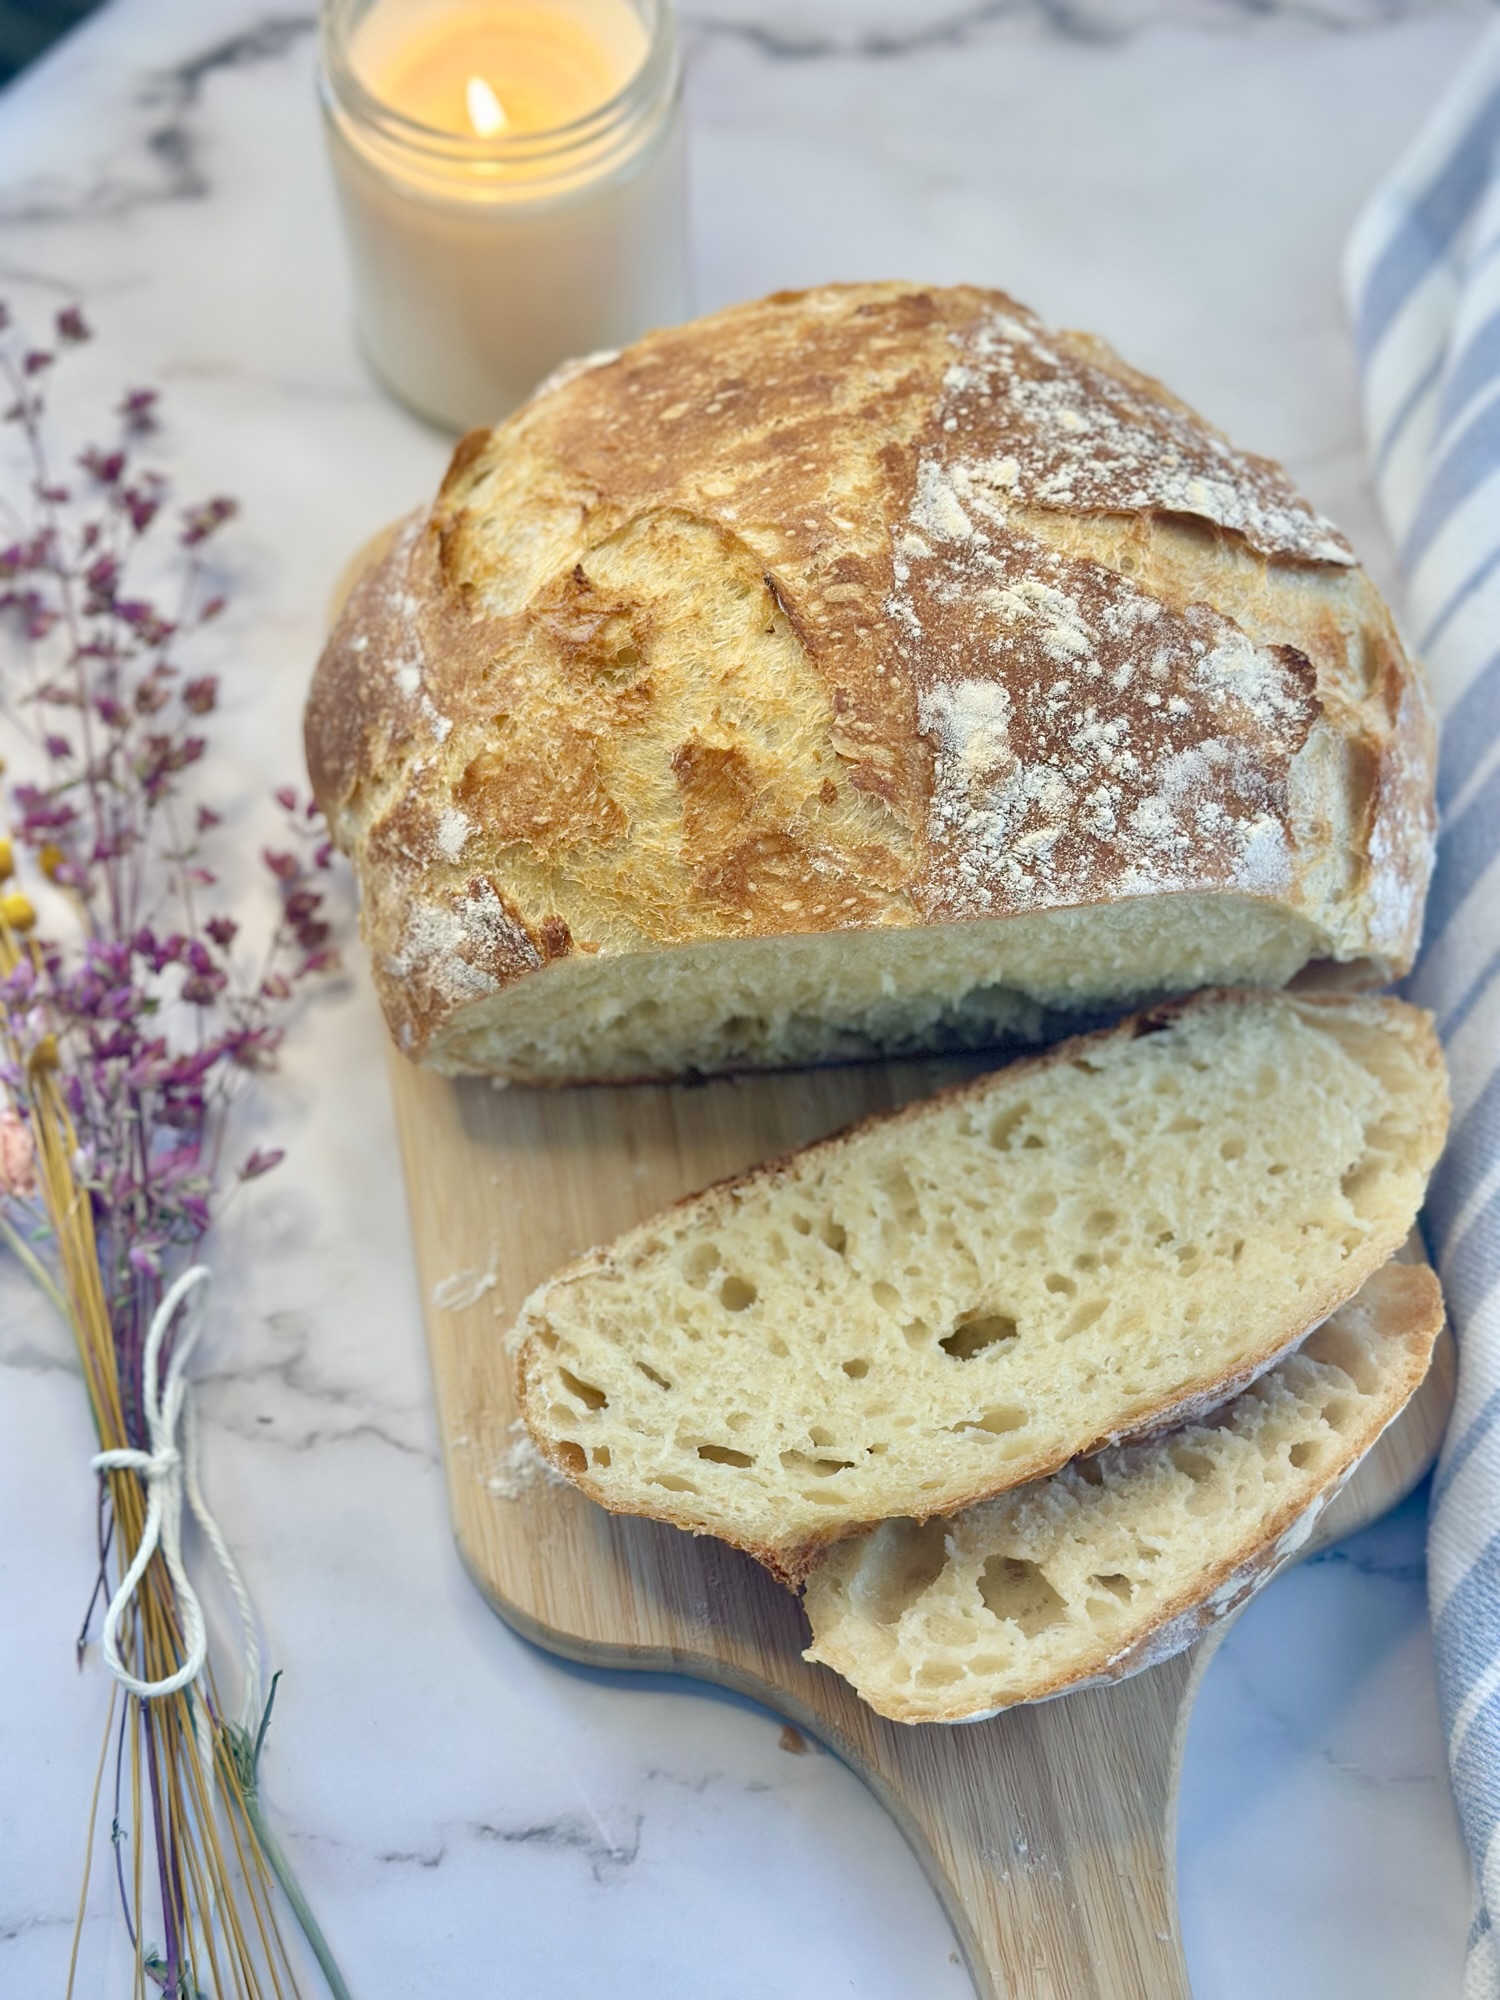
What I love most about artisan loaf bread is how minimal it is. Flour, water, salt, yeast. That is genuinely all you need. There are no eggs, no butter, no special additives. The magic comes entirely from the fermentation process and the way the heat of the oven transforms the dough in those first fifteen minutes of baking.
I bake mine in a Dutch oven, which creates steam in the early stages of baking and gives you that bakery quality crust. If you do not have a Dutch oven, it is honestly one of the best investments you can make for bread baking. Mine gets more use than almost any other piece of equipment in my kitchen.
This bread is endlessly versatile. I slice it thick for toast and layer it with butter and flaky salt. I serve it alongside soups and stews so people can drag it through the broth. I put it out on a charcuterie board with good cheese and it disappears within minutes. Cat and I have served it at more gatherings than I can count and it always gets comments.
Who is this bread for? Honestly, everyone. But I think it is especially perfect for someone who is just getting started with yeast baking. The recipe is approachable, the technique is simple, and the results are absolutely stunning. You will feel so proud of yourself when you pull this loaf out of the oven.
Get the full artisan loaf bread recipe here. Same Day Artisan Bread: Crusty, Chewy, and Easier Than You Think
2. Same-Day Baguettes
Can we talk about baguettes for a second? Because I think they have an unfair reputation for being impossibly difficult, and I want to clear that up right now. Yes, a traditional French baguette involves a multi-day process with preferments and very specific shaping techniques. But a same-day baguette? Totally achievable on a weekend afternoon, and the results are genuinely stunning.
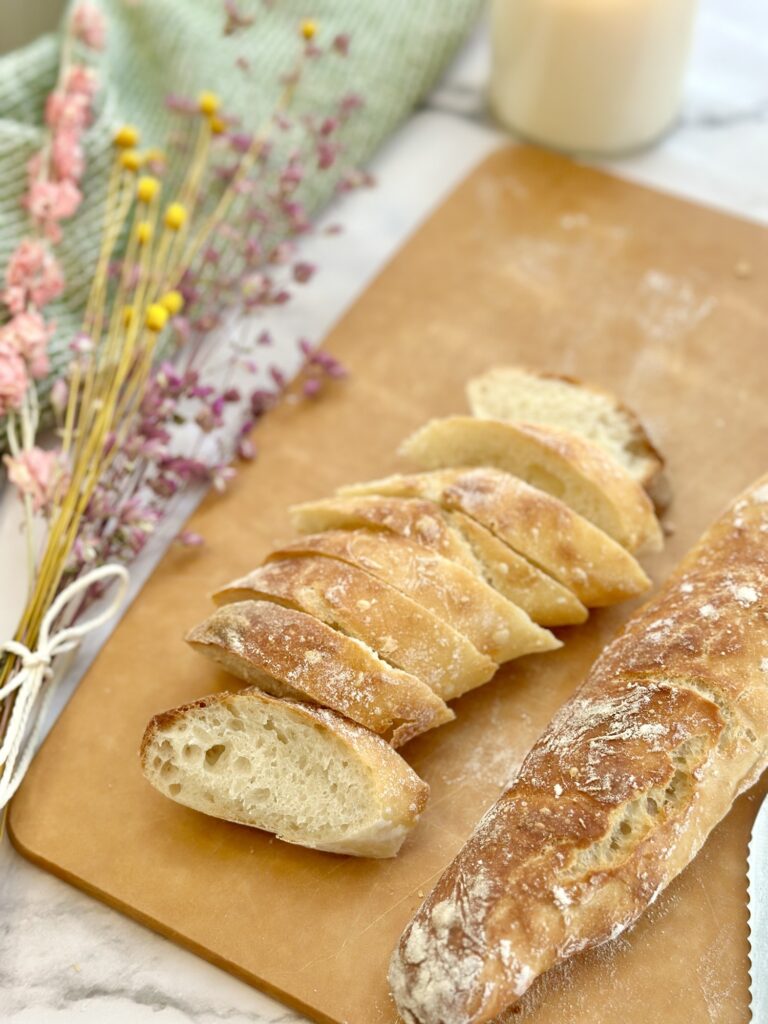
These baguettes have that iconic crackly crust that shatters a little when you bite into it, an airy interior with good chew, and that classic wheaty flavor that pairs with absolutely everything. When I pull them out of the oven and they start crackling as they cool on the rack, I feel like I am in a Parisian bakery and I am not even a little embarrassed to admit that.
The key with baguettes is the shaping and the steam. You want to create a tight surface tension when you shape the dough so the loaves hold their form and get that beautiful split when they bake. And just like the artisan loaf, steam in the early part of baking is what gives you that incredible crust. I add a pan of hot water to the bottom of my oven for the first ten minutes and it makes a noticeable difference.
What do I use baguettes for? Everything. I slice them up as an appetizer with olive oil and herbs for dipping. I use them for banh mi style sandwiches. I serve them alongside pasta dinners, especially anything saucy that deserves good bread for mopping up the pan. I also make the best bruschetta of my life with day-old baguette, and honestly the slightly stale bread is even better for that application.
If you have been wanting to try baguettes but thought they were out of reach, please let this be the nudge you needed. The same-day version makes them completely approachable, and once you taste one fresh from your own oven you will wonder why you ever bought them from the store.
Get the full same-day baguette recipe here: Same Day Baguettes You Can Actually Make at Home (No Overnight Rest, No Stand Mixer)
3. Ciabatta Rolls
Ciabatta is one of those breads that looks deceptively simple but has a little more going on beneath the surface, and I mean that in the best way. The dough is very wet and sticky, which is what gives ciabatta its signature open, hole-y crumb structure. It is not a dough you knead in the traditional sense. You stretch it, fold it, and let time do the work.
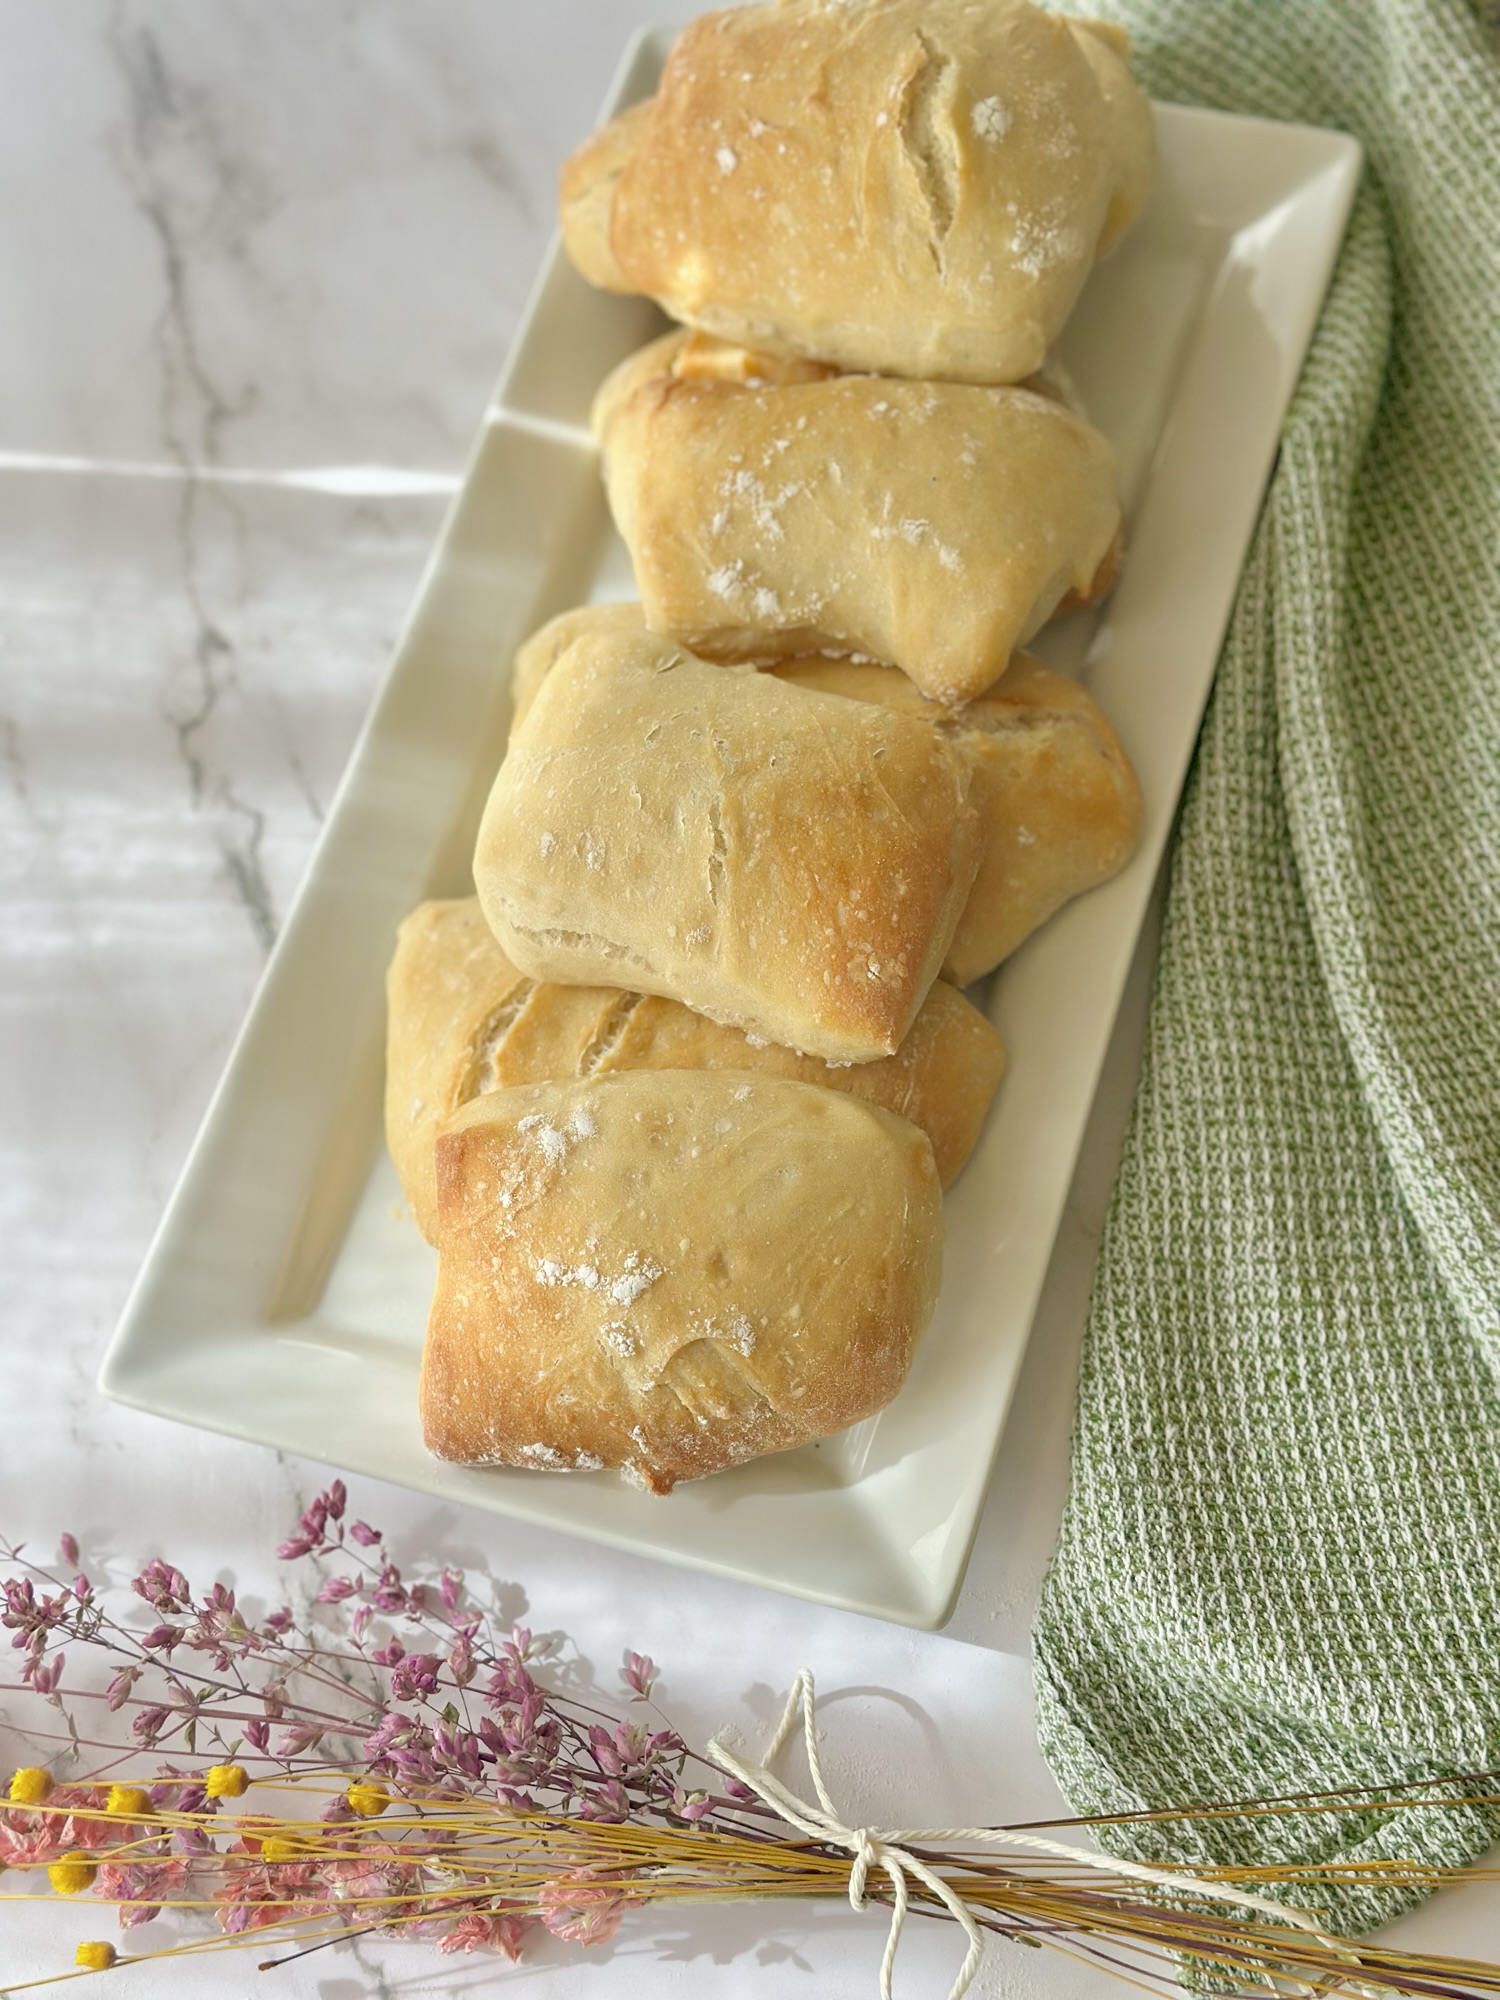
When you bake ciabatta rolls, you get these beautiful, rustic, slightly irregular little rolls with a thin crispy crust and an interior that is soft, chewy, and almost custardy in texture. They are not uniform. They are not perfectly round. And that is exactly the point. They look handmade because they are.
I make these as rolls rather than a full loaf because the rolls are just more practical. You can use them individually for sandwiches, pop them in a bread basket at dinner, or slice them in half and toast them for the best sandwich base you have ever had. A pulled pork sandwich on a ciabatta roll is one of those combinations that genuinely makes me close my eyes and appreciate the moment.
The wet dough can feel a little unnerving at first if you are used to more traditional bread doughs. It is not going to feel like something you can shape in the classic sense. But once you understand that the slack, sticky dough is the whole point, you stop fighting it and start working with it. The stretch and fold technique is surprisingly meditative once you get the hang of it.
Who is ciabatta best for? Someone who has made a loaf or two and is ready to try something with a little more technique involved. It is not a beginner recipe necessarily, but it is absolutely within reach if you have a basic understanding of how yeast doughs work.
Get the full ciabatta rolls recipe here. Easy Homemade Ciabatta Rolls : The Only Bread Recipe You’ll Ever Need
4. Focaccia
If I had to pick one yeast bread to recommend to an absolute beginner, it would be focaccia. No contest. Focaccia is forgiving, flexible, deeply flavorful, and genuinely hard to mess up. It also happens to be one of the most satisfying things I have ever pulled out of an oven, which is saying something.
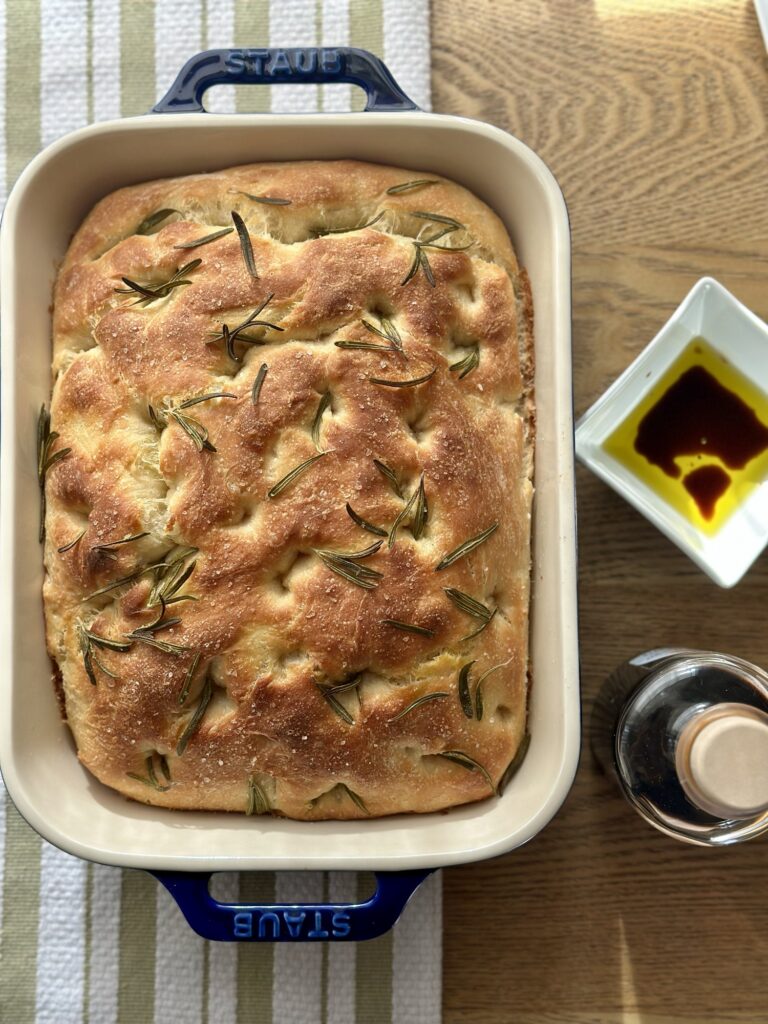
Here is what makes focaccia different from every other bread on this list: olive oil. A lot of it. You coat the pan in it, you drizzle it over the top of the dough, and it soaks in as it bakes, creating a crust that is golden and crispy on the bottom and sides while the interior stays pillowy and soft. The little dimples you press into the top before baking pool with olive oil and get these gorgeous golden spots that are honestly the best part.
Focaccia is also endlessly customizable, which is one of the reasons I love it so much. You can top it with fresh rosemary and flaky sea salt for the classic version. You can add cherry tomatoes that burst and caramelize in the oven. You can do caramelized onions and olives, or sliced zucchini and herbs, or even a drizzle of honey with walnuts and gorgonzola if you are feeling adventurous. I have made probably a dozen different variations and every single one has been a hit.
What do I use focaccia for?
- Serving as an appetizer with whipped ricotta or hummus for dipping
- Cutting into squares as part of a snack board
- Using as the base for a really elevated sandwich (try it with fresh mozzarella, tomato, and basil)
- Bringing to a potluck or dinner party as the bread course
- Eating warm out of the pan with absolutely nothing on it because it needs nothing
Cat and I have brought focaccia to more gatherings than I can count and it is always the first thing to disappear. It is visually beautiful, it smells incredible, and it tastes like you spent way more effort than you actually did. That is my kind of recipe.
The dough comes together quickly and the long rise in the refrigerator (which you can do overnight) actually develops incredible flavor. You can mix it the night before and bake it the next day, which makes it ideal for entertaining.
Get the full focaccia recipe here. Easy 5 Hour Focaccia: A Foolproof Recipe for Beginners
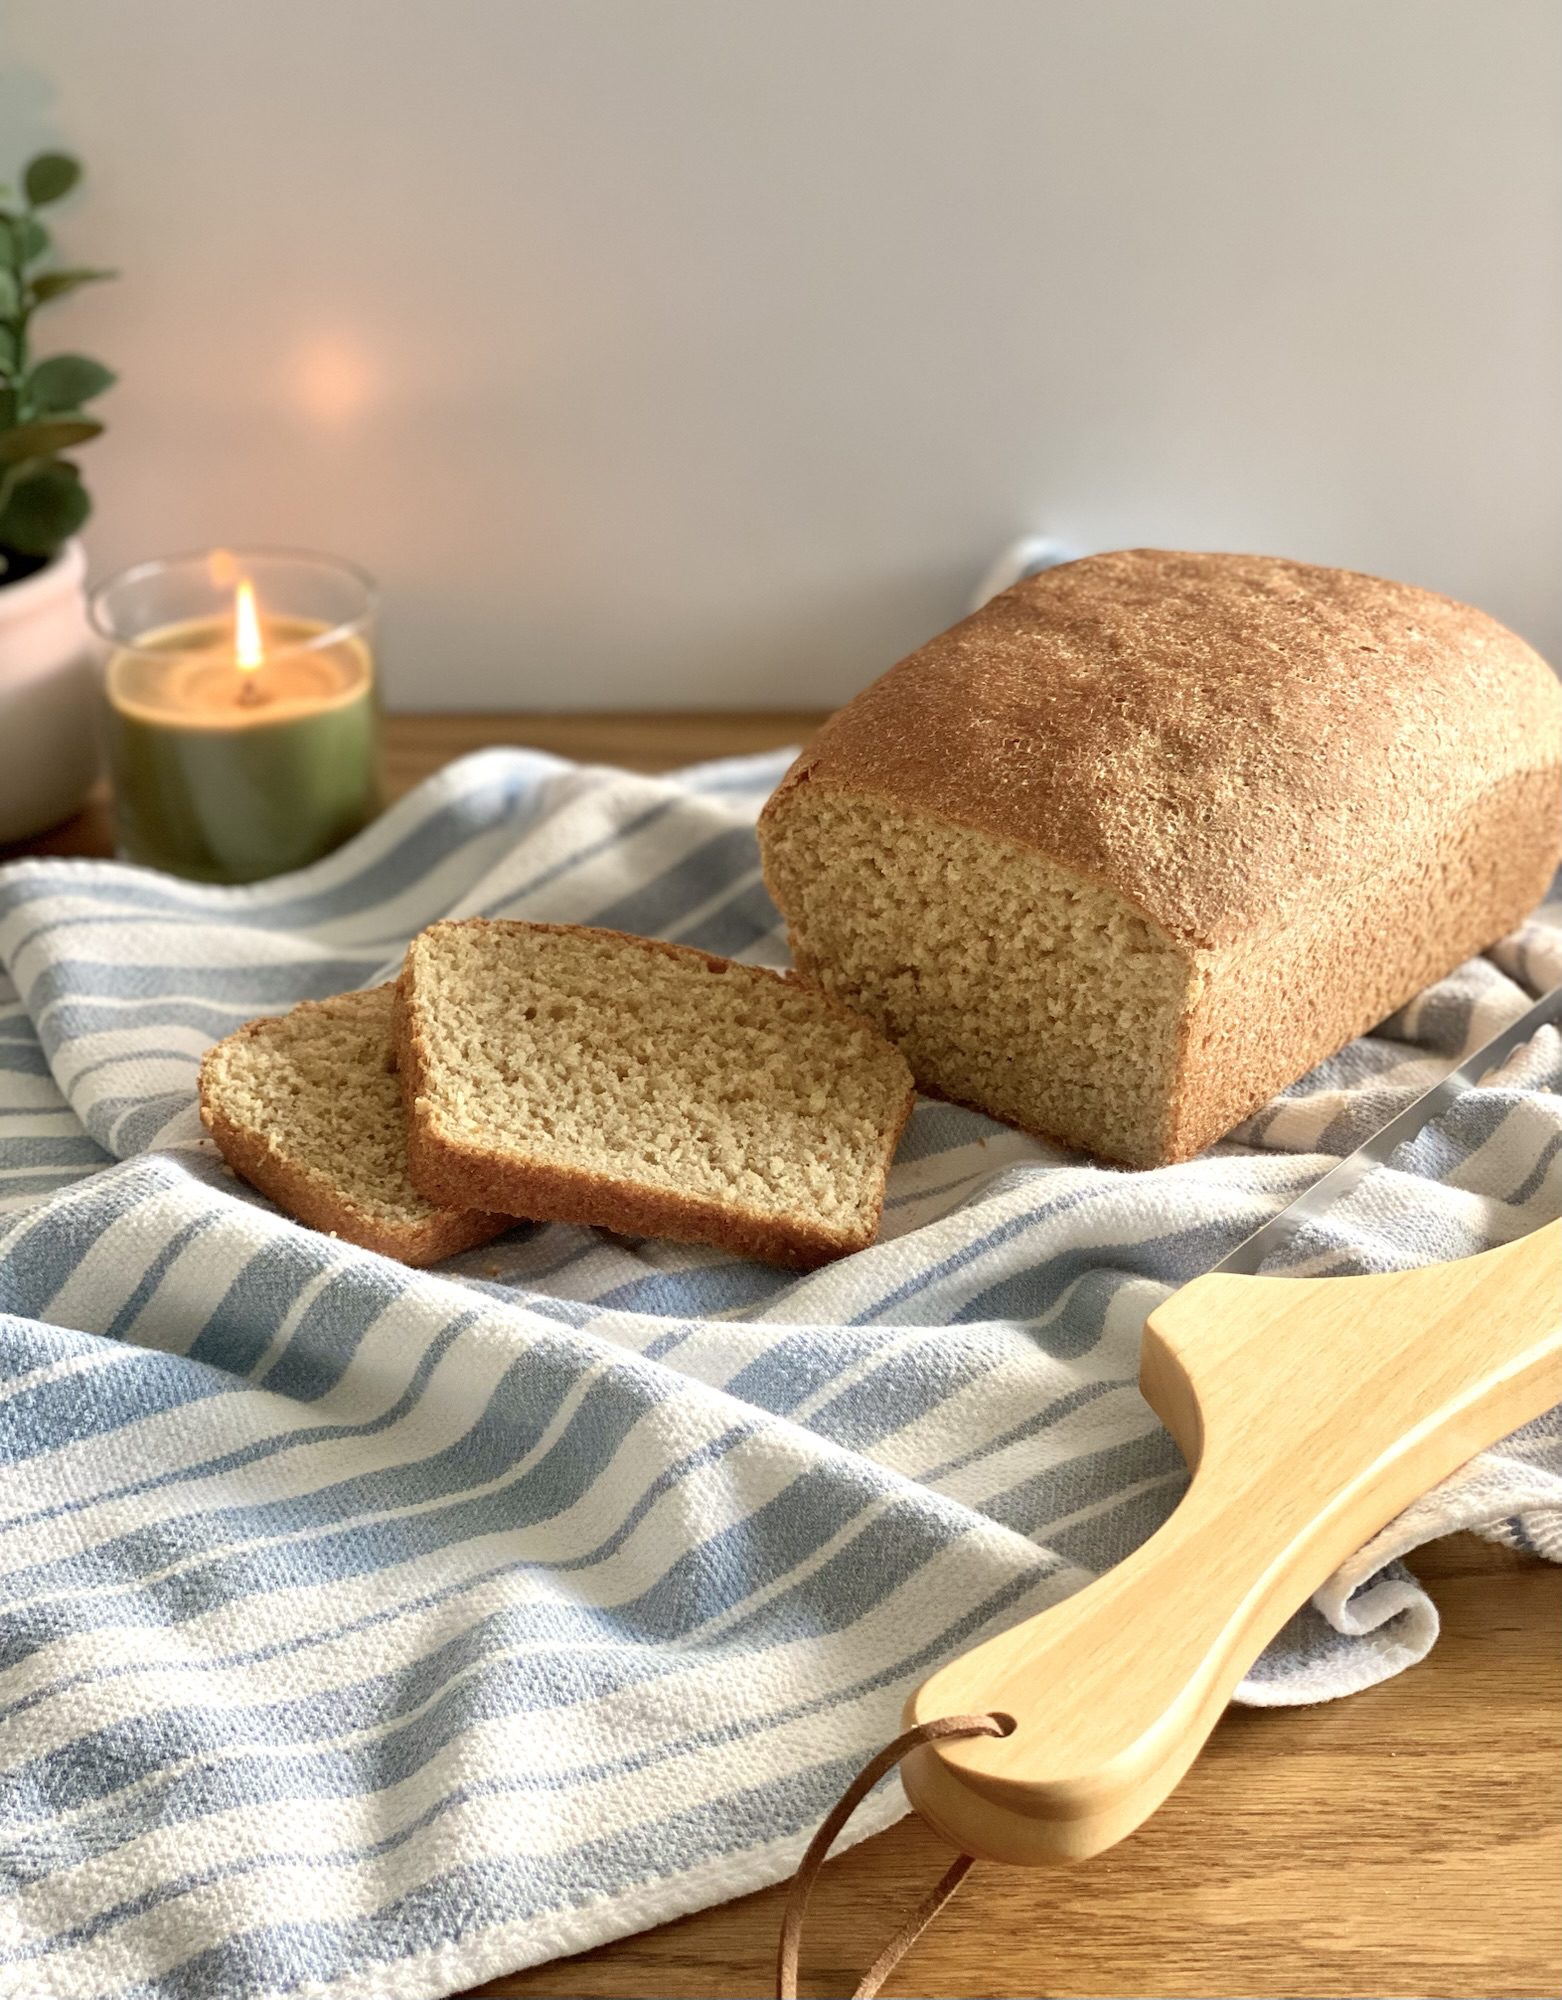
5. Sandwich Bread
Let me paint you a picture. It is a Tuesday morning. You open the pantry and the bread bag is empty. In the past, that meant a trip to the store. But now you have this recipe, and you know that in a few hours you are going to have a soft, perfectly sliceable sandwich loaf sitting on your counter, still a little warm, smelling like everything good in the world.
That is what homemade sandwich bread does for you. It changes your relationship with bread entirely.
This is a soft, enriched dough, which means it has butter and a little sugar and sometimes an egg, which gives it that tender, slightly pillowy crumb that holds up to a sandwich without falling apart. The slices are even and sturdy. The crust is soft. It toasts beautifully. It makes the best grilled cheese you have ever had in your life, and I will stand behind that statement completely.
I grew up eating store bought sandwich bread like most people, and it was fine. It did the job. But once I started making my own, I noticed how much better it actually tasted. No preservatives, no weird sweetness, just real bread made with real ingredients. My family noticed too, and now when I buy a store loaf out of convenience I always feel a little guilty about it.
Here is why homemade sandwich bread is worth adding to your regular rotation:
- You control exactly what goes into it
- It stays fresh for several days stored properly, and freezes beautifully
- It is significantly cheaper to make than buying a quality artisan sandwich loaf
- The smell of it baking is genuinely one of the best things your house can smell like
- Kids love it, and it is a great way to get them interested in where food comes from
This is also a great recipe for bakers who want to work with an enriched dough for the first time. The fat and sugar in the dough actually make it a little easier to handle than a lean dough, so it is very approachable even if you are still building your yeast baking confidence.
I make a loaf almost every week now. It has become part of my Sunday routine alongside meal prepping for the week, and it makes everything feel a little more intentional and a little more homemade.
Get the full sandwich bread recipe here. Grandma’s Homemade Sandwich Bread: A Fresh Take on a Family Favorite
Tips for Getting the Most Out of These Yeast Bread Recipes
Now that you know what you are working with, here are a few things I have learned from making all of these breads repeatedly that will set you up for success no matter which one you start with.
- Let your dough rise until it actually doubles. Not until it looks close to doubled. Until it is actually doubled in size. This is one of the most common mistakes beginners make and it affects the final texture of your bread significantly.
- Do not skip the preheat. Every single one of these recipes requires a hot oven, and a properly preheated oven makes a huge difference in how your bread bakes. If you are using a Dutch oven for the artisan loaf, preheat that too.
- Use good flour. You do not need anything fancy, but a decent all purpose or bread flour will give you better results than the bottom shelf bag you have had in the pantry for two years. Bread flour has a higher protein content, which means more gluten development and a chewier texture, and for the artisan loaf and baguettes especially it makes a noticeable difference.
- Score your loaves before baking when applicable. Those slashes are not just decorative. They control where the bread expands in the oven and prevent it from splitting in random places. I use a bread lame but a sharp serrated knife works in a pinch.
- And please, let your bread cool before you slice it. I know this is the hardest part. The smell is overwhelming and you want to dig in immediately. But slicing too soon means the interior has not finished setting and you will end up with a gummy crumb. Give it at least 30 to 45 minutes. It is worth the wait.
Where to Start
If you are brand new to yeast bread recipes and not sure which one to tackle first, here is my honest recommendation: start with the focaccia. It is the most forgiving, requires the least precision, and delivers results that feel really impressive for the level of effort involved. Once you have done that and built some confidence, move on to the artisan loaf. Then the sandwich bread. Then the baguettes. Save the ciabatta for when you are feeling adventurous.
But honestly? Any of these is a great place to start. The most important thing is that you just start. Pick one, gather your ingredients, and spend a Sunday afternoon making something with your hands. There is something deeply satisfying about the process of bread baking that goes beyond the end result. It is slow and tactile and a little bit meditative, and in a world that moves very fast, that feels really valuable.
I cannot wait to hear which one you try first. When you make any of these breads, tag us on Instagram at #BriAndCat so we can see your beautiful loaves. And if you have questions along the way, drop them in the comments. Happy baking!
With love,
Bri and Cat
Affiliate Disclaimer:
As an Amazon Associate I earn from qualifying purchases. This comes at no additional cost to you. We only recommend products that we believe will add value to our readers.
Leave a Reply