This site contains affiliate links, view the disclaimer page for more information.
If there’s one thing we have learned on this journey toward simpler, more natural living, it’s that making DIY swaps doesn’t have to be overwhelming. In fact, some of the best DIY swaps we’ve ever made started with a single afternoon, a few pantry staples, and the kind of curiosity that comes from asking, “Wait, why are we even buying this?” And that question changed everything.
Over the past few years, we’ve slowly but intentionally swapped out store-bought products in our homes and pantries for cleaner, simpler, homemade versions. Not because we’re trying to be perfect, trust us, we’re not, but because when we started reading ingredient labels and looking at what we were actually bringing into our homes and our bodies, we realized a lot of it was… unnecessary. Artificial fragrances. Fillers. Preservatives. Additives. Things we couldn’t pronounce, in products we used every single day.
So we started small. One swap at a time. And now? Our homes smell better, our pantries are simpler, and we honestly feel better about what we’re cooking with and cleaning with. Even better, most of these DIY swaps save money in the long run, which never hurts. Whether you’re just starting your natural living journey or you’re already deep in the rabbit hole with us, these 10 DIY swaps are some of our absolute favorites. Some are pantry staples, some are home essentials, and all of them are genuinely easy. Let’s get into it.

Table of Contents
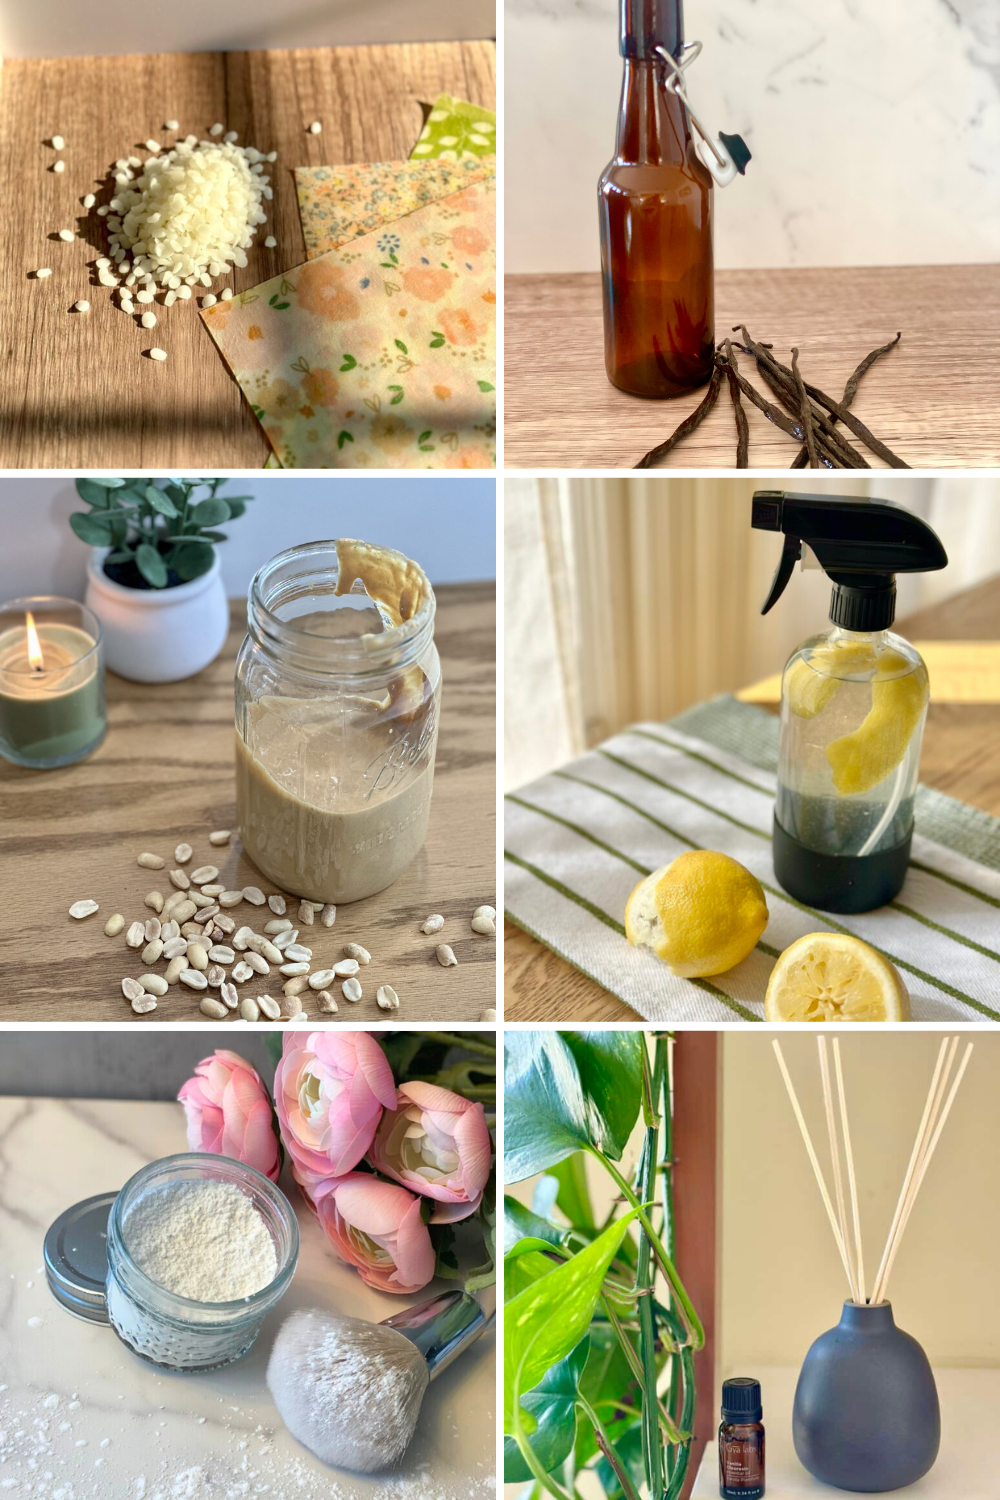
1. DIY Reed Diffusers Instead of Synthetic Candles
Let’s start with one of our most talked-about DIY swaps, because if you haven’t made your own reed diffusers yet, you are genuinely missing out. I used to burn candles constantly. Like, my Target candle budget was getting a little out of hand, if I’m being honest. And I loved them, the ambiance, the scent, the cozy feeling. But the more I learned about synthetic fragrance and the chemicals released when conventional candles burn, the more I started questioning whether the cozy feeling was worth it. That’s when we started making our own reed diffusers, and I genuinely haven’t looked back.
They’re made with just a few simple ingredients, a carrier oil like fractionated coconut or sweet almond oil, essential oils in your favorite scents, a small glass vessel, and reed sticks. That’s it. The scent is subtle, constant, and flame-free, which is a big plus in Cat’s house with two little boys running around. The best part? You can customize the scent completely. We love a warm amber and sandalwood blend in the winter, and something citrusy and bright in the summer. Our homes always smell amazing, without a single synthetic ingredient.
We wrote a full post walking through exactly how to make them: HERE, go check it out if you want all the details. It’s become one of our most-loved DIY projects, and for good reason.
2. Homemade Vanilla Extract Instead of Store-Bought
This one feels fancy, but I promise it’s one of the simplest DIY swaps you’ll ever make, and once you do it, you’ll wonder why you ever paid $12 for a tiny bottle at the grocery store. Store-bought vanilla extract often contains additives, stabilizers, or is made with artificial vanillin that tastes nothing like the real thing. Real, homemade vanilla extract is made with just two ingredients: vanilla beans and alcohol (typically vodka, though bourbon or rum work beautifully too). That’s it. You split the beans, submerge them in the alcohol, and let time do the work.

Yes, it takes patience. We usually make ours 6-8 weeks in advance, and the longer it sits, the better it gets. But the flavor it adds to baked goods, oatmeal, smoothies, and homemade whipped cream is incomparable. It’s richer, deeper, and so much more complex than anything from a plastic bottle.
It also makes the most beautiful homemade gift, pour it into a pretty glass bottle with a handwritten label and you have something that feels genuinely special. Bri started making a big batch every fall so she always has enough to give away at the holidays, and honestly, it’s become one of her signatures. People ask for it every year now. Get our full Instructions and recipe: HERE
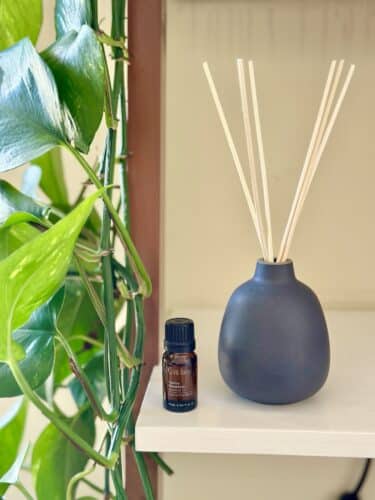
3. Beeswax Wraps Instead of Plastic Wrap
Okay, I want to talk about plastic wrap for a second. It’s one of those things we just… use. Without thinking. Wrap a bowl, cover some leftovers, pack a sandwich. But plastic wrap is single-use, it’s not recyclable, and the thought of it constantly ending up in landfills started to bother me more and more.
Enter beeswax wraps, one of the most satisfying DIY swaps we’ve ever made. You make them by infusing fabric (typically 100% cotton) with a mixture of beeswax, jojoba oil, and tree resin. The result is a pliable, slightly sticky wrap that molds to the shape of whatever you’re covering using just the warmth of your hands. They’re reusable, washable, compostable, and they actually work better than plastic wrap for things like covering a bowl of fruit or wrapping cheese.
The process involves laying the fabric on parchment paper, sprinkling the wax mixture on top, and melting it in the oven. It takes about 20 minutes start to finish and is genuinely fun to do. Cat makes them with her boys and they love choosing the fabric prints. One batch can last up to a year with proper care, and they’re infinitely more charming than a roll of Saran Wrap sitting on your counter. Get our full instructions in this post: HERE
4. Homemade Peanut Butter Instead of Store-Bought
Can I tell you something that might surprise you? Most store-bought peanut butter, even the ones that seem healthy, contain added sugar, hydrogenated oils, and sometimes palm oil or other stabilizers to keep it from separating. Flip the jar over and read the label. It’s often more than just peanuts. Homemade peanut butter contains exactly one ingredient: peanuts. (Okay, two if you add a pinch of salt, which you absolutely should.)

Making it at home is one of the easiest pantry DIY swaps I’ve ever made, and it takes less than five minutes in a food processor or high-speed blender. Sometimes i’ll add olive oil or a small amount of sugar for taste but we love knowing and controlling the ingredients.The result is fresh, creamy, rich, and completely customizable, you can make it smooth or chunky, add a drizzle of honey, a dash of cinnamon, or a spoonful of coconut oil for extra creaminess.
Once you taste freshly made peanut butter on warm toast, it’s genuinely hard to go back. I started making it for myself and Bri got obsessed with it too, she now makes big batches and keeps a jar in the fridge at all times. The same concept applies to almond butter, cashew butter, or sunflower seed butter for anyone with nut allergies. Roast the nuts first for even more depth of flavor. It’s a small swap with a big payoff. Get our homemade peanut butter recipe: HERE
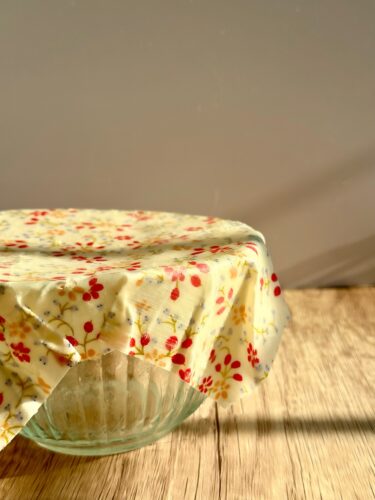
5. DIY Fruit and Vegetable Wash Instead of Plain Water (or Store-Bought Sprays)
This is one of those DIY swaps that sounds almost too simple to make a difference, but it really does. Did you know that rinsing produce under plain water doesn’t actually remove pesticide residue, wax coatings, or bacteria effectively? Studies have shown that a simple DIY fruit wash does a significantly better job. And the commercial produce sprays at the store? Most of them are largely water with a few added ingredients that you can easily replicate at home for a fraction of the cost.
A DIY fruit wash typically involves a combination of water, white vinegar, and sometimes lemon juice or baking soda, ingredients most of us already have in our pantry. The acidity helps break down residue and kill surface bacteria without leaving any taste behind (as long as you rinse well).
Cat started doing this when her boys got into eating grapes and strawberries by the handful, and once she realized how easy it was, it became a permanent part of her produce routine. I do the same whenever I come home from the farmers market or grocery store, quick soak, quick rinse, and everything goes straight into the fridge ready to eat. It’s one of those quiet little habits that just makes you feel better about what you’re feeding your family. And it costs almost nothing. Get out full fruit and veggie was spray recipe: HERE
6. Homemade Laundry Detergent Instead of Store-Bought
This is one of the DIY swaps that surprised me the most, because I genuinely didn’t think homemade laundry detergent could work as well as the brands I’d been buying for years. I was completely wrong.
Conventional laundry detergents are some of the most chemically loaded products in our homes. Synthetic fragrances, optical brighteners, surfactants, preservatives, and dyes, all of it sitting in your clothes, against your skin, all day long. For Cat’s family especially, with young kids and sensitive skin in the mix, finding something cleaner felt really important. And this recipe delivered.
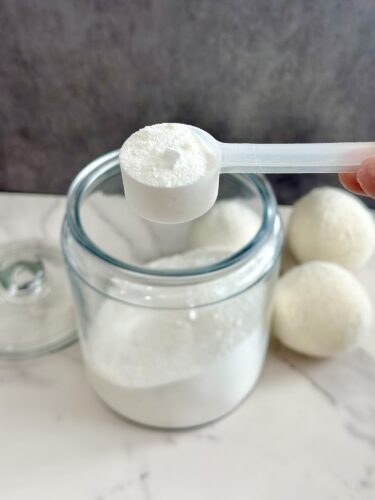
The ingredients are simple and purposeful. Washing soda and baking soda work together as the cleaning and deodorizing base, washing soda cuts through grease and grime while baking soda neutralizes odors and softens the water. Finely grated castile soap (we both love Dr. Bronner’s Baby Unscented or Kirk’s Fragrance-Free for this) provides the gentle, plant-based lather that actually lifts dirt from fabric. And Epsom salts are the quiet MVP of this recipe, they help soften both the water and your clothes, reduce static, and are gentle enough that they may even be soothing for sensitive skin.
Here’s what you need:
- 2 cups washing soda
- 2 cups baking soda
- 2 bars unscented castile soap, finely grated
- 1 cup Epsom salts
- Optional: 3–6 drops total of lavender and lemon essential oils, especially for sensitive loads like baby bedding
Get our full laundry detergent recipe HERE
Cat started making this when her youngest started showing sensitivity to commercial detergents, and it’s been a staple in her laundry room ever since. She adds a couple of drops of lavender oil to the batch she uses for the kids’ bedding and says it makes the whole laundry experience feel more like self-care than a chore. Bri uses the unscented version and loves how clean and fresh everything comes out without that heavy artificial fragrance smell that clings to so many store-bought detergents.
One batch makes enough for weeks of laundry, costs a fraction of what you’d spend on a name brand, and you know exactly what’s touching your family’s skin every single day. It’s one of those DIY swaps that once you make it, you genuinely wonder why you waited so long.
7. Homemade Spice Blends Instead of Pre-Mixed Packets
Those little packets of taco seasoning, ranch mix, or Italian seasoning that seem so convenient? Check the label. They’re almost always loaded with sodium, anti-caking agents, maltodextrin, and sometimes even sugar and MSG, things you’d never choose to add yourself if you were seasoning from scratch. Making your own spice blends is one of the quickest and most satisfying DIY swaps on this list. It takes about three minutes, uses spices you likely already have, and the result is fresher, more flavorful, and completely customizable to your taste.
Some of our favorites to make at home:
- Taco seasoning: chili powder, cumin, smoked paprika, garlic powder, onion powder, oregano, salt
- Italian seasoning: dried basil, oregano, rosemary, thyme, garlic powder
- Everything bagel seasoning: sesame seeds, poppy seeds, dried garlic, dried onion, flaky salt
- Pumpkin pie spice: cinnamon, ginger, nutmeg, cloves, allspice
Mix a big batch, store it in a labeled jar, and you’ll reach for it constantly. Bri keeps an entire drawer of homemade blends and genuinely uses them every day. It’s one of those swaps that once you make it, you can’t imagine going back.
8. DIY All-Purpose Cleaner Instead of Chemical Sprays
This swap was a game-changer for Cat especially, with little ones crawling around on floors and touching every surface imaginable. Conventional all-purpose cleaners contain a cocktail of synthetic chemicals, some of which have been linked to respiratory irritation, skin sensitivity, and hormone disruption with repeated exposure. And yet we spray them on our counters, our tables, our highchairs… surfaces where food is prepared and eaten.

A DIY all-purpose cleaner is surprisingly effective and takes about two minutes to make. The base is typically distilled white vinegar and water, with a few drops of essential oils for both fragrance and added antimicrobial properties, tea tree, lavender, and lemon are all great options. Some recipes also include a small amount of castile soap for extra cleaning power.
A quick note: vinegar-based cleaners aren’t ideal for natural stone surfaces like marble or granite. For those, a diluted castile soap spray works better. But for everyday counters, appliances, and bathroom surfaces, a DIY spray does the job beautifully.
Cat keeps a labeled spray bottle under every sink in her house, and Bri swears by a citrus-forward blend that makes her whole kitchen smell fresh every time she cleans. It’s cheaper, cleaner, and genuinely just as effective.
9. Homemade Hand Soap Instead of Store-Bought Pump Soap
This is one of those DIY swaps that feels a little intimidating at first, like, making your own soap sounds like a whole thing, but I promise it couldn’t be simpler, and once you see what’s actually in most store-bought hand soaps, you’ll be motivated to make the switch fast.
Conventional liquid hand soaps are full of synthetic surfactants, artificial fragrances, preservatives like parabens, and chemicals like sodium lauryl sulfate that can strip your skin of its natural oils over time. We wash our hands dozens of times a day, that adds up.
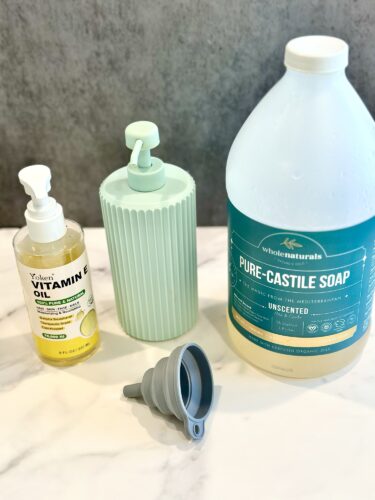
Homemade hand soap made with castile soap as the base is an entirely different experience. Castile soap is plant-based, biodegradable, and genuinely gentle on skin. We add vitamin E oil, which is deeply nourishing and helps protect the skin barrier (Cat’s hands used to get so dry in the winter, and this made a real difference), and then a few drops of essential oils for scent and added skin benefits.
Some of our favorite essential oil combinations:
- Lavender and tea tree: calming scent with natural antibacterial properties
- Peppermint and eucalyptus: fresh and invigorating, especially in the morning
- Lemon and rosemary: bright and clean, perfect for the kitchen sink
- Frankincense and geranium: a little more luxurious, lovely in a bathroom
You just combine the ingredients in a foaming soap dispenser or a regular pump bottle, give it a gentle swirl to mix, and that’s genuinely it. The whole process takes about two minutes. The soap lathers beautifully, rinses clean, and leaves your hands soft instead of tight and dry.
Bri keeps a pretty amber glass pump bottle filled with her lemon rosemary blend next to her kitchen sink and gets compliments on it every time someone visits. Cat makes a big batch at the start of each month and refills the dispensers throughout her house. It costs a fraction of what you’d spend on store-bought soap and feels so much more intentional.
10. Homemade Dry Shampoo Instead of Store-Bought Aerosol Cans
We saved one of our most-requested DIY swaps for last, and if you’ve ever reached for a can of dry shampoo between wash days, this one is going to change your routine completely. Store-bought dry shampoos are one of the most chemical-heavy products in the average bathroom. Most come in aerosol cans packed with butane, isobutane, and propane as propellants, plus synthetic fragrances, alcohols, and talc or starch fillers. You’re essentially spraying a cloud of chemicals directly onto your scalp, which is one of the most absorbent areas of your body. When I actually stopped and thought about that, I knew it was time for a swap.

Homemade dry shampoo has just two ingredients: arrowroot powder and rosemary essential oil. That’s it. Arrowroot powder is a fine, silky starch that absorbs excess oil at the roots beautifully, without the white cast that baking soda can sometimes leave, and rosemary essential oil not only smells incredible but has well-known benefits for scalp health and hair growth. It’s a genuinely functional ingredient, not just a pretty scent.
You simply combine 1/4 cup of arrowroot powder with 5–6 drops of rosemary essential oil, mix well, and store it in a small jar or a repurposed shaker bottle with a lid. To use it, tap a small amount onto your roots, massage it in with your fingertips, and brush through. Done.
Bri made the switch first and immediately texted me saying it worked better than anything she’d bought at the store. I was skeptical, I’d been loyal to a certain aerosol brand for years, but after one try I was completely converted. My scalp feels so much better, and the rosemary scent is honestly one of my favorite things about getting ready in the morning now. A little goes a long way, one batch lasts for weeks, and the whole thing costs almost nothing to make. It’s one of the simplest, most satisfying DIY swaps on this entire list.
A Few Thoughts on Making DIY Swaps Work for You
If there’s one thing we want you to take away from this post, it’s this: you don’t have to do all of these DIY swaps at once. In fact, please don’t. That’s a fast track to feeling overwhelmed and giving up entirely. We didn’t overhaul our homes and pantries overnight, it happened gradually, swap by swap, over a few years. Some weeks we tried something new. Some weeks we just lived our lives.
The goal was never perfection. Asking the question: is there a simpler, cleaner way to do this? And then, when the answer was yes and it felt manageable, making the change. These are some of the DIY swaps that have stuck in our lives because they’re genuinely easy, better, and worth it. We hope a few of them become part of your routine too.
Which swap are you most excited to try first? Drop it in the comments below, we’d love to hear! And if you’ve already made any of these, tell us how it went. This community is honestly one of our favorite things about this little blog, and we’re so glad you’re here. 🤍
With love,
Bri & Cat
Loved this post? Save it to Pinterest, share it with a friend who loves natural living, and subscribe to our newsletter for more simple, wholesome ideas from Bri & Cat.
Affiliate Disclaimer:
As an Amazon Associate I earn from qualifying purchases. This comes at no additional cost to you. We only recommend products that we believe will add value to our readers.
Leave a Reply